Showing posts with label family favorites. Show all posts

Saturday, November 1, 2014

Baked Oatmeal and Raisin Yummies

       I have made oatmeal and raisin cookies many, many times over the years. But I had not tried baked oatmeal until recently. How silly it sounds now;  this delicious, warm and wonderful comfort food is a must have for family night or on a rainy day! How did I ever miss this one when the boys were small!?! It simply was not a staple in the house I grew up in, and not a recipe I adopted until recently. Oh!!!!!!!!!! How I wish I had tried this recipe sooner! I hope you love it as much as I do!

Baked Oatmeal and Raisin Yummies. 

Serve warm with extra milk.

Preheat oven to 350 F and prep a 9x9 baking pan.
In large bowl combine:
3cups quick oats
1 cup brown sugar
2 tsp baking powder
1 tsp real salt
1 tsp fresh ground cinnamon
Sift until mixed together well.

in another bowl whisk together:
1 egg
1/2 c applesauce
1/2 c coconut oil (or real butter)
1 tsp vanilla extract
1 c milk

Stir this liquid in with the dry oatmeal mixture and combine well. Lastly, add in 1/2 c raisins and give one final stir. (You can also add 1/2 c of any fruit or nuts mixture you'd like- chopped apple bits is especially good! a small handful of chopped walnuts perhaps?? or both?)

Spoon mixture into 9x9 baking pan and bake for 40-45 minutes. Serve warm, with milk for fantastic breakfast, or anytime energy treat.  My kids love it on a rainy day!!!! Some people drench it in milk in the bowl, others serve milk on the side, my son tries to get a scoop of vanilla ice cream with it. Me? I love it plain. To each his own, yes?


You may want to try:


Disclaimer: the following Affilate links in no way raise your final cost, but they do help to support the efforts and endeavors of this blog and my family. :)Thank you

Monday, December 30, 2013

Apple-Pumpkin Spice Cake

Apple Pumpkin Spice Cake


You need:

1/2 c real butter melted (or shortening like olive oil)
2 eggs
1 1/2c brown sugar**
2 tsp vanilla extract
1 c applesauce or applebutter ( I used my homemade applebutter)
1 c pumpkin puree
1 tbsp cinnamon (or 1 tsp cinnamon & 2 tsp pumpkin pie spice)
2 1/2 c flour (all purpose, or whole wheat works great)
3 tsp baking powder
1 tsp real salt

In mixing bowl cream butter and sugar together, add eggs and beat until smooth. Add vanilla, pumpkin and applesauce. Mix well.
Add flour, salt and baking powder.


Mix until all smooth and no lumps- will be very thick.


Pour into greased 13x9 pan and bake 30 minutes at 350F degrees, or until butter knife inserted in middle comes out clean.


 Top with cream cheese frosting, basic butter cream frosting, just sprinkle with powdered sugar, or do nothing! It's delicious on it's own! .
Enjoy! :)

** If you are avoiding brown sugar then substitute   1 c honey or half honey/ half molasses?

This recipe is easy to make, and fairly inexpensive. A family favorite, and frugal on my budget. Which I love!
This is quick becoming one of our favorite cakes! Turns out moist and flavorful, a great for taking with you to family gatherings or parties!  Thumbs up from every family member! Kid tested, Kid approved! Yay!


You might like the links and recipes found at:
Frugal Days Sustainable Ways #101

Real Food Wednesday 1-1-2014

Monday's Homestead Barn Hop #141


If you cannot find ingredients you might try:

Disclaimer: These are affiliate links, which do not raise your end cost; but, do help support this blog. Thank you

Friday, December 27, 2013

Peanut Butter Cookies

Family Favorite Peanut Butter Cookies


 In a large mixing bowl add:

1 c peanut butter (Creamy or crunchy- depends on your taste preference!:)
1 c brown sugar
1 c sugar
2 eggs
1 c real butter (2 sticks)
2 tsp vanilla extract

Cream together in bowl until sugar dissolves.

Add to bowl:
3 c flour
1 tsp baking powder
2 tsp baking soda
1/2 tsp real salt

Mix all together well. Set bowl in refrigerator for 1 hour until dough firms. Take spoonful batter and roll into 1" balls. Place on ungreased cookie sheet. Use a fork to create hatch-marks on each and slightly flatten top on cookie dough roll.
Bake at 375F degrees for 8-10 minutes.
Enjoy!

This recipe is extremely easy to follow and very good for beginning learners! Kids love helping to roll and smoosh down the dough balls- the refrigerated batter makes for easy clean up, and easy to work with dough. Kid friendly and certainly kid approved. Makes approximately 5 dozen.
Bring smiles! Enjoy together!


You might find supplies you need:

Disclaimer: The above links are Affiliate Links. This, however, does not affect your end price; but does help to pay the cost of the blog. Thank you!.

Sunday, December 15, 2013

Easiest Holiday Fudge

Easiest Holiday Fudge 


You need:

1 1/2 c semi sweet chocolate chips
1 1/2 c milk chocolate chips
1 can (14 oz.) sweetened condensed milk (not evaporated)
1 1/2 c chopped walnuts
2 tsp vanilla

 Line a 8 inch square pan with wax paper, or foil.  In a double boiler, melt chocolate chips, add milk and stir constantly until incorporated. Remove from heat.  Stir in vanilla and walnuts. While still hot, pour immediately into lined pan.  Place into refrigerator for at least 2 hours to completely cool and set recipe. You might have to go longer.  When firm, remove from wax paper or foil, and cut into 8 rows by 8 rows for 1" pieces.

Variations to this recipe can be any 1 1/2 c chopped nuts you prefer (ex: almonds, pistachios, hazelnuts, or cashews). Or you can make this very festive by using crushing up candy canes instead of nuts.


I have found this recipe, if I watch sales and use coupons during holiday season, is very cheap and easy to make! Chocolate chips are frequently on sale! This makes  this fudge, for me, a perfect addition to holiday gift plates! It actually is Frugal, in that the recipe is so inexpensive, and the candy so rich, it goes a long way- it makes for a fantastic gift without high cost! Allowing me to share the season without a huge cut in my budget. :)

Saturday, December 14, 2013

Once a Month Alarm Brownies

Once A Month Alarm Brownies


I didn't know what to call these. My hubby said "Death by Chocolate Brownies".
I wanted "3 Alarm Brownies", or "Milk Alarm Brownies" (so rich, you run for the milk!)

Basically these are THE brownies to make when that chocolate craving is just beyond what you can handle. Want to solve the serious sweet tooth ? Really solve that once a month need for chocolate before the lack there of sets you off kilter and in a "mood"? (haha!)
This is it. For serious chocolate lovers, like me. I'm not even going to try to doll up the pictures- because this is serious- serious biz here folks! :)


Once a Month Alarm Brownies

Pre heat oven to 350F degrees. Spray/ or grease a 8" square baking pan.

Brownies:
1/2 c softened real butter
2 eggs
1 c sugar
2 tsp vanilla
1/3 c unsweetened cocoa powder
1/2 c flour
1/4 tsp baking powder
1/4 tsp real salt
1/2 c chopped walnuts (** Optional)

Frosting
4 tbsp softened real butter
1 tsp vanilla
2 tbsp unsweetened cocoa powder
2 tbsp honey
1 cup powdered sugar
1 tbsp milk

In a bowl,add 1/2 c softened butter, eggs and sugar. Mix on low speed until sugar dissolves. Add cocoa and vanilla. Add flour, baking powder and salt and mix on medium speed until smooth. **Add chopped walnuts and mix once more until well blended.  Will be thick.
Pour into prepped pan and bake in center of the oven for 25 -30 min. (until a butter knife inserted comes out clean.
In a bowl, mix  butter, powdered sugar, honey, milk, vanilla and  cocoa powder. Mix on low until powder dampens and then high speed until fluffed and smooth like frosting. Spread over brownies while they are still hot from oven. Let it melt across - and drizzle in.....ahhhhhhh enjoy warm with a glass of milk and dissolve away all sweet tooth or chocolate craving you have in a matter of seconds!
As i said- I'm not dolling up the pictures- these brownies speak for themselves. Make no mistake- these are for serious chocolate lovers!


You may like the links shared at:

Mondays Homestead Barn Hop #140


Thursday, December 12, 2013

Best Homemade Pizza Dough

Best Homemade Pizza Dough

(Dough for 2 reg. pizzas, or 4 mini personal pizzas)

 This particular recipe is delicious! For our family, the recipe has brought fun and joy into family food nights- everyone can participate. I usually have all the ingredients already on the shelf, and we save so much money! This feeds everyone with some left over for lunch next day (or midnight gamer's snacks), and the best part is each person gets to choose what goes on- fitting the moods, lightening hearts,  and bringing the family together for more than just a sit at the table- this gives us time. I hope it brings smiles to your family as well!

Homemade Pizza Dough

Start with large bowl & add:
3 tsp yeast
1 tsp sugar
1 1/3 c warm water

dissolve yeast and sugar in warm water in large bowl and allow to proof for 5 minutes. (will foam up)

add to yeast mixture:
3 tbsp olive oil
3 tbsp corn meal
1 tsp real salt
3 c all purpose flour or whole wheat flour

mix all together and knead dough until smooth. roll into ball, lightly oil the outside with olive oil and allow to rise until double- about 45 minutes


I always use the same bowl I just mixed it in- cuts down on dishes, but doesn't make for pretty pictures! Haha! Once doubled, you are ready to make pizzas! Yay! 

Cut dough in half **- this dough makes 2 pizzas. Roll out each half on lightly floured surface to desired size and thickness. Thin crust, thick crust- it all depends on what you roll it to! We like ours thin to regular.  Place on pizza pan, warmed pizza stone, or cookie sheet lightly dusted with cornmeal.  Bake in oven for 7 minutes at 450 F degrees. Remove from oven, Top with sauce, toppings of your choice an cheese. return to oven - Bake at 450F degrees for 9-10 minutes. (Sorry Sorry! I forgot to take a picture of rolling it out! I'll add it next time!) Here they are at prebake.


Have fun with the toppings! Have the kids help grate the cheese, and choose their own toppings. (For cheese lovers, you can roll pieces of string cheese into the crust edges and create a stuffed crust the kid's will love! -Do this at the first stage). Kids love rolling out the dough.** This is enough dough, you can further divide dough for four mini pizzas if everyone wants their own personal mini pizza!  Enjoy!


you might like the recipes and ideas on:
Frugal Days Sustainable Ways #100

Make Your Own Monday 12/16


you might enjoy:


Disclaimer: Affiliate Links in no way affect your end price, there is no increase for you. But, they do help to support the cost of the blog. Thank you.


Saturday, December 7, 2013

Chili Dogs- No Bean Chili

Homemade Chili Dogs- No Bean Chili 


Start with:
1 lb ground beef - lean
1/2 lb ground pork - lean (not sausage)
fry completely, drain of grease, and mince as small as possible-
I have even put mine through the food processor.

 in a separate bowl whisk until smooth and dissolved:
6 cups warm water
1/4 c cornstarch
1/2 c flour

add to water mixture and whisk until smooth:
2 tbsp tomato paste
1 tbsp white vinegar
3 tbsp chili powder
1/2 tsp real salt
1 tsp ground cumin
1/4 tsp black pepper
1/2 tsp garlic powder
2 tbsp dried onion flakes

Add this mixture to the meat and  mix together.  Over med heat - bring to a boil stirring constantly so it does not burn. Once it comes to a boil reduce to smallest simmer setting and cover with lid. Simmer 1 hour, stirring occasionally.

Serve with hotdogs, or over french fries, or even over nachos and extra grated  cheddar cheese. Delicious!!!!!!
Yummmmmm!!!!!!!!!


You might like the links shared at:
Frugal Days Sustainable Ways #100

Mondays Homestead Barn Hop #140


You might like to try:


Disclaimer: Affiliate Links in no way affect your end price, there is no increase for you. But, they do help to support the cost of the blog. Thank you.

Thursday, December 5, 2013

Soft Oatmeal Raisin Cookies

Soft Oatmeal Raisin Cookies


3/4 c real butter
3/4 c applesauce
3/4 c sugar
3/4 c brown sugar
2 eggs
1 tsp vanilla
1 1/2 c flour
1 tsp baking soda
1 tsp ground cinnamon
1/2 tsp real salt
3 c quick rolled oats
1 c raisins
Preheat oven to 375 F degrees
In large bowl, beat butter, sugars, and applesauce together until smooth.
Add eggs and vanilla and beat well until egg is incorporated. In separate bowl- mix flour, baking soda and salt. Stir into the butter/sugar mixture. Roll in oats and raisins and stir well
Place spoonfuls onto ungreased cookie sheet and bake at 375 F degrees in the oven (center rack) for 8-10 minutes.
cool and enjoy!

Great for holidays, or family events! Stay soft, and batch makes about 4 dozen! Perfect for sharing or the cookie jar!


You might like the recipes and links found at:
Mondays Homestead Barn Hop #139


You might enjoy:


Disclaimer: Affiliate Links in no way affect your end price, there is no increase for you. But, they do help to support the cost of the blog. Thank you.

Thursday, November 14, 2013

Back to Real Food and loving every minute of it!

Yay! We have a kitchen again! 


Love love love getting back into the kitchen and enjoying REAL food again!
Everything is so yummy when it's chopped fresh and cooked right! 


Tonight my hubby is making fajitas with homemade Mexican Rice and beans.
The Recipe for Authentic Mexican Rice can  found here:  Homemade Mexican Rice.

The fajitas really are simple- a matter of taste, really. Use Steak, chicken, or pork, cut the meat into small strips. Set aside.  Chop garlic, onions, bell peppers and jalapeno. Saute vegetables in olive oil until tender over med heat, add meat and brown. reduce heat, lid, and cook for 15-20 minutes until the meat is tender and done thoroughly ( varies depending upon which meat you choose to use.)  Salt and pepper to taste. Serve with warmed tortillas.

Tonight is perfect example of how it has been since we moved here. I was the helper- and happy to be "chef assistant!" Yay! During our 3 months away, we all missed real food so much!  We would sometimes  talk about what we should make first once we had it all back! Discussions debated between lazagna (last night),  or  pork chops(night before),- even meatloaf  made it in there!  The kitchen is now a new sparked interest, and REAL food is the only thing on the menu!!Watching the family now-  Every dinner is now a team effort in cooking! And I am loving the help in the kitchen! It has been wonderful!Yay!!!!

 Hope you've had a great week!


You might like:


Disclaimer: Affiliate Links in no way affect your end price, there is no increase for you. But, they do help to support the cost of the blog. Thank you.

Thursday, June 13, 2013

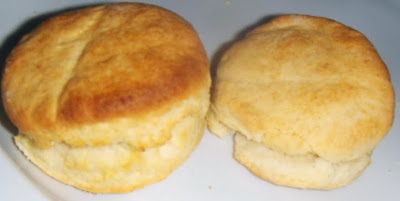
Homemade Biscuits

Homemade Biscuits


4 tbsp cold real butter or cold lard
1 tsp sugar or honey
2 c whole wheat flour
4 tsp baking powder
1 tsp real salt
3/4 cup whole milk, or half and half

 Preheat oven to 425F.
Cut butter into slices and in bowl,  sift together the baking powder and wheat flour and sugar and salt. Using a pastry cutter, or fork, combine until mixture is small crumbs. Add milk all at once and stir until batter follows fork, place on lightly floured surface and barely knead with hands a few times (comes together fast and do not over work).
Roll out dough to about 1/2 inch thickness. Cut out biscuits using a cookie cutter, biscuit cutter, or I used a juice glass with edge lightly floured :). Place biscuits on an un-greased cookie sheet.
Bake for approximately 10 minutes, or until light brown on top. Do not over bake - or the bottoms will burn.

Awesome, flaky, and easy alternate to pre-made biscuits; making this a healthier Real Food alternate to the convenience prepackaged foods containing unnecessary preservatives and fake ingredients.


Note: This is an excellent recipe for teaching the kids dough, measuring and mixing, following instructions, and baking. Fun for all! Make memories in the kitchen!
Kid Idea: Make small amount of  bacon and scrambled eggs, and grated cheese; allowing the kids to stack their own breakfast sandwiches. :)

Wednesday, June 12, 2013

Baked Spiral Potatoes

So easy and an awesome variation to regular baked potatoes! A Family favorite! Kid approved!

Baked Spiral Potatoes 

4-6 small potatoes (1 per person)
skewers
olive oil
seasonings (Your preference)

Peel and wash potatoes. Prep a cooking sheet with butter or olive oil to prevent sticking. Skewer potato lengthwise from small end to small end. With a sharp knife, carefully cut in to potato just until you feel the skewer, using it as your guide- rotating potato over as needed to achieve spiral. This actually is the hardest part if you do not have a spiral slicer, which I don't. But it is not impossible- basically tilt the knife at a slight angle as you cut and do not take it out of the potato- let it guide itself. It goes faster the more you cut.
                                                    
When done to end,  slowly pull potato apart along skewer until stretched and resembling spiral. Place on baking sheet. Brush with olive oil,  and sprinkle with seasonings. I use paprika, garlic powder, and pepper.

Bake at 350F  for 45 minutes or until potatoes are done.

For added goodie: You can add a slice of bacon skewering end at top and winding around to end-spiraled around potato.

The taste is slightly different than a baked potato - more like wedges. Some people pull it in the last 5 minutes and add grated cheese and bacon bits across the top returning to the oven to melt this in. I have also heard people drench it in sour cream, and add chives in the end.

Many people deep fry these, I chose to bake mainly to avoid huge amounts of greasy food. But you can easily look up or google, the directions if you prefer frying. They are also called tornado fries.

Serves great with Homemade Chicken Nuggets or BBQ Chicken! A great alternate for something different on the menu!  Love the fact it's easy to do and cheap making it one of my more favorite frugal recipes to stretch the budget. It's Easy to figure out how many to cook- 1 per person!

I think I am going to try this style with a sweet potato next time and see how that turns out. This might also be promising for a zucchini squash as well! :) I'll let you know! :)


This has been shared with, and you might also like the links at:

Frugal Days Sustainable Ways #76


You might try:


Disclaimer: Affiliate Links in no way affect your end price, there is no increase for you. But, they do help to support the cost of the blog. Thank you.

Friday, June 7, 2013

Easy Fried Rice - Kid's Favorite

Easy Fried Rice - Kid's Favorite

This is one of my fall back recipes, it is not incredibly authentic, but it has been incredibly successful in my house- particularly when my children were younger- it was one of my favorite recipes accepted by the kids that I felt good about because it got them to eat their vegies! It was easy to make and always a success. I even loved it for the ability to use up leftovers- like the meat or vegies- making my meals spread further and happily stretching my budget! A frugal favorite!

Easy Fried Rice (Takes about 30 minutes to prepare if using old fashioned rice )

To cook, I start with the rice-

2 cups rice
1 tbsp olive oil
a dash salt
4 cups water
To cook, I prepared old fashioned rice, (you can also use instant rice if you prefer, or as time saver. Prepare 2 cups as instructed on the box.). For old fashioned rice:
In large sauce pan, with excellent fitting lid:
I added olive oil and 2 cups old fashioned long grain rice. Over med high heat, I fried the rice grains until they turn puffier white and start to brown. Takes about 5 minutes, stir frequently- but, doing this trick helps to insure the grains won't stick together in finished product. Once rice begins to brown, add 4 cups hot water and bring to boil. When boil starts, reduce heat to low simmer and cover tight. Set timer for 20 minutes.

While rice is cooking, I steam the vegies or prepare the frozen vegetables, as directed, in a sauce pan. ( Or heat up your left over vegies at this time.) You'll need about 2 cups vegies - For the pictured fried rice, I used a frozen vegetable mix; however, I have a lot of success with just frozen peas, or just broccoli.

Last step is the meat:

1 lb. cooked shredded meat- (perfect for left overs! Use anything you have - pork chops, chicken breast, steak, ground beef, etc.)
olive oil
1 clove minced garlic, 1/2 c green onion diced tiny,  salt and pepper. 
1 tbsp. soy sauce
 2 eggs (scrambled in a bowl and set aside for last step)

Shred  or dice the meat into small chunks. In fry pan, add olive oil and garlic and cook until the garlic is tender - just a minute or two (this infuses the flavor of the garlic into the oil.) Add the diced meat. Lightly fry until the meat is heated through. Add the green onions and seasonings. Stir thoroughly and cook only until the green onions are to your liking- they get soft very fast.  Turn off heat.

Your sauce pan of vegies should be done at this point- Drain your vegies. set aside.
By now the rice should be done. Yay! Stir to fluff, and check to make sure it's completely cooked.

In the meat fry pan, bring back to heat until all is sizzling, add in rice, and soy sauce. Stir together until all is combined well. Add vegies and stir again. Once combined well, move all ingredients to the side -so as to give yourself a pocket space to work in of fresh fry pan- pour in the scrambled egg and fry until completely done. Takes only a quick minute- do not worry about the remaining rice- at this point- it's just gaining the extra  fried flavor as you focus on the egg. I scramble it with the edge of my spatula. Once the egg is done stir into the rice mixture.  (Note: I do not add personally add extra salt to this as the soy sauce is already mainly salt. Taste test to decide for yourself.)
Yay! You are done! Use as a main dish or a side dish, depending on how adventurous you are. I served a salad first, and at times I will serve with a spring roll.

Monday, May 20, 2013

The Most Important Lesson - Heat Control

When I talk with my boys about their cooking, I asked them what they felt was the most valuable lesson in the kitchen. Both answered quickly and simply- heat control.

My rules were simple about the stove.
Handles in. I am a repetitive teacher. I repeat until I am sick of hearing it then I say it again. But it sticks. And I believe everyone should learn- handles in. It saves so many little ones from being burned! So simple- yet so important. First time learners can saves themselves a lot of pain as well, nothing sticking out cannot get caught up in shirts sleeves or aprons. Handles in. I started saying that and pointing it out to them as early as I could. I cannot really say an age- because there is a stage where they stop being babies and told no, stay away from the stove- to growing enough to see what's actually on the stove and being curious about how to do it. I guess about 10 -ish. If that makes sense.

Beyond this simple rule- I approached the stove like their father approaches tools out in the garage. I am teaching boys after all. And it worked.  I explained the tool (the stove) and we practiced together, then on their own.
 It went something like this:


How to control the heat….

  This was an observation first lesson- Then a hands on second.  I explained the parts of the stove, and oven. Then set down a small sauce pan, a med sauce pan, and a large pot - all filled a bit of  water on each burner-  on the last burner I put on a fry pan with a dab of butter.

 I started the stove starting with the small saucepan burner- I had them look at the flames/burners in comparison to the size of the pans. Up and down. I Compared pans to pots and small sauce pans – adjust flames up and down . Turn on, turn down, turn off. I did it- then turned everything off -and had them do it. Start to finish, one at a time. I asked for high, med, low, simmer, and off.  I had them turn the fry pan to med and then to low- melting the butter. They moved it around with a spatula to spread it around, and I had them watch the areas that heated first. We stopped and turned it off after that. I asked them what they'd do if it felt out of control, or over boiled. I made sure they had handles in and were spatially aware of their body when reaching over.
 We turned everything off. I then Turned on the oven . We got on our knees  for a second and looked at the heat source. We adjusted the racks, and in turn we learned the mitts. They explained it back to me- showing they understood the oven -where the heat comes from ,what’s broil and what’s heat. 

Then we went back to the pots on the stove. I shifted them, so the front two were saucepans - one already filled with water, and we filled one with milk.  They turned on the burners by themselves. We reviewed high, and low, quickly then began: lesson 2: How to Boil water and how to Boil milk- a side by side lesson  for comparison. I did this so they could understand what liquid looks like just before boil point- on both. Then they boiled.
They understood a simmer, and compared  it to rolling boil. We covered the saucepans with a lid and I showed them the steam, condensation, and how much faster a rolling boil occurs. I let the milk boil - and didn't say a word when it started to rise and foam like milk does. This displayed the difference- (Boiling over) when temp turned up or down. By allowing the milk to scald and spit out the lid so they saw  what not to do… worst case scenario. 

After they had proven they could boil, control, and manage the water without fear-we turned everything off and cleaned up the milk mess. 

Then together we made mac n cheese start to finish. They filled the pan with water, started the stove - handles in- watched for a boil, added the noodles....and READ the directions. They st the timer.  I strained the noodles but then returned the whole venture over to them to finish. They completed it with relatively few noodles hitting the counter! And felt pride in what they accomplished. We sat down together and enjoyed a bit for lunch. Their first cooking experience was a success. 

The way I relate this may seem tedious, and repetitive, but it worked. How you walk your child through their first lesson is up to you. My hope is that in relating my experience I can help to encourage others- or take the fear out of where to start for some, and maybe give a tip or two to others. 
Just have fun with it. If nothing else, the experience is worth the smiles at the end.  :)