Showing posts with label cleaning tips. Show all posts

Friday, December 6, 2013

My DIY Favorite! My Mix Laundry Soap

DIY Favorite! My Mix Laundry Soap!
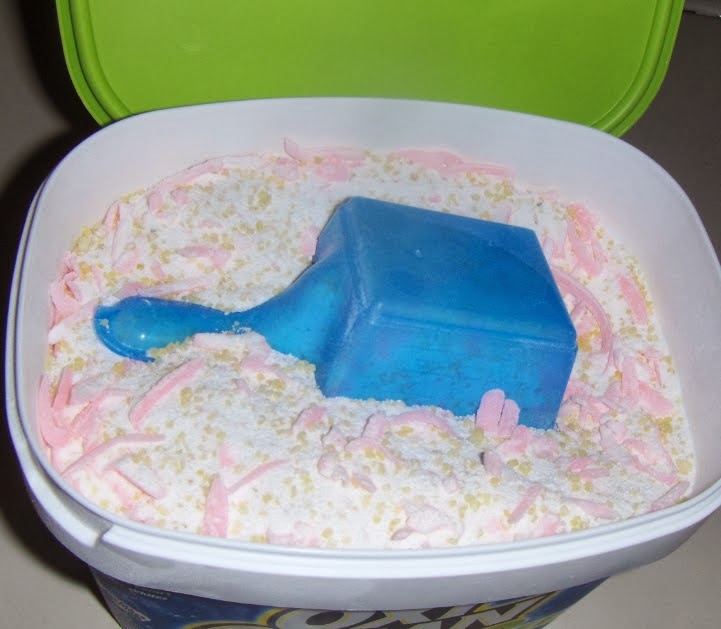

We all have our favorites- the ONE recipe or household tip that started the ball rolling for DIY enthusiasts!

This laundry mix was mine- the starter of it all!

 I always had trouble with Laundry soaps. Tide is a hives producer, for me, personally. I always fought the laundry soap blues between budget and quality constraints. When my youngest started getting the itchies from other brand soaps I used, my options kept getting narrowed down. When the options I did have just didn't clean, or seemed watered down, or left bad smells (like some hypo allergenic unscented soaps can)...

...well,  I got fed up! Grrrrrr!

And the search was on.  Thus began my love for DIY!

And oh how my budget can love some of my discoveries.
Hence,  My project for the day!  My Mix!!!!!!! Yay!!!!! 
I'm always Always happy with the results of this one- it has never let me down! I absolutely love it!

I wrote about it before- at this link: My Mix Laundry Soap
So I won't be explaining everything over again, however- I'll give you the recipe once more- :DYay!
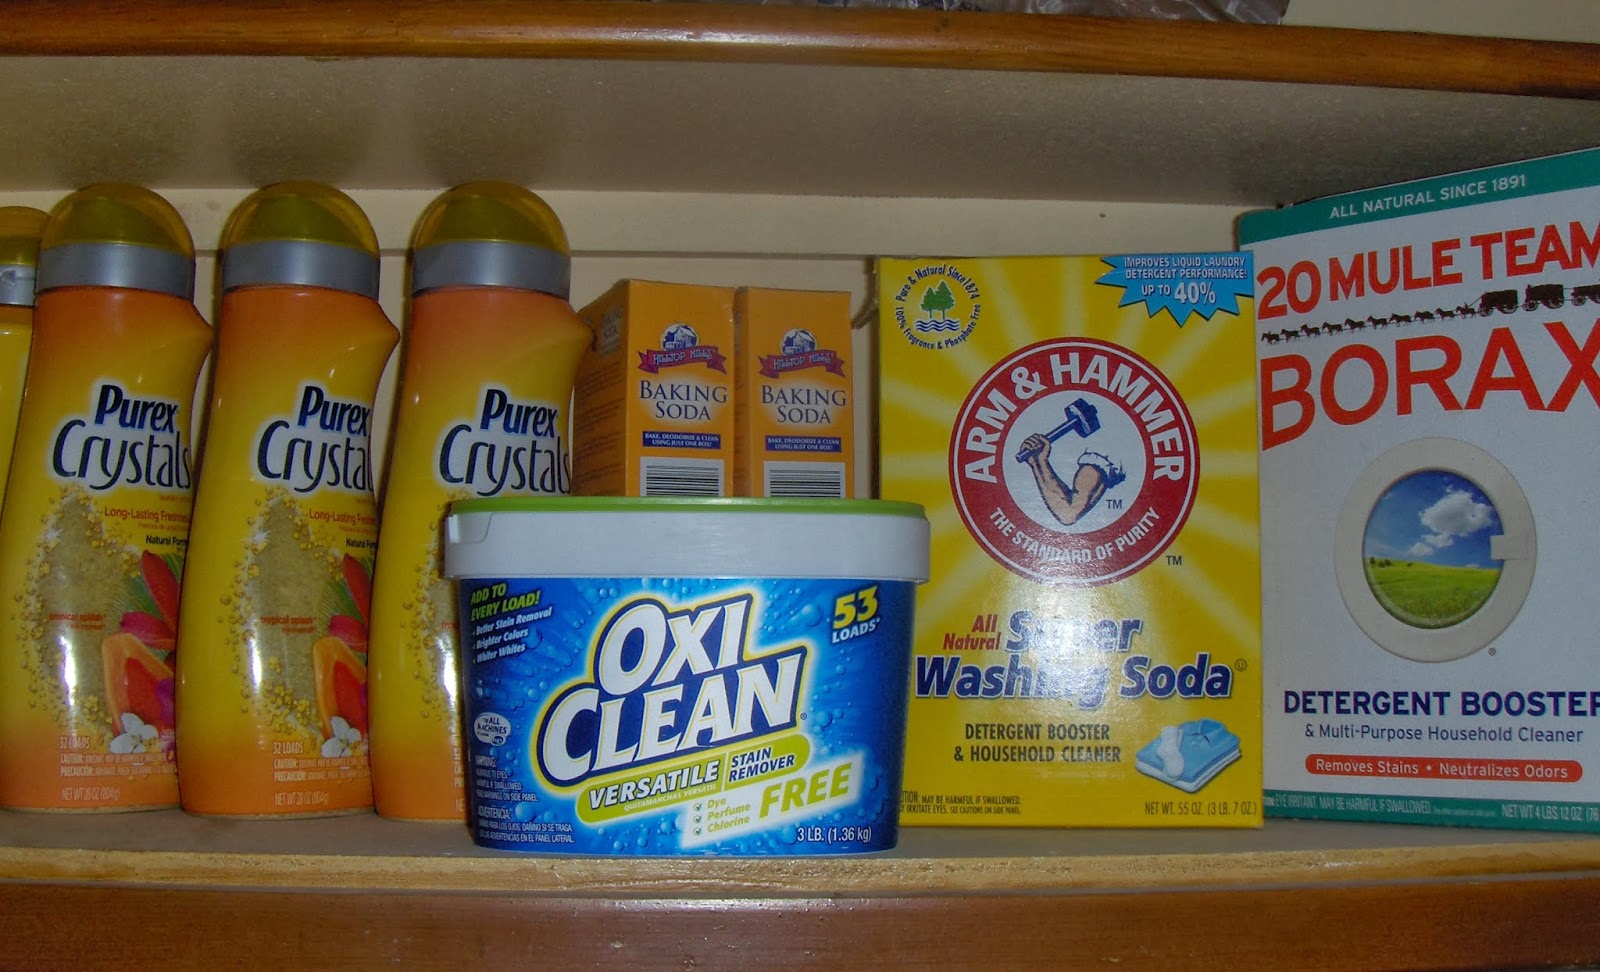


My Mix Laundry Soap

1 box 20 Mule Team Borax (4lb+)
1 box Arm & Hammer Super Washing Soda (3lb+)
4 boxes Baking soda (1lb ea)
3 bars Zote soap (grated ahead of time)(14 0z ea)
3 Purex Crystals Laundry Enhancer (28 oz ea., or 2 -55 oz)
1 OxyClean  (3lb.)

step 1: grate the soap - like this:
(Note: A fine grate is best if you only use cold water. The Zote soap dissolves easily enough.)

Step 2: Mix it all into a large bucket! I use a recycled 5 gal. bucket from my hubby's pile in the garage. LOL  - I pour ingredient's into the bucket in layers or parts outside- because - well the powder can Poof! LOL and frankly I do not want Poof! in the house! ;) , Mix it all - well-  with large ladle or slotted spoon and then--- done! Yay!!!!!!!  It's as easy as that!

Step 3: Use it!   I recycle the OxyClean container and the scoop that comes with it. Fill it with my mixture and this sits on my washer for daily use. A large load to the 2 line on the OxyClean blue scoop is perfect!

Note: The remainder of the mix, I store in the garage (keep in a cool dry place, away from the children and label) , refilling as needed.

Also to note: because this is a low suds recipe- it is safe for HE washers, and does not leave a residue like some castile soap mixes can.
It lasts! About 6 months- or longer depending how often you do laundry. The cost is a whopping $35.  ---- (compared to the amount I paid before- averaging $20 a month, or more, on soaps- that's a previous cost of  $120 for 6 months of soaps- and I just paid less than $35 actually because I caught everything on sale. Savings $85. For me, this is a no brainer!)

Easy! Done! Enjoy!


You might Like the Links at:
Make Your Own Monday Link Up 12/16


If you can't find items at your local store- You might try:


Disclaimer: Affiliate Links in no way affect your end price, there is NO increase for you. But, they do help to support the cost of the blog. Thank you.

Friday, June 14, 2013

DIY Glass Cleaner

DIY Glass Cleaner   

The blue stuff.... ugh....
millions of gallons of the blue stuff are sold daily- all just because the mass market media says it's what you should use to clean your windows. But.... do you HAVE to use the blue stuff?
NO.
Did you know the blue stuff contains: Ammonia, 2 Hexoxyethanol, Ammonium Hydroxide, Mirapol Surf S-210, Viden EGM, Sodium C14-17 Sec-Alkyl Sulfonat, and Synthetic Fragrances.

Not green. Not safe. More like a toxic concoction of mess.
Don't know what some of these are? Neither does your body, or the earth, or your pets, or your family. Like I have explained before in posts- if an ingredient listed on an item is non-pronounceable, non-recognizable to you- it most likely is non recognizable to your body! Toxic chemicals, when sprayed, go into the air you breathe, and soak into your skin on your hands that you touch. They are either inhaled or soaked in, and are dangerous either way to your health. They leave a toxic chem-trail behind that can affect you.

Many things clean glass.
Many things clean glass well: and are safe, effective, non-toxic, and GREEN.

Like what might you ask?  I'll address the 2 most common, that you most likely already have on your shelves: Hydrogen peroxide, and or - Vinegar.

Hydrogen Peroxide -


Did you know the nozzle to a standard spray mist bottle will fit directly onto a peroxide bottle? So perfectly convenient-  no mess no fuss?

Hydrogen peroxide as a glass cleaner?
Oh yes! And much more!
Hydrogen peroxide is cheap! And not only does it save money, it is Antibacterial, Antifungal, Kills mold, Kills mildew. It is a natural  disinfectant!!!!! Kills house hold germs and prevents spreading of germs due to common colds and flu!  My first grab if someone has been sick.

You can clean far more than your windows with it!
You can clean glass, counter tops, sinks, and other hard surfaces. Use the three percent solution undiluted in a spray bottle and spray it on the surface to be cleaned. Allow it to stand for several minutes and then wipe it off.
Hard surfaces that can be cleaned with hydrogen peroxide are: counter tops, stove tops, appliances, mirrors, windows, showers, shower doors. bathtubs, sinks, toilets, garbage cans, walls, door frames, door knobs, etc etc.

My favorite use for a bottle of peroxide is in the kitchen. It is the perfect disinfectant for my cutting boards! Wash the cutting board off in the sink. Then Spray on Hydrogen Peroxide, wait 10 minutes, and wipe away. This eliminates all bacteria from meats & raw foods and disinfects your cutting board! No cross contamination! Yay!

Vinegar

White Vinegar is incredible.
For DIY Glass Cleaner:  A 50/50 solution of water and vinegar in a spray bottle is all you need for glass cleaning! Spray on, wipe dry. It works! No streaks! Removes dirt, finger prints, and other grime that can build up. All natural, no toxins.
If gunk is built up on the glass surface you can apply vinegar undiluted and remove nearly anything. (An example for me was the bird poop that was graciously left on my car window the other day- by the time I got to it, it was dry and permanently stuck on....ugh...until that is I applied the vinegar! Yay! Gone in seconds!)

Vinegar is the best household cleaner! It cleans, disinfects, is anti fungal, antibacterial, eliminates mold and mildew, kills most household germs, and it's cheap! Making it extremely frugal for house cleaning!

Make Homemade Wipes with vinegar- these will clean your glass, windows, tubs tiles, counter tops, stove tops sinks, walls, doors. door knobs, shower- (oh! in the shower! get rid of mold and mildew with vinegar too!)


You can mop with vinegar solution as well! Shine those tile or linoleum floors! Safe and effective!


Here is my mirror after vinegar- see no streaks! Just clean clear shine. Yay!


Between these 2 cleaners- you can nearly clean your entire house! Frugal, and very GREEN cleaning!


Shared with, and you may also like the DIY Links on:

Make Your Own Monday Link Up

Homestead Barn Hop #115

Frugal Days Sustainable Ways #77


You might like to try:


Disclaimer: Affiliate Links in no way affect your end price, there is no increase for you. But, they do help to support the cost of the blog. Thank you.

Monday, April 8, 2013

Cleaning tip: Kitchen Range Hood.


Ever had trouble deep cleaning the kitchen range hood? The old grease just laughs and stays no matter what you use? I found a secret… Oil. …Yup- oil!  Oil cleans up oil. Sounds crazy- but try it, dampen a cloth or the corner of your scrub sponge with a small amount of cooking oil, and coat a small test spot with oil… then walk away. Take a minute- let soak in and do it’s thing.  Just a few minutes, then test the spot, rub in small circles… you do have to rub- but you WILL see it move! The Oil dissolves/combines with the old caked-on greasy mess and then all of it (old and new) wipes away …. 

Amazing. Try the whole top of the hood. Soak it first, rub. Rinse the sponge in hot water in between. Re-dampen with fresh dot of oil.   After you’ve got off the old layer with the oil, Try the DIY  All-Purpose Cleaner to finish the hood off. Polish it to a shine without sticky greasy feel! No oil residue now. Clean hood, and smells lemon fresh!