Showing posts with label cooking tips. Show all posts

Thursday, December 12, 2013

Best Homemade Pizza Dough

Best Homemade Pizza Dough

(Dough for 2 reg. pizzas, or 4 mini personal pizzas)

 This particular recipe is delicious! For our family, the recipe has brought fun and joy into family food nights- everyone can participate. I usually have all the ingredients already on the shelf, and we save so much money! This feeds everyone with some left over for lunch next day (or midnight gamer's snacks), and the best part is each person gets to choose what goes on- fitting the moods, lightening hearts,  and bringing the family together for more than just a sit at the table- this gives us time. I hope it brings smiles to your family as well!

Homemade Pizza Dough

Start with large bowl & add:
3 tsp yeast
1 tsp sugar
1 1/3 c warm water

dissolve yeast and sugar in warm water in large bowl and allow to proof for 5 minutes. (will foam up)

add to yeast mixture:
3 tbsp olive oil
3 tbsp corn meal
1 tsp real salt
3 c all purpose flour or whole wheat flour

mix all together and knead dough until smooth. roll into ball, lightly oil the outside with olive oil and allow to rise until double- about 45 minutes

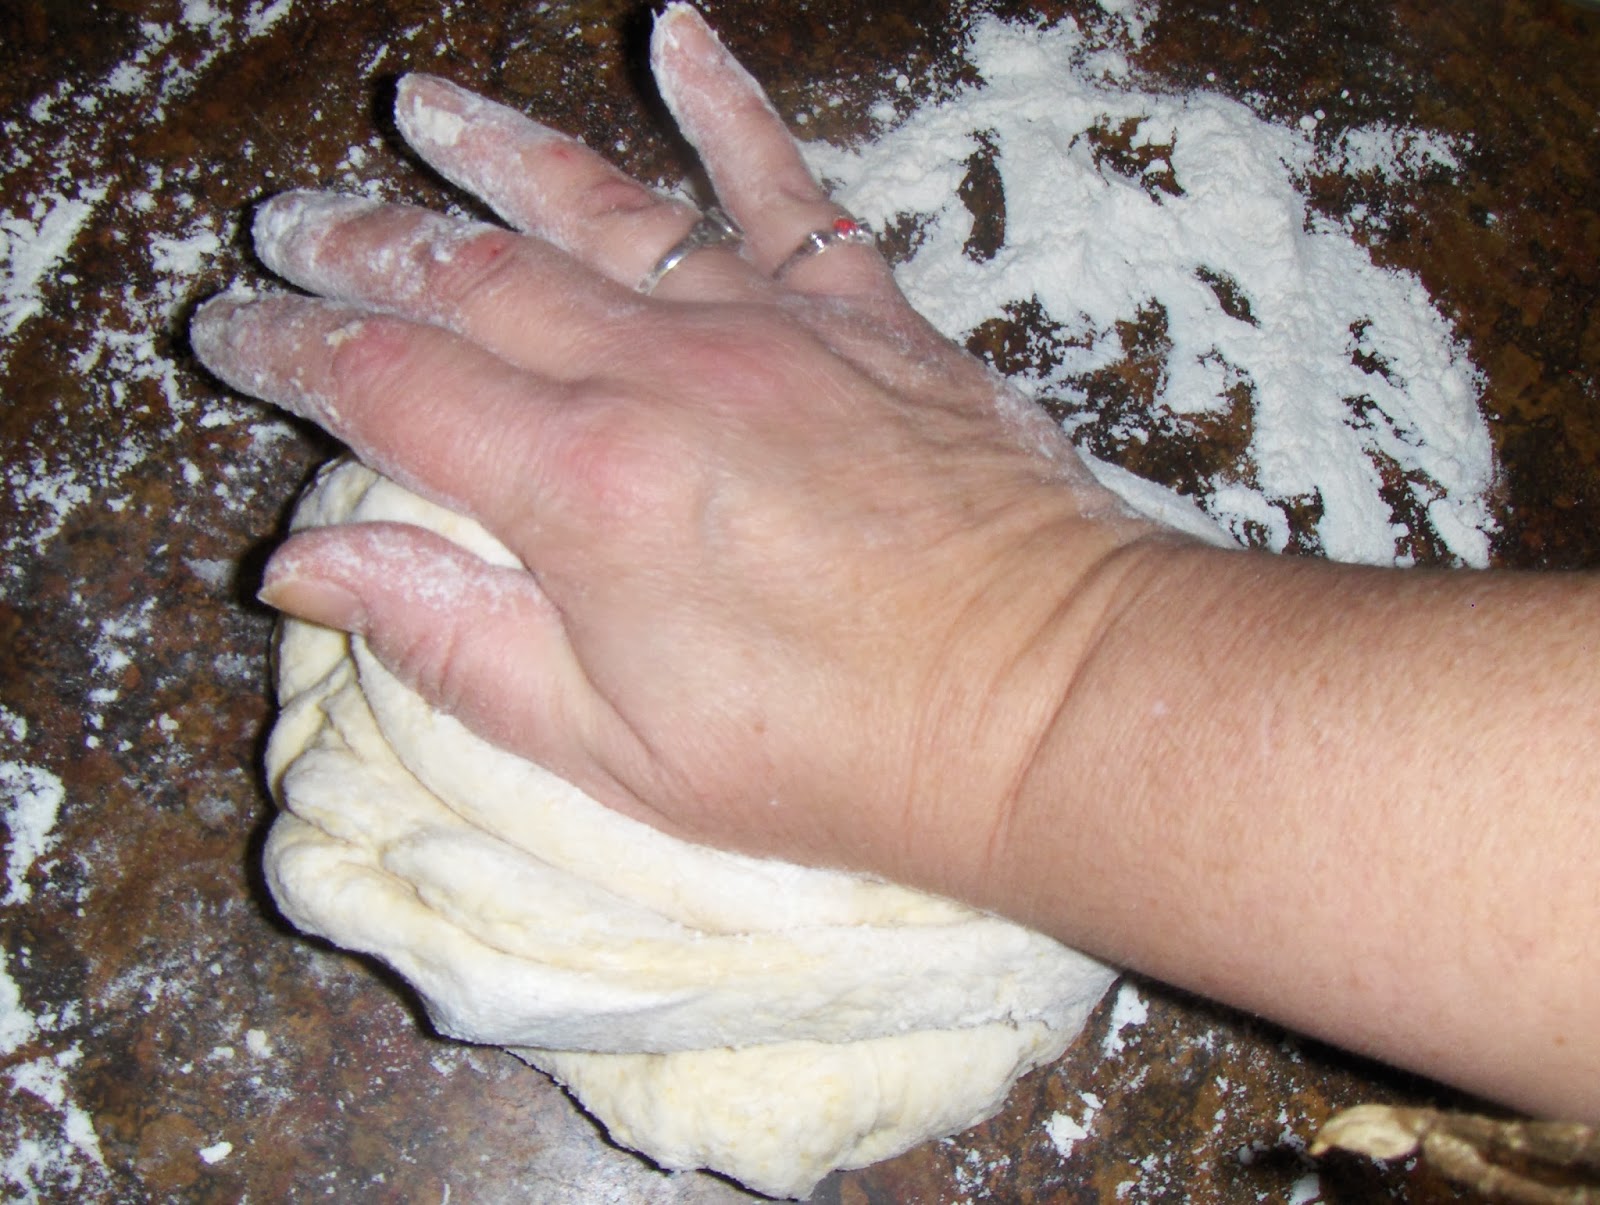


I always use the same bowl I just mixed it in- cuts down on dishes, but doesn't make for pretty pictures! Haha! Once doubled, you are ready to make pizzas! Yay! 

Cut dough in half **- this dough makes 2 pizzas. Roll out each half on lightly floured surface to desired size and thickness. Thin crust, thick crust- it all depends on what you roll it to! We like ours thin to regular.  Place on pizza pan, warmed pizza stone, or cookie sheet lightly dusted with cornmeal.  Bake in oven for 7 minutes at 450 F degrees. Remove from oven, Top with sauce, toppings of your choice an cheese. return to oven - Bake at 450F degrees for 9-10 minutes. (Sorry Sorry! I forgot to take a picture of rolling it out! I'll add it next time!) Here they are at prebake.


Have fun with the toppings! Have the kids help grate the cheese, and choose their own toppings. (For cheese lovers, you can roll pieces of string cheese into the crust edges and create a stuffed crust the kid's will love! -Do this at the first stage). Kids love rolling out the dough.** This is enough dough, you can further divide dough for four mini pizzas if everyone wants their own personal mini pizza!  Enjoy!


you might like the recipes and ideas on:
Frugal Days Sustainable Ways #100

Make Your Own Monday 12/16


you might enjoy:


Disclaimer: Affiliate Links in no way affect your end price, there is no increase for you. But, they do help to support the cost of the blog. Thank you.


Tuesday, July 2, 2013

Who's hungry in the heat?!

In my neck of the woods, it is just too hot to be hungry.
Our local temperatures and weather are causing warnings to be issued. Excessive heat can be scary.
 I push the liquids and have written a reminder about the heat: Summer is Here!

Summer is a time to careful and mindful of others. 
It's a time to be understanding of family, and patient as a Mom.
Kids can get cranky.
Adults can get cranky, and routines can dissolve right along with anything melting out in the sunshine.
I love our meal times together. I haven't been cooking a lot. My whole family seems to be nibbling a lot. Which is fine. It's just as a Mom, it seems for me hard to get used to.

So I question, Why do our appetites go down with the heat?  

It's actually not an easy answer to find; at least I didn't come across it so easily. But I did find some answers. Now, I am not a professional, but as I personally understand it-  in the cold weather our bodies need the extra nutrients in order to create and maintain our core temperatures of our bodies. However, in the excessive heat- the opposite is true. Our bodies have to fight to cool down our body's core temperature and fight to maintain a healthy temp. It does so through liquids, sweating, and naturally cooling. Think of an evaporative cooling system- water is pumped outward onto pads and air blown by picks up the moisture and cools down the air. Sweating and our bodies is very much like this. Water (Sweat) is poured outward and air blows by thus cooling the skin. It is vital part of being able to maintain health in the heat.
As gross as it sounds- In the excessive heat,  you actually want to sweat! Your body will crave liquids to perform and maintain this function. When it doesn't have enough you will become dehydrated. If you eat instead of drink fluids, your body's systems have to divert blood flow and fluids to process the food, and this takes away temporarily from your body's ability to maintain it's natural cooling system. That's why you get a nauseated feeling, after eating heavy in the high heat. Your body wants to reject this function and continue maintaining your core temp. Your body is in a kind of survival mode at that time, and will give you clues to help you be at your best.

Now, yes, you must eat in order to survive- but during the high heat of the day- it might be wise to avoid heavy foods. Eat small, eat light, and try to listen to your internal voice as to weather or not you need food or a glass of water.  Foods with a lot of water content are fantastic- small portions- snack on watermelon, tomatoes, cucumbers, fresh berries. Salads!  Infuse water with fruit and gain the extra nutrients naturally. Avoid alcohol and caffeine. Nibble, allow kids to nibble. It's okay to divert off the normal routine. safer and healthier for everyone!

Rest when you need to. Water water water, fluids fluids fluids.

Have fun, Be smart about it. Be safe!


Sunday, June 16, 2013

Happy Father's Day! And Father's Day Dinner Steak Tips

Happy Father's Day!

To all those special Fathers out there!
Hope the day turns out wonderful for you!! 


 My hubby with the boys several years ago. :) So sad how fast they grow!


Making Special Father's Day Steak dinner?

A few quick tips to make it turn out just right!

Steak Tips for cooking on fry pan or grill:


A key factor: What ever steak you want to cook let it set at room temp about 15 -20 minutes before you cook it. Cooking cold steak takes longer and causes a tougher steak in finish. Let it get to room temp!

For average size steak say an 1" thick, cook an average of 5-7 minutes each side- using salt and pepper only. You can add or brush a dab of real butter on each side to help it not stick to the pan or grill and add flavor, but you really do not need more.

Do not poke the steak with a fork to flip -that releases the juices that you want  to stay!- use your spatula or tongs.

To tell if the steak is done: Poke it with your thumb- If it feels like soppy jelly, it's still in need of cooking time and not done. If it's rock hard- it's overcooked.

Before you cut or serve- Let it rest!!!   This allows the juices to settle into the meat. Let it rest  for half the time you cooked it, before cutting it to serve-so if you cooked it a total of 14 minutes, let it rest for 7.


Thursday, June 13, 2013

Homemade Biscuits

Homemade Biscuits


4 tbsp cold real butter or cold lard
1 tsp sugar or honey
2 c whole wheat flour
4 tsp baking powder
1 tsp real salt
3/4 cup whole milk, or half and half

 Preheat oven to 425F.
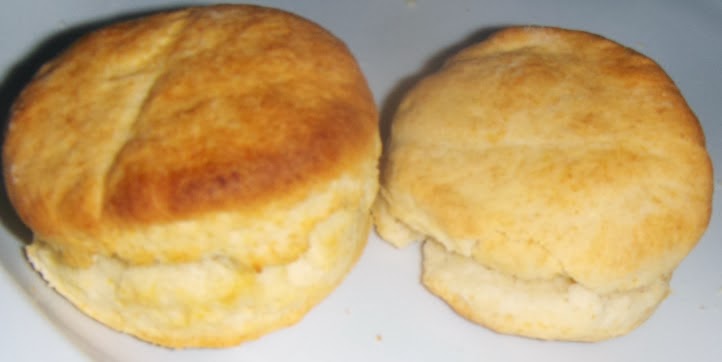
Cut butter into slices and in bowl,  sift together the baking powder and wheat flour and sugar and salt. Using a pastry cutter, or fork, combine until mixture is small crumbs. Add milk all at once and stir until batter follows fork, place on lightly floured surface and barely knead with hands a few times (comes together fast and do not over work).
Roll out dough to about 1/2 inch thickness. Cut out biscuits using a cookie cutter, biscuit cutter, or I used a juice glass with edge lightly floured :). Place biscuits on an un-greased cookie sheet.
Bake for approximately 10 minutes, or until light brown on top. Do not over bake - or the bottoms will burn.

Awesome, flaky, and easy alternate to pre-made biscuits; making this a healthier Real Food alternate to the convenience prepackaged foods containing unnecessary preservatives and fake ingredients.


Note: This is an excellent recipe for teaching the kids dough, measuring and mixing, following instructions, and baking. Fun for all! Make memories in the kitchen!
Kid Idea: Make small amount of  bacon and scrambled eggs, and grated cheese; allowing the kids to stack their own breakfast sandwiches. :)

Wednesday, June 12, 2013

Baked Spiral Potatoes

So easy and an awesome variation to regular baked potatoes! A Family favorite! Kid approved!

Baked Spiral Potatoes 

4-6 small potatoes (1 per person)
skewers
olive oil
seasonings (Your preference)

Peel and wash potatoes. Prep a cooking sheet with butter or olive oil to prevent sticking. Skewer potato lengthwise from small end to small end. With a sharp knife, carefully cut in to potato just until you feel the skewer, using it as your guide- rotating potato over as needed to achieve spiral. This actually is the hardest part if you do not have a spiral slicer, which I don't. But it is not impossible- basically tilt the knife at a slight angle as you cut and do not take it out of the potato- let it guide itself. It goes faster the more you cut.
                                                    
When done to end,  slowly pull potato apart along skewer until stretched and resembling spiral. Place on baking sheet. Brush with olive oil,  and sprinkle with seasonings. I use paprika, garlic powder, and pepper.

Bake at 350F  for 45 minutes or until potatoes are done.

For added goodie: You can add a slice of bacon skewering end at top and winding around to end-spiraled around potato.

The taste is slightly different than a baked potato - more like wedges. Some people pull it in the last 5 minutes and add grated cheese and bacon bits across the top returning to the oven to melt this in. I have also heard people drench it in sour cream, and add chives in the end.

Many people deep fry these, I chose to bake mainly to avoid huge amounts of greasy food. But you can easily look up or google, the directions if you prefer frying. They are also called tornado fries.

Serves great with Homemade Chicken Nuggets or BBQ Chicken! A great alternate for something different on the menu!  Love the fact it's easy to do and cheap making it one of my more favorite frugal recipes to stretch the budget. It's Easy to figure out how many to cook- 1 per person!

I think I am going to try this style with a sweet potato next time and see how that turns out. This might also be promising for a zucchini squash as well! :) I'll let you know! :)


This has been shared with, and you might also like the links at:

Frugal Days Sustainable Ways #76


You might try:


Disclaimer: Affiliate Links in no way affect your end price, there is no increase for you. But, they do help to support the cost of the blog. Thank you.

Tuesday, June 4, 2013

Slow Cooker Stuffed Cabbage

Slow Cooker Stuffed Cabbage


Cut  and wash half a cabbage pulling leaves apart as whole and large as is possible.

In a bowl, mix:
2 lbs ground meat ( you can use hamburger, ground beef, ground sausage, ground turkey or chicken)
1 cup bread crumbs
1/2 cup oats (if using ground turkey-or chicken eliminate the oats as this will be too dry a mixture to hold)
2 eggs
seasonings - pinch of cumin, paprika, garlic powder, salt and pepper.
(Other seasonings that are really good in it are  basil, oregano, green onion, minced garlic, chopped onions, etc.)
Combine all ingredients in bowl, and form med sized  meat balls - wrapping each ball with cabbage and place in the slow cooker/crock pot. Add all unused cabbage to the cooker surrounding the stuffed leaves.

Fill the remaining spaces in the casserole with cleaned and cut potato and carrot wedges.

Pour over all of it 1 quart jar of homemade canned tomatoes -which is  my favorite-juice and all- and  cover. Cook on high for 3-4 hours until meatballs are completely done in center.

That's it- additions to the casserole can include celery, carrots,  onions, squash, whatever you feel would match the cabbage taste. You can use canned tomato sauce, or tomato soup instead of whole tomatoes if you prefer. So easy- so versatile. And very filling!  Serves at least 4-6.  I usually have left overs, making this one of my favorite frugal recipes!. Enjoy!


you may also like the links found at:
Frugal Days Sustainable Ways #75


You might try:


Disclaimer: Affiliate Links in no way affect your end price, there is no increase for you. But, they do help to support the cost of the blog. Thank you.
Tuesday, May 21, 2013

Ideas for younger Kitchen helpers


Little ones love the kitchen.
It's a noisy, rattly yummy experience. This is the place where magic happens! 
While they are young, there are several basics they can learn to help both you and them have wonderful experiences in the room!

Some are obvious: like always wash your hands first.   

Textures in the kitchen are amazing. If your little one wants to help, here are a few ideas they can manage and enjoy: 

Hand them a pile of lettuce and a bowl- they can tear the lettuce into pieces to start the salad.

Have them pull the celery apart and peel out the strings.
Have them fill the celery with peanut butter.

Have them butter the toast. Once older, Have them learn how to make toast. Rules are simple- show them the toaster, and the fact there is heating elements. "Never stick anything in the toaster." Wait, and butter.

Snapping fresh green beans or snap peas is a great start!

They love helping putting vegies into the sink, or the bowl of vinegar water or colander to wash! They earn what floats!

Have them rinse the beans in the colander before cooking. This is fun and a texture experience!

Have them help make sandwiches. Peanut butter and jelly or honey is great to start with!

Even if they cannot read yet, point out the recipe and have them help follow. Many mixes show pictures of the eggs and the cup of water. They can help and learn to follow directions, and starts reading skills and measuring skills.
 
Have them help stir the mix! Cake mix, cookie dough, pudding mix, all super yummy and all teach self control, improve dexterity,  and care in what they are doing. 

Have them help frost the cupcakes!  Or help decorate the gingerbread men

Have them help arrange the platter of raw vegies around the dip! This would involve stacking and sorting, colors, and vegie names!

The magic in the kitchen really is all about quality time and a fun experience. Any and every child, boy or girl, should learn the basics with joy -  without fear. This fosters healthy attitudes for entire family and healthy attitudes for real food. The more they know about healthy real food and how it works; the more likely they will continue good cooking habits later on in life. And, Yes!  the less likely they are to eat junk food. If a person enjoys cooking- the more real food they'll cook! 


Monday, May 20, 2013

The Most Important Lesson - Heat Control

When I talk with my boys about their cooking, I asked them what they felt was the most valuable lesson in the kitchen. Both answered quickly and simply- heat control.

My rules were simple about the stove.
Handles in. I am a repetitive teacher. I repeat until I am sick of hearing it then I say it again. But it sticks. And I believe everyone should learn- handles in. It saves so many little ones from being burned! So simple- yet so important. First time learners can saves themselves a lot of pain as well, nothing sticking out cannot get caught up in shirts sleeves or aprons. Handles in. I started saying that and pointing it out to them as early as I could. I cannot really say an age- because there is a stage where they stop being babies and told no, stay away from the stove- to growing enough to see what's actually on the stove and being curious about how to do it. I guess about 10 -ish. If that makes sense.

Beyond this simple rule- I approached the stove like their father approaches tools out in the garage. I am teaching boys after all. And it worked.  I explained the tool (the stove) and we practiced together, then on their own.
 It went something like this:


How to control the heat….

  This was an observation first lesson- Then a hands on second.  I explained the parts of the stove, and oven. Then set down a small sauce pan, a med sauce pan, and a large pot - all filled a bit of  water on each burner-  on the last burner I put on a fry pan with a dab of butter.

 I started the stove starting with the small saucepan burner- I had them look at the flames/burners in comparison to the size of the pans. Up and down. I Compared pans to pots and small sauce pans – adjust flames up and down . Turn on, turn down, turn off. I did it- then turned everything off -and had them do it. Start to finish, one at a time. I asked for high, med, low, simmer, and off.  I had them turn the fry pan to med and then to low- melting the butter. They moved it around with a spatula to spread it around, and I had them watch the areas that heated first. We stopped and turned it off after that. I asked them what they'd do if it felt out of control, or over boiled. I made sure they had handles in and were spatially aware of their body when reaching over.
 We turned everything off. I then Turned on the oven . We got on our knees  for a second and looked at the heat source. We adjusted the racks, and in turn we learned the mitts. They explained it back to me- showing they understood the oven -where the heat comes from ,what’s broil and what’s heat. 

Then we went back to the pots on the stove. I shifted them, so the front two were saucepans - one already filled with water, and we filled one with milk.  They turned on the burners by themselves. We reviewed high, and low, quickly then began: lesson 2: How to Boil water and how to Boil milk- a side by side lesson  for comparison. I did this so they could understand what liquid looks like just before boil point- on both. Then they boiled.
They understood a simmer, and compared  it to rolling boil. We covered the saucepans with a lid and I showed them the steam, condensation, and how much faster a rolling boil occurs. I let the milk boil - and didn't say a word when it started to rise and foam like milk does. This displayed the difference- (Boiling over) when temp turned up or down. By allowing the milk to scald and spit out the lid so they saw  what not to do… worst case scenario. 

After they had proven they could boil, control, and manage the water without fear-we turned everything off and cleaned up the milk mess. 

Then together we made mac n cheese start to finish. They filled the pan with water, started the stove - handles in- watched for a boil, added the noodles....and READ the directions. They st the timer.  I strained the noodles but then returned the whole venture over to them to finish. They completed it with relatively few noodles hitting the counter! And felt pride in what they accomplished. We sat down together and enjoyed a bit for lunch. Their first cooking experience was a success. 

The way I relate this may seem tedious, and repetitive, but it worked. How you walk your child through their first lesson is up to you. My hope is that in relating my experience I can help to encourage others- or take the fear out of where to start for some, and maybe give a tip or two to others. 
Just have fun with it. If nothing else, the experience is worth the smiles at the end.  :)


Kitchen helpers

As a Mom, there is nothing better than to hear someone say, "Can I help?"
I welcome it, and have found it occurs often in the kitchen. It's natural, I believe, for kids to be curious.
To have the opportunity to teach basic steps of cooking is a wonderful and very natural thing to occur. Everyone needs to eat- we as humans have to consume to survive. And I, as a homeschooling mother of 2 boys, will never deny an opportunity to teach and nurture a natural desire to want to learn more.

All too often the curiosity of children in the kitchen is squelched due to time constraints, or parental fears of messes that so often can occur when kids attempt new things.
If I can do anything in this, I'd like to encourage parents to allow the mess, encourage the attempts, and realize an extra 5 minutes of sweeping or swiping is worth the invaluable lessons your child could be learning in the kitchen. The lessons truly go so much further than just edibles to be consumed. The kitchen contains thousands of textural, scientific, dexterity, self control, and progressive steps lessons within it- it can be an invaluable tool to the learning progress of any child.

If I can do anything in this blog, I'd hope to encourage you to cook with your children! I encourage it!
The smiles, laughter, joy and pride in their accomplishment are all the best reasons on earth to say yes when they ask to help. Encourage, not discourage. Create memories. And enjoy.

My oldest sons Chicken Parmesan! Completely done on his own!


Sopas: a perfect intro to masa dough, that kids love to play with and shape-  and build up later with yummy ingredients that they helped to chop and make!