Showing posts with label kid cooks. Show all posts

Tuesday, November 4, 2014

Easy Carrot Salad

Easy Carrot Salad

2 cups shredded carrots,
1 cup raisins,
2 tbsp lemon juice,
1 diced apple,
2 tbsp. honey,
1 heaping tbsp. mayonnaise (Homemade preferred).

Grate, dice, and mix! Stir together and chill for 1 hour before serving.


Excellent for picnics, kid approved, great way to teach kids how to make recipes. 
Bring a smile- enjoy. 

Proof we can have fun with fruits and vegies! 

Recipe also noted in Carrots!


Friday, December 27, 2013

Peanut Butter Cookies

Family Favorite Peanut Butter Cookies


 In a large mixing bowl add:

1 c peanut butter (Creamy or crunchy- depends on your taste preference!:)
1 c brown sugar
1 c sugar
2 eggs
1 c real butter (2 sticks)
2 tsp vanilla extract

Cream together in bowl until sugar dissolves.

Add to bowl:
3 c flour
1 tsp baking powder
2 tsp baking soda
1/2 tsp real salt

Mix all together well. Set bowl in refrigerator for 1 hour until dough firms. Take spoonful batter and roll into 1" balls. Place on ungreased cookie sheet. Use a fork to create hatch-marks on each and slightly flatten top on cookie dough roll.
Bake at 375F degrees for 8-10 minutes.
Enjoy!

This recipe is extremely easy to follow and very good for beginning learners! Kids love helping to roll and smoosh down the dough balls- the refrigerated batter makes for easy clean up, and easy to work with dough. Kid friendly and certainly kid approved. Makes approximately 5 dozen.
Bring smiles! Enjoy together!


You might find supplies you need:

Disclaimer: The above links are Affiliate Links. This, however, does not affect your end price; but does help to pay the cost of the blog. Thank you!.

Thursday, June 13, 2013

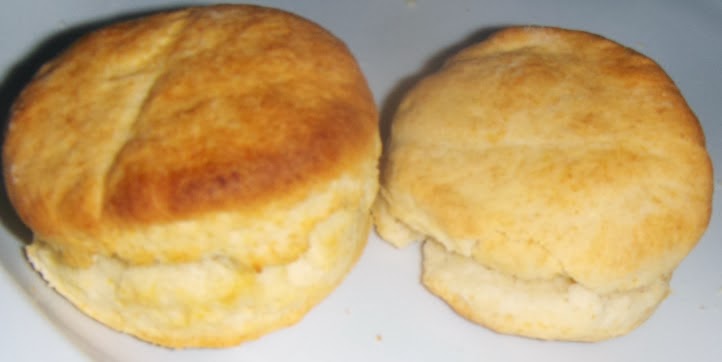
Homemade Biscuits

Homemade Biscuits


4 tbsp cold real butter or cold lard
1 tsp sugar or honey
2 c whole wheat flour
4 tsp baking powder
1 tsp real salt
3/4 cup whole milk, or half and half

 Preheat oven to 425F.
Cut butter into slices and in bowl,  sift together the baking powder and wheat flour and sugar and salt. Using a pastry cutter, or fork, combine until mixture is small crumbs. Add milk all at once and stir until batter follows fork, place on lightly floured surface and barely knead with hands a few times (comes together fast and do not over work).
Roll out dough to about 1/2 inch thickness. Cut out biscuits using a cookie cutter, biscuit cutter, or I used a juice glass with edge lightly floured :). Place biscuits on an un-greased cookie sheet.
Bake for approximately 10 minutes, or until light brown on top. Do not over bake - or the bottoms will burn.

Awesome, flaky, and easy alternate to pre-made biscuits; making this a healthier Real Food alternate to the convenience prepackaged foods containing unnecessary preservatives and fake ingredients.


Note: This is an excellent recipe for teaching the kids dough, measuring and mixing, following instructions, and baking. Fun for all! Make memories in the kitchen!
Kid Idea: Make small amount of  bacon and scrambled eggs, and grated cheese; allowing the kids to stack their own breakfast sandwiches. :)

Tuesday, May 21, 2013

Ideas for younger Kitchen helpers


Little ones love the kitchen.
It's a noisy, rattly yummy experience. This is the place where magic happens! 
While they are young, there are several basics they can learn to help both you and them have wonderful experiences in the room!

Some are obvious: like always wash your hands first.   

Textures in the kitchen are amazing. If your little one wants to help, here are a few ideas they can manage and enjoy: 

Hand them a pile of lettuce and a bowl- they can tear the lettuce into pieces to start the salad.

Have them pull the celery apart and peel out the strings.
Have them fill the celery with peanut butter.

Have them butter the toast. Once older, Have them learn how to make toast. Rules are simple- show them the toaster, and the fact there is heating elements. "Never stick anything in the toaster." Wait, and butter.

Snapping fresh green beans or snap peas is a great start!

They love helping putting vegies into the sink, or the bowl of vinegar water or colander to wash! They earn what floats!

Have them rinse the beans in the colander before cooking. This is fun and a texture experience!

Have them help make sandwiches. Peanut butter and jelly or honey is great to start with!

Even if they cannot read yet, point out the recipe and have them help follow. Many mixes show pictures of the eggs and the cup of water. They can help and learn to follow directions, and starts reading skills and measuring skills.
 
Have them help stir the mix! Cake mix, cookie dough, pudding mix, all super yummy and all teach self control, improve dexterity,  and care in what they are doing. 

Have them help frost the cupcakes!  Or help decorate the gingerbread men

Have them help arrange the platter of raw vegies around the dip! This would involve stacking and sorting, colors, and vegie names!

The magic in the kitchen really is all about quality time and a fun experience. Any and every child, boy or girl, should learn the basics with joy -  without fear. This fosters healthy attitudes for entire family and healthy attitudes for real food. The more they know about healthy real food and how it works; the more likely they will continue good cooking habits later on in life. And, Yes!  the less likely they are to eat junk food. If a person enjoys cooking- the more real food they'll cook! 


Monday, May 20, 2013

The Most Important Lesson - Heat Control

When I talk with my boys about their cooking, I asked them what they felt was the most valuable lesson in the kitchen. Both answered quickly and simply- heat control.

My rules were simple about the stove.
Handles in. I am a repetitive teacher. I repeat until I am sick of hearing it then I say it again. But it sticks. And I believe everyone should learn- handles in. It saves so many little ones from being burned! So simple- yet so important. First time learners can saves themselves a lot of pain as well, nothing sticking out cannot get caught up in shirts sleeves or aprons. Handles in. I started saying that and pointing it out to them as early as I could. I cannot really say an age- because there is a stage where they stop being babies and told no, stay away from the stove- to growing enough to see what's actually on the stove and being curious about how to do it. I guess about 10 -ish. If that makes sense.

Beyond this simple rule- I approached the stove like their father approaches tools out in the garage. I am teaching boys after all. And it worked.  I explained the tool (the stove) and we practiced together, then on their own.
 It went something like this:


How to control the heat….

  This was an observation first lesson- Then a hands on second.  I explained the parts of the stove, and oven. Then set down a small sauce pan, a med sauce pan, and a large pot - all filled a bit of  water on each burner-  on the last burner I put on a fry pan with a dab of butter.

 I started the stove starting with the small saucepan burner- I had them look at the flames/burners in comparison to the size of the pans. Up and down. I Compared pans to pots and small sauce pans – adjust flames up and down . Turn on, turn down, turn off. I did it- then turned everything off -and had them do it. Start to finish, one at a time. I asked for high, med, low, simmer, and off.  I had them turn the fry pan to med and then to low- melting the butter. They moved it around with a spatula to spread it around, and I had them watch the areas that heated first. We stopped and turned it off after that. I asked them what they'd do if it felt out of control, or over boiled. I made sure they had handles in and were spatially aware of their body when reaching over.
 We turned everything off. I then Turned on the oven . We got on our knees  for a second and looked at the heat source. We adjusted the racks, and in turn we learned the mitts. They explained it back to me- showing they understood the oven -where the heat comes from ,what’s broil and what’s heat. 

Then we went back to the pots on the stove. I shifted them, so the front two were saucepans - one already filled with water, and we filled one with milk.  They turned on the burners by themselves. We reviewed high, and low, quickly then began: lesson 2: How to Boil water and how to Boil milk- a side by side lesson  for comparison. I did this so they could understand what liquid looks like just before boil point- on both. Then they boiled.
They understood a simmer, and compared  it to rolling boil. We covered the saucepans with a lid and I showed them the steam, condensation, and how much faster a rolling boil occurs. I let the milk boil - and didn't say a word when it started to rise and foam like milk does. This displayed the difference- (Boiling over) when temp turned up or down. By allowing the milk to scald and spit out the lid so they saw  what not to do… worst case scenario. 

After they had proven they could boil, control, and manage the water without fear-we turned everything off and cleaned up the milk mess. 

Then together we made mac n cheese start to finish. They filled the pan with water, started the stove - handles in- watched for a boil, added the noodles....and READ the directions. They st the timer.  I strained the noodles but then returned the whole venture over to them to finish. They completed it with relatively few noodles hitting the counter! And felt pride in what they accomplished. We sat down together and enjoyed a bit for lunch. Their first cooking experience was a success. 

The way I relate this may seem tedious, and repetitive, but it worked. How you walk your child through their first lesson is up to you. My hope is that in relating my experience I can help to encourage others- or take the fear out of where to start for some, and maybe give a tip or two to others. 
Just have fun with it. If nothing else, the experience is worth the smiles at the end.  :)


Kitchen helpers

As a Mom, there is nothing better than to hear someone say, "Can I help?"
I welcome it, and have found it occurs often in the kitchen. It's natural, I believe, for kids to be curious.
To have the opportunity to teach basic steps of cooking is a wonderful and very natural thing to occur. Everyone needs to eat- we as humans have to consume to survive. And I, as a homeschooling mother of 2 boys, will never deny an opportunity to teach and nurture a natural desire to want to learn more.

All too often the curiosity of children in the kitchen is squelched due to time constraints, or parental fears of messes that so often can occur when kids attempt new things.
If I can do anything in this, I'd like to encourage parents to allow the mess, encourage the attempts, and realize an extra 5 minutes of sweeping or swiping is worth the invaluable lessons your child could be learning in the kitchen. The lessons truly go so much further than just edibles to be consumed. The kitchen contains thousands of textural, scientific, dexterity, self control, and progressive steps lessons within it- it can be an invaluable tool to the learning progress of any child.

If I can do anything in this blog, I'd hope to encourage you to cook with your children! I encourage it!
The smiles, laughter, joy and pride in their accomplishment are all the best reasons on earth to say yes when they ask to help. Encourage, not discourage. Create memories. And enjoy.

My oldest sons Chicken Parmesan! Completely done on his own!


Sopas: a perfect intro to masa dough, that kids love to play with and shape-  and build up later with yummy ingredients that they helped to chop and make!


Tuesday, April 23, 2013

Real Food snacks: Fruit Leathers

Real Food Snacks: Fruit Leathers
When talking with my husband and boys about the real food challenge, and writing about it; they jumped in with a request I post my fruit leathers. According to them, this is the biggest of all the changes. These have been a fantastic snack alternative to candy bars, etc.  Along with simple dried fruit for snacks(banana chips apple chips, dried pineapple), I always keep something of this on the counter readily available for anytime they need it. 


Apple Fruit Leather
1 jelly jar of apple butter (Homemade and canned, gala apples simmered with honey and cinnamon for 10 hours in crock pot until fully reduced, and canned in jelly jars) or 8oz applesauce!
1 7 oz jar homemade plain yogurt
1/4 cup honey
mix well and dehydrated in dehydrator on 135 degrees for 6-8 hours until leathered
pulled off and cut warm, wrapped in wax paper rolls. sent easily in lunches for snack.
Pina-Coco Leather
1/2 pineapple cored, skinned, and cut into chunks
1 cup shredded coconut
1/4 cup organic honey
Combined all in food processor  and pulse until smooth,  (this one will always appear slightly chunky- get it as smooth as possible). Spread flat on dehydrator tray. Dehydrate for 6-8 hours at 135 degrees. this one comes out a bit stickier, thicker- remove from sheets and wrap in strips on wax paper while warm. Delicious pina colada flavor.

Pina-coco leathers are not as pretty but just explode in taste:

If you do not have a dehydrator:
Line a rimmed baking sheet with wax paper. Pour out the mixture into the lined baking sheet to about an 1/8 to 1/4 inch thickness. Place the baking sheet in the oven. Heat the oven to lowest setting below 140f. Perfect range: 135-140°F. If you have a convection setting, use it, it will speed up the process and help dry out the fruit in half the time.  Let dry in the oven like this for as long as it takes for the fruit mixture to dry out and form fruit leather. We usually keep it in the oven overnight, so about 8-12 hours for the thicker leathers, check at 6 hours for thin leathers like apple. The fruit leather is ready when it is no longer sticky, but has a smooth surface.