Showing posts with label DIY beauty products. Show all posts

Saturday, January 3, 2015

Beginning a New Year


Welcome 2015. 


I Gladly welcome in a New Year.
I have never wanted a year to be done, and gone, and put to rest, as much as I did the year 2014.
The hardest part for me, personally, in keeping up with the blog was writing during the hardest times. I naturally go silent during troubles or changes. And this year was filled with some whoppers- like hospital visits, near death experiences, 4 separate surgeries, and cancer scares. We lost a lot. We learned a lot.
When I read other people's blogs they present perfect worlds, perfect solutions, and pretty places. I cannot keep up with that. I have to say with sincerity, the world is not a perfect place  and being a blog writer during hardships is difficult at best. I am sorry for long absences and I am grateful for every reader I have. Thank you so much.

That being said, I have to admit- I learned a lot in 2014.

We gardened a serious yard garden for the first time ever. I loved every minute of it.

We canned everything from that garden that we didn't eat right away. I dehydrated herbs like basil and made my own seasoning mixes. I made my own infused oils for both cooking and health (like garlic oil and Calendula oil.)  Fresh salsa was on the menu often. It was wonderful experience for all of us.

As for homesteading, the experience of canning and prepping my own was amazing. I became more of a Prepper than I ever had imagined. And I am so glad I did! I have always thought it wise to stash something for an emergency. My naive mindset was to set to prepare for something big -like a disaster: an earthquake, or a storm.  But I never realized that that list should include personal disasters- like sudden illness, unemployment, and loss.  The list of what could go wrong goes much further than that; but my point is more to make it known that events can occur at a blink of an eye. And preparing ahead of time is smart. I am so glad we did. That stash of items not only got us through- I am making it again as soon and as fast as I can. And I urge others to do the same. Don't wait for the disaster to occur. Give yourself at least a small reprieve from the stress by knowing you are able to provide for your family-for at least a day, or a week. Longer if possible.  The traumatic events causing the need- are enough to go through!  Ease the burden by being able to at least provide for your family for a small window of time. It helps so much, the benefits are immeasurable.
 (I plan to write more on this in the future.*)

During the year, I had some family who visited. We were sitting on my back porch- surrounded by my homemade wind-chimes, my plants and flowers, boxes of herbs growing healthy.  I'd just walked up with my little 6 year old niece from giving her a tour of our garden- her mouth was full of my wild lettuce I'd just let her pick on her own and taste. Her mother reprimanded her- "don't eat that! It's not safe!" to which,  I laughed- "It's as safe as it gets- fresh from the garden, organic, all natural and ready for salad." At this point, my mother in law looked around and bluntly observed, "You are such a hippy."  And that one personal remark struck home. I was flat out called a hippy. At the time I laughed. Never thought of myself as such. But it struck home.

I have thought of it a lot this week. I am. Only they do not call it hippy so much anymore- crunchy, yes. Ha! But I got to thinking of the all natural things I reach for- and the list is amazing. They say if you try something new for 3 months, it becomes habit. I have done that and more- in the two years. A fact that was proven to me this last October when we suddenly found ourselves packed to move to a place that wasn't ready. With everything in boxes, unprepared and unpacked- we spent 1 night at a hotel with nothing. We purchased dinner on the fly and I grabbed 1 box of baking soda. Yes, baking soda. With that box we all had instant toothpaste, deodorant, and bodywash,  and I could wash my hair..... I figured for emergency get through- I'd covered my bases pretty well! LOL  But just looking back on it now- I have to laugh- who does that?!! LOL - me- my hippy self, and I. (grin) guess she called it right. :)
So...
What else do I do?
Ha!

When faced with bug bites, I grab Lavender essential oil. lavender-for-buggy-bites
When I have a stuffy nose I use peppermint essential oil.
- If it persists, I make ginger tea.
For shampoo, body wash, and bath soap I mix coconut milk with castille soap. diy-homemade-body-wash
I make my own toothpaste from coconut oil, Bentonite clay and baking soda.
I make my own deodorant. 3-diy-all-natural-deodorants
I make my own lotions, and face cream. simple-natural body care
I use witchhazel for acne.
I make my own house cleaners. diy-cleaning
I make my own laundry soap.my-mix-laundry-soap
I make my own body sprays.
I make my own lip balms diy-homemade-lipbalm
I cut my own hair.
I use aloe as a detangler, and to stop frizzy curls.100% natural detangler
I eat Real food.
I make my own fruit roll ups.real-food-snacks-fruit-leathers
I make homemade yogurt.
I use raw local honey for allergies.
I mix raw honey with lemon juice and cinnamon for a homemade cough syrup.
If I'm in pain, I take turmeric.
If I need energy I grab a spoonful of coconut oil.
I take ACV for heartburn.
I use vinegar and baking soda to unclog drains.
When I run out of garlic powder or onion flakes, I dehydrate more.seasonings-dehydrated-vegies


And the list goes on...
In trying times, the list expanded and was confirmed and reaffirmed and necessary. My point is, I proved to myself to be true to what I have written. I proved to myself to be true, and do practice what I preach (so to speak). That acceptance for myself, of myself ,was more valuable than any resolution I could make this New Years.
 I am what I am. Crunchy, and Hippy and still learning -all rolled into one. With this admission, I am happy to roll onto a New Year with freedom to move forward, Happy to be who I am. :)
Thank you so much.
Happy New Years! - Janey


Friday, August 2, 2013

DIY Homemade Body Wash

DIY Homemade Body Wash


I am still using castile bar soap in the shower, but occasionally- especially during extra hot summer days-  I love to use body wash- and my favorite is peppermint body wash during the heat.

 In a recycled, or new squeeze bottle add:

2/3 cup Castile Soap (Dr. Bronner's Peppermint is my favorite in the summer for cooling relief;  Lavender is fantastic at night ; and Citrus is refreshing and great for energy and early mornings! But, any will work!)
1/3 cup Coconut milk (hydrating for skin)
2 tsp. glycerine
2 tsp. vitamin E oil (an antioxident that actually helps preserve the mixture)
additional Essential Oil for more scent, if desired. (5-10 drops of whatever you like- whatever compliments the mood!)

Shake well to mix.


Wet a washcloth, or loufa and squeeze a bit on- lather and enjoy!

Rinses off with ease, doesn't dry your skin out or leave you with icky film, is refreshing and wonderful and all natural!!!


Best Homemade Body Wash I have found yet!

Great for kids!  Perfect, if you choose Baby Mild Castile Soap for youngest ones! (Reduce amount of essential oils added extra for babies - you don't want to irritate their sensitive skin!)
All Natural and safe from toxins, and perfumes! Yay!

Note: Unless you know you will be using a lot, make small amounts at a time, store in cool place, will last a week or two.

I hope you enjoy!


You might also enjoy the links found in:

Make Your Own Monday 8/5

Homestead Barn Hop 122


You might find items here:


Disclaimer: Affiliate Links in no way affect your end price, there is no increase for you. But, they do help to support the cost of the blog. Thank you.

Thursday, June 20, 2013

100% Natural Detangler

Natural Detangler -


Surprises can come from the simplist of things. And I love the fact I learned this one! YAY!!!!

The longer my hair gets the more I have to mind the tangles. I have naturally curly hair that can frizz and tangle in a heartbeat (or a foggy day- whichever comes first! Haha!)  I am sooo tired of the myriad of products all designed to detangle, with nothing more than fake, toxic chemicals that strip and dry out; or do the opposite- coat and grease, and weigh down the hair. Either way- when I discovered this simple secret- I have never been happier.

Aloe. 100% pure, all natural aloe.
I use Aloe Vera gel! All natural 100% Aloe Vera Gel  (about a quarter sized portion in my hand)  run through the ends of my hair softens, detangles, and moisturizes my hair- without residue, without chemicals. Applied to my wet hair (or to dry), it works wonders and has no scent, it soaks in, is weightless and non greasy, and combs through and dries clear- disappearing.


I now use it after every shower. I combine the quarter sized dollop with 1-2 drops of lavender essential oil and my hair smells amazing, and I have no fear of the comb! Plus! It reduces the amount of frizz my curls have- for my hair it's amazing!


This is exceptionally natural way to detangle a child's hair with less tears and no extra toxins or build up. Less tears-that is a huge WIN WIN! & makes mom happy!  It's fantatsic for the scalp and skin, and cannot harm children in any way!
 

Oh how I love Aloe Vera and it's many uses! Always work from the bottom up. If the tangle mass is huge- douse the mass with aloe and slowly separate- within minutes it starts to come apart and combs right through!

After a long conversation with my friends Virginia, and Vicki;  I was happy to have it confirmed that Aloe Vera works in more hair types than just thick curly brown! Which is fantastic news! Virginia and Vicki both have confirmed that Aloe Vera is excellent in ethnic hair! Vicki said she uses aloe all the time on her and her daughter's hair, when she gets her out of bath she puts it on,  and said she likes it because it does not add extra weight and is non greasy!!!! Followed by coconut oil for extra moisturizing, especially when using the hot irons-  they are 100% natural and happy with their hair!  Yay!!


Healthy Hair! Happy Hair!


Shared with and You might also like the links at:

Frugal Days Sustainable Ways #77

Make Your Own Monday Link Up 6/24

Homesteaders Hop 23


You can find items here:


Disclaimer: Affiliate Links in no way affect your end price, there is no increase for you. But, they do help to support the cost of the blog. Thank you.

Thursday, May 23, 2013

3 DIY All Natural Deodorants - and why you might want to try them

3 DIY All Natural Deodorants

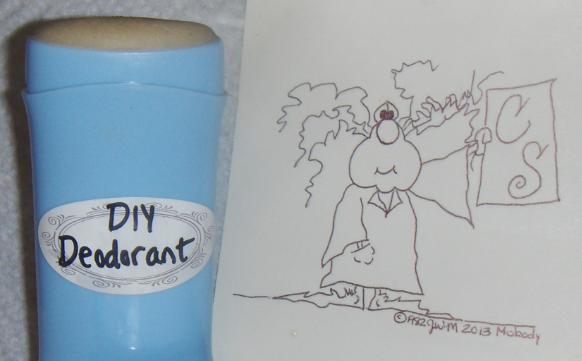
DIY All Natural Deodorant -Stick  

1 Tbsp. beeswax
2 Tbsp. coconut oil
1 Tbsp. shea butter or coconut butter
1 Tbsp. cornstarch or arrowroot powder
1 1/2 Tbsp. baking soda (aluminum free)
1 Tbsp. bentonite clay (I used Redmond)
1 /4 tsp. Vitamin E oil
10 drops tea tree essential oil
10 drops lavender essential oil
10 drops lemon essential oil

In a double boiler, melt beeswax and coconut oil first, then add shea butter (shea cannot tolerate high heat as well, and  needs to be melted last- do not boil just reach melt point and stop). Once melted, remove from heat and add cornstarch and baking soda and bentonite clay- Stir well to incorporate until smooth. Add essential oils and Vit. E oil last. I used lavender/lemon oil as it is my favorite scent, but you can change the essential oil to whatever you prefer. (A citrus fresh blend could include lemon and grapefruit oil, or lemon and orange.) Pour mixture into new or cleaned re-purposed deodorant stick. Let cool over night without the lid, 24 hours. Use as you normally would- thin layer, this actually requires less than commercial brands to be effective and thus lasts longer.
All natural  and chemical free!


- or -

DIY All Natural Deodorant - jar version.

5 tbsp. coconut oil
1/4 cup baking soda (aluminum free)
1/4 cup cornstarch or arrow root powder
1/4 tsp Vitamin E oil
lavender essential oil

In small bowl mix with spoon all ingredients except essential oil.  A small jelly jar works fantastic for this, or you can reuse any old cold cream jar  that's been cleaned and has a good lid.  Add essential oil last- 10 to 20 drops of your favorite scent will do. Lemon gives great fresh citrus scent. My favorite is lavender, but the choice is yours. Because this is mostly coconut oil, it can get liquid in heat, best to store in cool place. Take a small amount on finger and rub into arm pit area, soaks in quickly and works well!  
simple, easy, all natural  and chemical free!


- or -

DIY All Natural Deodorant - Spray bottle version.

1 small mister spray bottle
rubbing alcohol
tea tree essential oil
in bottle, fill with rubbing alcohol and add 10-20 drops of tea tree oil. shake well. Spray onto armpit area.
easiest version possible, and seems to be preferred by men, you can add any essential oils you'd like to create a scent preferred. the tea tree oil is an excellent start having antibiotic, anti fungal, anti viral and antibacterial properties.

:) 
I have tried all 3 versions personally. I am most pleased with the stick; but the jar version was wonderful. Simple and easy to make. I encourage anyone and everyone I know to try it. It's easy to get used to, easy to make, and  it works. You won't stink! Really!  You won't! :)


Why DIY deodorant? 


 Why would I, or anyone else, go to the trouble?

For me it is simple-Cancer causing Chemicals.  The statistics for women with breast cancer is constantly rising. I believe it stands right now at 1 in 5 women will be diagnosed with breast cancer in their lifetime. My mother, my mother-in-law, and a very close friend have survived it. My step mother did not and we lost her this last year. That is 4 women I know - I can count myself as 5. That means, in that group, 4/5 have dealt with breast cancer. Not great odds. That's not a possible hypothetical statistic that mildly sounds concerning- that's actual numbers.
Commercial deodorants often contain parabens, propylene glycol, cyclopentasiloxane, chemical fragrances, talc made with asbestiform fibers (asbestos), and aluminum. Many of these are attributed to causing cancer, or other neurotoxic effects. 
New research suggests that many of the breast cancer cases today began with the lymph nodes in the armpit area. It does not take a brilliant mind to figure out that putting cancer causing agents in the armpit area in order to deodorize and smell pretty- might actually be contributing to the rise in breast cancer over the last number of  years. I am not saying they are the sole cause- but certainly they cannot be helping at all.
I personally do not see the reason to take the chance; not when I know I can naturally create an alternate that is safe to use and actually works!

If you are uncertain - don't take my word for it-  research this for yourself- PLEASE!!!   A fantastic resource for checking the ingredients in the beauty products you use is: Environmental Working Group Skin deep database

This is why I make my own deodorant- happily. I hope more and more women out there start to as well. All natural, effective and actually really easy to make.


You can find the ingredients at this site:

 
Mountain Rose Herbs. A Herbs, Health & Harmony Com 
 
 
you might also like the recipes and links at: 
 
Nourishing Treasures Make your own! Monday link up 

Friday, April 26, 2013

DIY Olive Oil Sugar Scrub

Sometimes, the easiest of things can create big changes!

I worked in the tourism industry for quite a few years when living near the Grand Canyon. When you are working with the public (I was a florist for 8 years, then worked front desk for another year) -you see a lot of faces from many different places, and they see your face and your hands when you hand them what they need. Clean hands, smiling face and warm friendly service.
A common side effect of working with the public, is washing your hands often. Antibacterial soap does it's job but it can ravage your skin! Mine would get dry and cracked if I didn't take drastic measures. This happens to be another case for me, of "if I knew then, what I know now.."which seems to be a running theme in my life! LOL

The easiest answer I have found is in my kitchen and readily available. I recycled a jar and cleaned it- filling it with sugar and olive oil. It now resides beside my soap pump at the sink. I refill as needed, no recipe really needed. Sugar soaked in olive oil. About a 1/4 c olive oil to 3/4 c sugar.

After cleaning up, when the sponges and cleansers go down for the day, and I am ready to relax with the family and enjoy the night- I wash my hands, and then I sugar scrub.
The sugar cleans and exfoliates. Rubbing vigorously warms my hands and the pores open up, improves circulation, and eases muscles. The olive oil goes to work moisturizing healing and protecting. Olive oil is rich in antioxidants, especially Vitamin E. The olive oil has an added benefit of being extremely good for cuticles and nails- be sure to rub into cuticles.  Scrub for a minute, until the sugar starts to dissolve, and rinse with warm water.

I no longer have to purchase expensive, and chemical laden hand lotions again. I had everything I needed right there in the kitchen. :) Done. easy. All natural.Very Frugal when considering the cost of hand lotions today.

A simple easy answer to dry, overworked, cracked hands. I do not have a model's figure or modeling hands- but you can see below- no alligator cracks, no dry patches, no unsightly exzema- just soft hands.


you might also like:
Frugal Days Sustainable Ways #77


You might try:


Disclaimer: Affiliate Links in no way affect your end price, there is no increase for you. But, they do help to support the cost of the blog. Thank you.

DIY Homemade Body Spray

     :) Summer is here in Southern California!!!!!! We can feel it!!!!!

On warmer days it's nice to be able to use a refreshing body spray, but I personally want to avoid the extra perfume chemicals that so often over power them. The older I get, the more I have started to notice certain perfumes overwhelm my sense of smell. I prefer a light and natural scent that essential oils give off. Their aromatherapy is beneficial health wise, and provides a natural alternative everyone can enjoy with out chemical dangers.  

An Easy to make DIY Body Spray

In a mist bottle combine:
8oz. distilled water
1 tbsp. witch hazel
20-30 drops essential oil
Mix and shake well before each use.

The combinations of essential oils are endless: for energetic and bright try sweet orange oil with lemon oil, or grapefruit and lime for citrus zing! For calm and relaxed moods you might like just lavender essential oil;  or for calm focus, lavender and lemon essential oil.  Personally my favorite is lavender and vanilla essential oils. For holidays you might like cinnamon and orange scents.  The possibilities are endless! You cannot go wrong.


Shared with and you might enjoy the links at:
Make Your Own Mondays 7/1


You can find wonderful essential oils at:

Bulk organic herbs, spices and essential oils. Sin


You might also like:
The Holistic Mama Organic Skin CareSkin Care eBookThe Holistic Mama Organic Skin Care


You might find items here:


Disclaimer: Affiliate Links in no way affect your end price, there is no increase for you. But, they do help to support the cost of the blog. Thank you.

DIY Homemade Body Butter

Back in January I ran out of my body butter, and being in mid winter season- that was a bad thing to have happen. For me, winter dry skin is a definite challenge. Being compared to an alligator is not my idea of sexy- LOL. I need serious help, and I found an answer that's easy and natural. Love it.

DIY Homemade Body Butter
4 oz. Coconut oil
2 oz. Sweet Almond oil
2 oz. Grape seed oil
8 oz. Shea butter
10-20 drops essential oil

In a double boiler, melt shea butter, coconut oil and almond oil  and grape seed oil together. Shea butter takes the longest to melt, stir to help it along. Remove from heat and pour into a medium sized mixing bowl. place in the refrigerator for about 1-2 hours until it chills and hardens. Once it's hard white, whip on med. speed in a mixer for at least 5-7 minutes. At first this is tough, because the mixture is cold, but it breaks up quick and begins to whip. The trick is to mix for a minimum of 5 minutes, any shorter time length and the mixture will not emulsify and combine properly (causing it to separate later). After about 5 minutes you will start to see peaks form and it takes on a whipped cream kind of look. Add essential oils and whip some more until incorporated. (For first batch I added lavender essential oil. But if you love the smell of shea butter you can just leave it be- for a tropical coconut shea smell that's already there.)
 You're done!
 Place into a jar you can lid, and set on shelf. It will harden more in the jar.I recycled my old jar of coconut oil for it- worked perfect!
To use, the golden rule is to realize a little bit goes a long way! Use Too much and it can be interpreted as a greasy mess. Start with just a dime sized portion and spread as far as you can before grabbing more. I have found it is wonderful to keep legs smooth!  This body butter soaks in to the skin in just a matter of a minute and is wonderful! It leaves a light scent, and the alligator dry is gone. I use it right after the shower and since I have started I do not have to re apply lotion later in the day.
This is all natural, and will last on the shelf (if kept in a cool room) for a few months. If you are uncertain about the amount- mix a half batch and give it a try. Contains none of the chemicals of store bought brands, moisturizes and hydrates your skin naturally.


You might also like:
The Holistic Mama Organic Skin CareSkin Care eBook


You might find items here:


Disclaimer: Affiliate Links in no way affect your end price, there is no increase for you. But, they do help to support the cost of the blog. Thank you.

Wednesday, April 24, 2013

DIY Homemade Lipbalm

Homemade Honey Lip balm


2tbsp. coconut oil
1 tbsp. sweet almond oil
3 tbsp. raw honey
2 tbsp. beeswax

In small saucepan over lowest heat, on or in double boiler, melt beeswax and oil. add honey. stir constantly until incorporated. This actually takes about 5 minutes for it to reach temp where everything comes together.
Pour with a spoon into lip balm containers. Cool completely (about 4-5 hours) before capping.

Store in cool area; it  is a softer balm.  Use as you would normally for dry chapped lips, works wonderful to moisturize and protect and tastes great! If exposed to heat (I live in area that gets 100+F in summer)-just place it in the fridge for a bit- solids right back up.

Be Very careful to not spill when pouring- will burn you! I just used old spoon and carefully went one by one. I refilled 4 old recycled and cleaned out lip balm tubes, and 4 small metal round lip balm containers with this recipe.


 You might love the links on this site as well:

Make Your Own Monday 6/3


You might find items here:


Disclaimer: Affiliate Links in no way affect your end price, there is no increase for you. But, they do help to support the cost of the blog. Thank you.

Monday, April 8, 2013

All Natural Daily Moisturizer


All Natural Daily Moisturizer

I have become aware of the scary amount of chemicals and fake ingredients that are included in daily moisturizers sold today. It’s amazing, the amount of dangerous ingredients in products sold to be the best.
Nature is best. Your skin is natural, you are natural, so use natural products. What can be so hard about that? 
Many do not consider their skin to be an organ of the body. The fact is, it’s the largest. What you put on it soaks in, goes to your blood stream, goes into cells and structure, and affects you. What you put on it -goes IN it. Simple.
The golden rule for your body’s organs is: If you do not recognize an ingredient, your body cannot recognize it either. This applies to lotions, soaps, shampoos, body washes, deodorants, etc. etc. etc. Anything you put on to bare skin.
But I am addressing replacing my daily facial moisturizer with a natural ingredient. It’s been over a year now, with my new routine, and I cannot be happier! The older I get, the drier my skin reacts to weather changes and exposure. But I have found the easiest answer for me: Grape seed oil and coconut oil.  Grape seed oil is light, thin, soaks in fast and doesn’t leave a heavy greasy feel. It does not clog pores, and it’s 100% natural.  Leaves my skin happy,
In harder weather, harsh conditions require a little more, so I combine 1 tsp. of 100% organic virgin coconut oil and 1 tsp. Grape seed oil into a recycled/reused night cream container and use this instead of Grape seed oil alone. Still doesn’t clog pores, soaks in in just a minute, and leaves my face not feeling dry and taut.
Bye-bye chemicals. Hello Happy skin! 

Washing your face- for Pimples and alternate to harsh soaps


Washing your face…

For pimples & an alternate to soaps 

If I knew then- what I know now… so many things would have changed. I was a teenager in the 80’s- the big hair, the big makeup, the 80’s music, the style. I still have fond memories of most of it- but one thing I wish I could have changed that would have made life so easy back then, was how I dealt with pimples. Uhhhhh… I washed with so many things- Noxema, Clearasil, Sea breeze, Acne soap! It only got worse.

 I just didn’t understand the simple rule. I get it now- less is more. 
The harsher the chemicals you use on your face, the more of the natural oils you strip away that your skin needs to maintain health. When over stripped, your skin reacts by over compensating- and excessive oil is the result. Thus, far more oil is available to clog pores, get dirty, or get infected. The results from this can only be pimples. 

Luckily for my boys- I learned the trick before they needed it.
It’s simple: Warm water, Witch hazel, and Grape seed oil.

1 Simple rule- never use harsh soap on your face.

For Deep clean: OIL WASH! Yes, actually - oil wash! Works with amazing results. Oil cleans oil.
 Spread small amount of grape seed oil over entire face, Wet wash cloth with hottest  water possible and hold  over face for a few minutes; this opens pores and allows oils  to mix with the old excess oils and dirt on the face. Wipe away with warm wash cloth after. This wipes away old oil, and the mixture of excessive oil and dirt. This leaves nothing but hydrated, moisturized clean skin that is not over stripped.  This moisturizes, cleans away dirt, and keeps the skin’s natural oils intact. No stripping away of what you naturally need.

If break out occurs: rinse face with warm water, and pat dry with clean wash cloth. Use a clean cotton pad with a dab of witch hazel all over face. The witch hazel acts as astringent and pad removes dirt. Follow with tiny amount of grape seed oil in the dry patches if you have combination skin.
Occasionally, especially in the heat of summer my boys will have a break out – they are, after all, ages 15 & 17. Mostly the break outs occur in areas where sweat has accumulated around their glasses when outside- or on their forehead where hair hung down. With this method, pimples vanish quickly. The Witch hazel works, Pimples go away fast & easy. Effective for us.
Witch Hazel can be found easily in the medicines or first aid section at almost every pharmacy or grocery store. It is an astringent used for first aid on minor cuts, scrapes, or insect bites. It’s cheap, and natural…A must have for your bathroom shelf. (Also is fabulous for razor burn.)
For ease and convenience for my teens, I recycled/reused an old acne pads container, washed it out, placed in clean 100% cotton pads, and filled with witch hazel enough to dampen the pads. Now they can use whenever they need, and I know it’s natural.