Showing posts with label DIY. Show all posts

Friday, December 6, 2013

My DIY Favorite! My Mix Laundry Soap

DIY Favorite! My Mix Laundry Soap!


We all have our favorites- the ONE recipe or household tip that started the ball rolling for DIY enthusiasts!

This laundry mix was mine- the starter of it all!

 I always had trouble with Laundry soaps. Tide is a hives producer, for me, personally. I always fought the laundry soap blues between budget and quality constraints. When my youngest started getting the itchies from other brand soaps I used, my options kept getting narrowed down. When the options I did have just didn't clean, or seemed watered down, or left bad smells (like some hypo allergenic unscented soaps can)...

...well,  I got fed up! Grrrrrr!

And the search was on.  Thus began my love for DIY!

And oh how my budget can love some of my discoveries.
Hence,  My project for the day!  My Mix!!!!!!! Yay!!!!! 
I'm always Always happy with the results of this one- it has never let me down! I absolutely love it!

I wrote about it before- at this link: My Mix Laundry Soap
So I won't be explaining everything over again, however- I'll give you the recipe once more- :DYay!


My Mix Laundry Soap

1 box 20 Mule Team Borax (4lb+)
1 box Arm & Hammer Super Washing Soda (3lb+)
4 boxes Baking soda (1lb ea)
3 bars Zote soap (grated ahead of time)(14 0z ea)
3 Purex Crystals Laundry Enhancer (28 oz ea., or 2 -55 oz)
1 OxyClean  (3lb.)

step 1: grate the soap - like this:
(Note: A fine grate is best if you only use cold water. The Zote soap dissolves easily enough.)

Step 2: Mix it all into a large bucket! I use a recycled 5 gal. bucket from my hubby's pile in the garage. LOL  - I pour ingredient's into the bucket in layers or parts outside- because - well the powder can Poof! LOL and frankly I do not want Poof! in the house! ;) , Mix it all - well-  with large ladle or slotted spoon and then--- done! Yay!!!!!!!  It's as easy as that!

Step 3: Use it!   I recycle the OxyClean container and the scoop that comes with it. Fill it with my mixture and this sits on my washer for daily use. A large load to the 2 line on the OxyClean blue scoop is perfect!

Note: The remainder of the mix, I store in the garage (keep in a cool dry place, away from the children and label) , refilling as needed.

Also to note: because this is a low suds recipe- it is safe for HE washers, and does not leave a residue like some castile soap mixes can.
It lasts! About 6 months- or longer depending how often you do laundry. The cost is a whopping $35.  ---- (compared to the amount I paid before- averaging $20 a month, or more, on soaps- that's a previous cost of  $120 for 6 months of soaps- and I just paid less than $35 actually because I caught everything on sale. Savings $85. For me, this is a no brainer!)

Easy! Done! Enjoy!


You might Like the Links at:
Make Your Own Monday Link Up 12/16


If you can't find items at your local store- You might try:


Disclaimer: Affiliate Links in no way affect your end price, there is NO increase for you. But, they do help to support the cost of the blog. Thank you.

Thursday, December 5, 2013

Good Smells for the Home - Quick and Easy

Good Smells for the Home - Quick and Easy

Today I checked the orange tree in our backyard; pulled the most ripe citrus I could find. Better now than tomorrow, I figured. Because our local weather is predicting a Hard Frost warning tonight, 31 degrees F.
Snow is coming Friday and Saturday.
On my orange tree, I fear some of the top fruit I didn't get today could be bit; but there wasn't much time.
I might have to brave the ladder tomorrow and see what I can salvage.

Today, however, I was after the ripest sweet treats! Oranges are fantastic fruit for the cold weather- to ward off sniffles -and one of the best grab and go treats I can offer the family! 


Bringing in the oranges today sparked an old favorite whim- the smell of fresh orange and cinnamon! But I personally do not do well with commercial potpourri that is soaked in chemicals and heavy on perfumes. I prefer to go natural, and it is so easy to do! Also a huge money saver! Frugal Home Recipe ! Makes the whole house smell great!

Stovetop Potpourri
On the back of the stove, I cut up 2 oranges, and added water to fill the pan and 2+ cinnamon sticks- and set it to simmer. You can use ground cinnamon as well! The wonderful smell soon came from the kitchen! Inspiring! Inviting!  Wonderful! Yay! A Fall favorite anyone can do!
 It Took less than 2 minutes and I had simmering potpourri for the rest of the day! So easy!  Made the house smell fantastic! Loved it!
(Note: simmer the potpourri mixture, and check the water off and on all day, It will run out! Don't forget to check. Simply add more water if you need. Be sure to turn off if you leave, or head to bed!)

It can be done with any citrus! Oranges, Lemons, Limes!  And different spices! Anise, nutmeg, ginger, cloves, cinnamon! or Mint! Whatever combo strikes the inspiration in you! Even just the smell of simmering cinnamon can be a welcoming change! Try apples! Ahhhhh! Fantastic! Aromatic and romantic! and best yet- all natural.

Hope you might try it! But be careful! You might end up absolutely LOVING it!.


You might like the tips shared at:
Frugal Days Sustainable Ways #100


You might like these items:


( Disclaimer, the links above are affiliate links. Affiliate Links in no way affect your end price, there is no increase for you. But, they do help to support the cost of the blog. Thank you.)

Sunday, November 3, 2013

Returning to Home -

It was breezy and the small wind seemed to increase a bit, but nothing prepared us for the gust that came! Suddenly it gusted 3- - no 40 - no 50 mph! picking up dirt, debris, bits of tree branches flew by. The gust didn't end - it increased! dirt and sand in the eyes- we couldn't see the road any longer- so thick was the wall of dirt going by-  the umbrella for the table picked up and flew 10 feet into the pool, trying to grab it and save it and nearly fell in -then continued blast- trash and tree limbs flying across the parking lot... a dust devil the size of a small tornado picked up large tumble weeds and threw them into a whirl 200 feet up in the air... it kept going....until it was gone.
... just as suddenly as it started....
I saw this happen last month.

 An actual occurrence, that turns out to be a perfect analogy for our lives this last three months.

A whirlwind, a tornado of events, turmoil, upheaval, and then sudden calm.  Discovering how to survive a storm and still smile with little left.
I am not comfortable giving out whole details, but in short- we were buying a house, the seller backed out 5 days before escrow, everything fell through, and three months later- after multitude of events such as losing cars and jobs- we are finally back in a rental house.
It is now a week after our move and I am still going through boxes, and discovering where things might go and basically...settling down.

Whew.
I never intended to be away so long.

I learned a great many things during that time and I want to share it all with you, I just have to figure out how to word it all. I missed writing!
The three months covered the bulk of summer here. The hottest months- we did a great deal of swimming and walking.
Many hours got spent outside- and we enjoyed the BBQ many nights, rather than going out to eat fast food. I found out just how bad I could feel after nasty fast food. (McD's made me feel like I had poisoned myself into a sluggish grease pit, I wasn't alone! Everyone including the kids agreed!)
Oh, how I missed real food! I craved home cooking daily. We all craved it after just a week of not having it! The BBQ helped, but really  nothing compares to homemade lasagna fresh from the oven (our voted most missed food 2nd was baked chicken).

 I missed my All natural cleansers and safe cleansers. I used baking soda whenever I could but could not escape the motel cleansers etc.

In the heated outdoors, I discovered Lavender Essential Oil is fantastic for mosquito bites, and spider bites, and virtually eliminates all itching! It also deters ants and flies.

I discovered my small jar of coconut oil could become far more than cooking oil, it turned into my daily moisturizer, my hand lotion, and a soothing answer for sunburn!

I discovered my bottle of castile lavender soap could wash dishes, be a hand and body soap, and shampoo!

I discovered that even in trying times and adversity I still could not compromise my beliefs that natural is better than the convenience products sold on the shelves. All in all the experience was like a test for all of us- did our steps to go real food and more natural before really take hold? I'd have to say a resounding YES!!!!!

So happy to be back! So happy to be able to write it all again!

As I unbox and unravel from the past summer- I hope to start sharing everything again. Thanks to everyone for following and thank you for your patience!

-Janey
a truly Consistently Sporadic Writer


Friday, August 2, 2013

DIY Homemade Body Wash

DIY Homemade Body Wash


I am still using castile bar soap in the shower, but occasionally- especially during extra hot summer days-  I love to use body wash- and my favorite is peppermint body wash during the heat.

 In a recycled, or new squeeze bottle add:

2/3 cup Castile Soap (Dr. Bronner's Peppermint is my favorite in the summer for cooling relief;  Lavender is fantastic at night ; and Citrus is refreshing and great for energy and early mornings! But, any will work!)
1/3 cup Coconut milk (hydrating for skin)
2 tsp. glycerine
2 tsp. vitamin E oil (an antioxident that actually helps preserve the mixture)
additional Essential Oil for more scent, if desired. (5-10 drops of whatever you like- whatever compliments the mood!)

Shake well to mix.


Wet a washcloth, or loufa and squeeze a bit on- lather and enjoy!

Rinses off with ease, doesn't dry your skin out or leave you with icky film, is refreshing and wonderful and all natural!!!


Best Homemade Body Wash I have found yet!

Great for kids!  Perfect, if you choose Baby Mild Castile Soap for youngest ones! (Reduce amount of essential oils added extra for babies - you don't want to irritate their sensitive skin!)
All Natural and safe from toxins, and perfumes! Yay!

Note: Unless you know you will be using a lot, make small amounts at a time, store in cool place, will last a week or two.

I hope you enjoy!


You might also enjoy the links found in:

Make Your Own Monday 8/5

Homestead Barn Hop 122


You might find items here:


Disclaimer: Affiliate Links in no way affect your end price, there is no increase for you. But, they do help to support the cost of the blog. Thank you.

Tuesday, July 9, 2013

DIY (Fake Shout) Laundry Stain Remover


DIY (Fake Shout) Laundry Stain Remover 


1 cup water
1/2 cup hydrogen peroxide
1/2 cup washing soda

Combine all ingredients well and pour into empty hydrogen peroxide bottle.(Hydrogen Peroxide requires dark bottles as sunlight decreases it's effectiveness.) Cap with spray bottle lid.

Pre-treat laundry by spraying directly onto stain, 5 minutes before tossing clothing into load.
Very similar to Shout- without harsh chemicals or toxins.

Another Green Clean! Yay!

For delicate material, or brightest colors- test a small spot first  to ensure doesn't bleach out color.
Great for whites, kid's clothes, ring around the collar and grass stains.

Label clearly, store with your homemade laundry soap, and keep out of reach of children.
(Note: Washing soda is more caustic than baking soda, and thus not recommended to eat  Be sure to label clearly.  To make your own Washing Soda: DIY Laundry Soap and Washing Soda.)


You might like the links at:
Mondays Homestead Barn Hop #118

Make your Own Monday 7/8


You can find items here:


Disclaimer: Affiliate Links in no way affect your end price, there is no increase for you. But, they do help to support the cost of the blog. Thank you.

Monday, July 1, 2013

DIY Greasy Hand Cleanser

 DIY Greasy Hand Cleanser


Have a man in the house always working on something? Mine is...
He was a Diesel Mechanic for Railway for many years. I learned over that time there is nothing to use against Cosmoline (a railroad mama's nightmare!) However, the regular grime and grease out that can happen with cars and small engine's is another story. And yes,  I have an answer for those greasy grimey hands that can often need extra strong cleaning.

DIY Greasy Hand Cleanser

1/4 c salt
1/4 c baking soda
1/4 c sugar
3/4 c Dawn dish soap-The blue stuff - (+-)
10 drops Tea tree essential oil (for anti bacterial properties) Lemon works well too! Or both. 
1 tbsp bentonite clay (optional -if you really need extra power)

In a tub that's reusable, but not breakable- (I used a rubbermaid tub that holds at least 2 c liquid) 
sift together the dry ingredients until thoroughly mixed. Add dawn dish soap and mix until thoroughly incorporated. If too paste- like, you can add more dawn until it comes out creamier, but not too liquid. You want the scrub capabilities!
Have that guy scrub, and rinse with warm water.

Works well as gardener's mix too. Especially after a long day in the dirt! :)Yay!

Better smelling than the orange gunk they usually use in the shop- but very effective. Better for them too, but you don't have to tell them that.   ;)


Shared with, and you might like the links at:
Monday's Homestead Barn Hop #117

Frugal Days Sustainable Ways #79


You can try:


Disclaimer: Affiliate Links in no way affect your end price, there is no increase for you. But, they do help to support the cost of the blog. Thank you.

Thursday, May 23, 2013

3 DIY All Natural Deodorants - and why you might want to try them

3 DIY All Natural Deodorants

DIY All Natural Deodorant -Stick  

1 Tbsp. beeswax
2 Tbsp. coconut oil
1 Tbsp. shea butter or coconut butter
1 Tbsp. cornstarch or arrowroot powder
1 1/2 Tbsp. baking soda (aluminum free)
1 Tbsp. bentonite clay (I used Redmond)
1 /4 tsp. Vitamin E oil
10 drops tea tree essential oil
10 drops lavender essential oil
10 drops lemon essential oil

In a double boiler, melt beeswax and coconut oil first, then add shea butter (shea cannot tolerate high heat as well, and  needs to be melted last- do not boil just reach melt point and stop). Once melted, remove from heat and add cornstarch and baking soda and bentonite clay- Stir well to incorporate until smooth. Add essential oils and Vit. E oil last. I used lavender/lemon oil as it is my favorite scent, but you can change the essential oil to whatever you prefer. (A citrus fresh blend could include lemon and grapefruit oil, or lemon and orange.) Pour mixture into new or cleaned re-purposed deodorant stick. Let cool over night without the lid, 24 hours. Use as you normally would- thin layer, this actually requires less than commercial brands to be effective and thus lasts longer.
All natural  and chemical free!


- or -

DIY All Natural Deodorant - jar version.

5 tbsp. coconut oil
1/4 cup baking soda (aluminum free)
1/4 cup cornstarch or arrow root powder
1/4 tsp Vitamin E oil
lavender essential oil

In small bowl mix with spoon all ingredients except essential oil.  A small jelly jar works fantastic for this, or you can reuse any old cold cream jar  that's been cleaned and has a good lid.  Add essential oil last- 10 to 20 drops of your favorite scent will do. Lemon gives great fresh citrus scent. My favorite is lavender, but the choice is yours. Because this is mostly coconut oil, it can get liquid in heat, best to store in cool place. Take a small amount on finger and rub into arm pit area, soaks in quickly and works well!  
simple, easy, all natural  and chemical free!


- or -

DIY All Natural Deodorant - Spray bottle version.

1 small mister spray bottle
rubbing alcohol
tea tree essential oil
in bottle, fill with rubbing alcohol and add 10-20 drops of tea tree oil. shake well. Spray onto armpit area.
easiest version possible, and seems to be preferred by men, you can add any essential oils you'd like to create a scent preferred. the tea tree oil is an excellent start having antibiotic, anti fungal, anti viral and antibacterial properties.

:) 
I have tried all 3 versions personally. I am most pleased with the stick; but the jar version was wonderful. Simple and easy to make. I encourage anyone and everyone I know to try it. It's easy to get used to, easy to make, and  it works. You won't stink! Really!  You won't! :)


Why DIY deodorant? 


 Why would I, or anyone else, go to the trouble?

For me it is simple-Cancer causing Chemicals.  The statistics for women with breast cancer is constantly rising. I believe it stands right now at 1 in 5 women will be diagnosed with breast cancer in their lifetime. My mother, my mother-in-law, and a very close friend have survived it. My step mother did not and we lost her this last year. That is 4 women I know - I can count myself as 5. That means, in that group, 4/5 have dealt with breast cancer. Not great odds. That's not a possible hypothetical statistic that mildly sounds concerning- that's actual numbers.
Commercial deodorants often contain parabens, propylene glycol, cyclopentasiloxane, chemical fragrances, talc made with asbestiform fibers (asbestos), and aluminum. Many of these are attributed to causing cancer, or other neurotoxic effects. 
New research suggests that many of the breast cancer cases today began with the lymph nodes in the armpit area. It does not take a brilliant mind to figure out that putting cancer causing agents in the armpit area in order to deodorize and smell pretty- might actually be contributing to the rise in breast cancer over the last number of  years. I am not saying they are the sole cause- but certainly they cannot be helping at all.
I personally do not see the reason to take the chance; not when I know I can naturally create an alternate that is safe to use and actually works!

If you are uncertain - don't take my word for it-  research this for yourself- PLEASE!!!   A fantastic resource for checking the ingredients in the beauty products you use is: Environmental Working Group Skin deep database

This is why I make my own deodorant- happily. I hope more and more women out there start to as well. All natural, effective and actually really easy to make.


You can find the ingredients at this site:

 
Mountain Rose Herbs. A Herbs, Health & Harmony Com 
 
 
you might also like the recipes and links at: 
 
Nourishing Treasures Make your own! Monday link up 

Wednesday, May 22, 2013

DIY (Fake Comet) Cleaner

"Honey! Where's the comet?!"

My Hubby had to do some clean up last night... I handed him my DIY cleaner - fake comet version- he glanced and didn't say a word. The look was enough- a kind of  'well, if I have to'...a glare that says it all. I left with a grin. :D...no worries!

He later told me it worked fine! By his standards, that's a huge compliment. I knew it would- I'd already used it for a while! But for him- it was new. LOL
It's simple to make-

DIY (Fake Comet) Cleaner

I reused/re-purposed a shaker  bottle and added to it
1 part baking soda
1 part borax
1 part salt
1 part washing soda

and I shook it to mix.
Sprinkle it on what you have to scrub just like you do comet. Take a damp sponge or scrubber, and watch the stains go away. Rinse well.
 Works wonders on the tub and toilet! Love it! Whitens, brightens, grime is gone, cuts grease and residue, without bleach alternatives and extra chemicals.
 No noxious smell. The baking soda naturally deodorizes, borax and washing soda cut grease and residues and whitens, and the salt acts as abrasive- it's a win win.
 That's it. Done. Can't get much simpler. DIY. Effective. Frugal. Green cleaning. No noxious smells. Just clean.
Yay! 


This post is also shared in: (And You might also like what you find on:)

Homestead Barn Hop #114 

Frugal Days Sustainable Ways #73


http://www.yourthrivingfamily.com/


You might try:


Disclaimer: Affiliate Links in no way affect your end price, there is no increase for you. But, they do help to support the cost of the blog. Thank you.

Monday, May 6, 2013

DIY Homemade Dish Soap

DIY Homemade Dish Soap


Dish soap is so cheap, and so easy to grab, and just too easy...why would I replace dish soap?

Many reasons, actually.
It touches your skin- one of your most important organs on your body.
It touches the dishes you cook and eat off of.
It goes down the drain and flows back through the system, eventually retouching the earth we come from and live off of.
All Three very good reasons to consider using a product with far less toxic chemicals in it. Think green.
Green cleaning is so easy, it is even cost effective if your are on a tight budget.  It is also so much better for your family in the long run!

To make Homemade Dish Soap

you need a mixing bowl, a small sauce pan to boil water in, a grater and a whisk.
2 cups water
1 tbsp. borax
1 tbsp. grated Castile soap bar. (I use Kirk's Castile Original, but any Castile bar will work. Dr. Bronner's Citrus is excellent!) 
Essential oils (lemon is my favorite- but you can also use tea tree oil for antibacterial, or any combination you prefer! Lemon and Lavender is wonderful! So is orange and lemon for a bright energetic citrus smell of fresh and clean!)

Boil the 2 cups of water in sauce pan.
In bowl combine both the borax and grated bar soap
pour boiling water over the soap mixture and whisk until the soap dissolves.
Now let it rest. As it cools it will gel up.
Let it completely cool for a couple hours. 4-6 actually depending on your house's temp.
Add essential oils, if you choose to,  at the very last step.
Pour into recycled/ reused dish soap bottle and use as you normally would for dishes.


Note: This is not intended for dishwashers-just in the sink dish-washing.


Friday, April 26, 2013

DIY Homemade Body Spray

     :) Summer is here in Southern California!!!!!! We can feel it!!!!!

On warmer days it's nice to be able to use a refreshing body spray, but I personally want to avoid the extra perfume chemicals that so often over power them. The older I get, the more I have started to notice certain perfumes overwhelm my sense of smell. I prefer a light and natural scent that essential oils give off. Their aromatherapy is beneficial health wise, and provides a natural alternative everyone can enjoy with out chemical dangers.  

An Easy to make DIY Body Spray

In a mist bottle combine:
8oz. distilled water
1 tbsp. witch hazel
20-30 drops essential oil
Mix and shake well before each use.

The combinations of essential oils are endless: for energetic and bright try sweet orange oil with lemon oil, or grapefruit and lime for citrus zing! For calm and relaxed moods you might like just lavender essential oil;  or for calm focus, lavender and lemon essential oil.  Personally my favorite is lavender and vanilla essential oils. For holidays you might like cinnamon and orange scents.  The possibilities are endless! You cannot go wrong.


Shared with and you might enjoy the links at:
Make Your Own Mondays 7/1


You can find wonderful essential oils at:

Bulk organic herbs, spices and essential oils. Sin


You might also like:
The Holistic Mama Organic Skin CareSkin Care eBookThe Holistic Mama Organic Skin Care


You might find items here:


Disclaimer: Affiliate Links in no way affect your end price, there is no increase for you. But, they do help to support the cost of the blog. Thank you.

DIY Homemade Body Butter

Back in January I ran out of my body butter, and being in mid winter season- that was a bad thing to have happen. For me, winter dry skin is a definite challenge. Being compared to an alligator is not my idea of sexy- LOL. I need serious help, and I found an answer that's easy and natural. Love it.

DIY Homemade Body Butter
4 oz. Coconut oil
2 oz. Sweet Almond oil
2 oz. Grape seed oil
8 oz. Shea butter
10-20 drops essential oil

In a double boiler, melt shea butter, coconut oil and almond oil  and grape seed oil together. Shea butter takes the longest to melt, stir to help it along. Remove from heat and pour into a medium sized mixing bowl. place in the refrigerator for about 1-2 hours until it chills and hardens. Once it's hard white, whip on med. speed in a mixer for at least 5-7 minutes. At first this is tough, because the mixture is cold, but it breaks up quick and begins to whip. The trick is to mix for a minimum of 5 minutes, any shorter time length and the mixture will not emulsify and combine properly (causing it to separate later). After about 5 minutes you will start to see peaks form and it takes on a whipped cream kind of look. Add essential oils and whip some more until incorporated. (For first batch I added lavender essential oil. But if you love the smell of shea butter you can just leave it be- for a tropical coconut shea smell that's already there.)
 You're done!
 Place into a jar you can lid, and set on shelf. It will harden more in the jar.I recycled my old jar of coconut oil for it- worked perfect!
To use, the golden rule is to realize a little bit goes a long way! Use Too much and it can be interpreted as a greasy mess. Start with just a dime sized portion and spread as far as you can before grabbing more. I have found it is wonderful to keep legs smooth!  This body butter soaks in to the skin in just a matter of a minute and is wonderful! It leaves a light scent, and the alligator dry is gone. I use it right after the shower and since I have started I do not have to re apply lotion later in the day.
This is all natural, and will last on the shelf (if kept in a cool room) for a few months. If you are uncertain about the amount- mix a half batch and give it a try. Contains none of the chemicals of store bought brands, moisturizes and hydrates your skin naturally.


You might also like:
The Holistic Mama Organic Skin CareSkin Care eBook


You might find items here:


Disclaimer: Affiliate Links in no way affect your end price, there is no increase for you. But, they do help to support the cost of the blog. Thank you.

Wednesday, April 24, 2013

DIY Homemade Lipbalm

Homemade Honey Lip balm


2tbsp. coconut oil
1 tbsp. sweet almond oil
3 tbsp. raw honey
2 tbsp. beeswax

In small saucepan over lowest heat, on or in double boiler, melt beeswax and oil. add honey. stir constantly until incorporated. This actually takes about 5 minutes for it to reach temp where everything comes together.
Pour with a spoon into lip balm containers. Cool completely (about 4-5 hours) before capping.

Store in cool area; it  is a softer balm.  Use as you would normally for dry chapped lips, works wonderful to moisturize and protect and tastes great! If exposed to heat (I live in area that gets 100+F in summer)-just place it in the fridge for a bit- solids right back up.

Be Very careful to not spill when pouring- will burn you! I just used old spoon and carefully went one by one. I refilled 4 old recycled and cleaned out lip balm tubes, and 4 small metal round lip balm containers with this recipe.


 You might love the links on this site as well:

Make Your Own Monday 6/3


You might find items here:


Disclaimer: Affiliate Links in no way affect your end price, there is no increase for you. But, they do help to support the cost of the blog. Thank you.

Monday, April 8, 2013

Washing your face- for Pimples and alternate to harsh soaps


Washing your face…

For pimples & an alternate to soaps 

If I knew then- what I know now… so many things would have changed. I was a teenager in the 80’s- the big hair, the big makeup, the 80’s music, the style. I still have fond memories of most of it- but one thing I wish I could have changed that would have made life so easy back then, was how I dealt with pimples. Uhhhhh… I washed with so many things- Noxema, Clearasil, Sea breeze, Acne soap! It only got worse.

 I just didn’t understand the simple rule. I get it now- less is more
The harsher the chemicals you use on your face, the more of the natural oils you strip away that your skin needs to maintain health. When over stripped, your skin reacts by over compensating- and excessive oil is the result. Thus, far more oil is available to clog pores, get dirty, or get infected. The results from this can only be pimples. 

Luckily for my boys- I learned the trick before they needed it.
It’s simple: Warm water, Witch hazel, and Grape seed oil.

1 Simple rule- never use harsh soap on your face.

For Deep clean: OIL WASH! Yes, actually - oil wash! Works with amazing results. Oil cleans oil.
 Spread small amount of grape seed oil over entire face, Wet wash cloth with hottest  water possible and hold  over face for a few minutes; this opens pores and allows oils  to mix with the old excess oils and dirt on the face. Wipe away with warm wash cloth after. This wipes away old oil, and the mixture of excessive oil and dirt. This leaves nothing but hydrated, moisturized clean skin that is not over stripped.  This moisturizes, cleans away dirt, and keeps the skin’s natural oils intact. No stripping away of what you naturally need.

If break out occurs: rinse face with warm water, and pat dry with clean wash cloth. Use a clean cotton pad with a dab of witch hazel all over face. The witch hazel acts as astringent and pad removes dirt. Follow with tiny amount of grape seed oil in the dry patches if you have combination skin.
Occasionally, especially in the heat of summer my boys will have a break out – they are, after all, ages 15 & 17. Mostly the break outs occur in areas where sweat has accumulated around their glasses when outside- or on their forehead where hair hung down. With this method, pimples vanish quickly. The Witch hazel works, Pimples go away fast & easy. Effective for us.
Witch Hazel can be found easily in the medicines or first aid section at almost every pharmacy or grocery store. It is an astringent used for first aid on minor cuts, scrapes, or insect bites. It’s cheap, and natural…A must have for your bathroom shelf. (Also is fabulous for razor burn.)
For ease and convenience for my teens, I recycled/reused an old acne pads container, washed it out, placed in clean 100% cotton pads, and filled with witch hazel enough to dampen the pads. Now they can use whenever they need, and I know it’s natural. 

Monday's "Find the House" Routine

"Find the House" 

... it's Monday. Even for me, this is a MONDAY!

After a weekend of everyone home, friends over, BBQ's, game time- what ever has occured... Monday is the time for me to "find the house". I try to take the weekends off too!  Doesn't work 100% of the time, but my normal cleaning routines are definitely disrupted! There's just something about getting the week started that can be a chore even for a SAHM like me. I am not certain about everyone, but the weekends are break time. Enjoying the family or friends and movies, outdoors, games, BBQ's, gardening,etc. Anything but cleaning the house!
And no matter what the reason- Mondays always seem to come back around. Haha!

Mondays, for my schedule, are usually filled with just trying to find my house after Hubby and the teens have relaxed all weekend too!

I used to be overwhelmed by it, until I discovered small baby steps go a long way.  Some of the simplist steps can make Monday a joy rather than a chore! My goal, as I say to my husband, is to "find the house" on Monday- not make it perfect pristine! Some may argue with me- but I consider it a step in the week- not a mountain to climb in one stretch! With Homeschooling my two boys, blogging, and writing; Baby steps are manageable and feel good at the end of each day.  They actually allow me to smile, rather than have a grudge against the day. So much nicer!  And the best part is having the smile when everyone else is a grump. They think I'm weird, but what's new. I can relax feeling accomplished tonight, and sleep well.
So, my baby steps are the a SD system I discovered by accident- I am a list maker, and when I'd write my liwt of things I wanted done in the day- I noticed quick I titled everything by S's or D's. LOL Just me- but here's how it kind of breaks down:

SD-DS,  break, SD- DS, break SD-DS!   Yay! 
What in the world does that mean? Okay:
__________
1. SD=Sheets/Dirty: This is laundry. In a nutshell. I start my day, everyday, by making the beds. On Monday mornings that means the full bed, I pull the sheets and pillowcases etc and get them to the laundry pile. Dirty: I have a dirty laundry basket in each bathroom that my boys and DH know to use- so I am never searching for dirty laundry. My simple house rule is: If it's not in the basket, it doesn't get washed. (They know full and well- there are no exceptions. It really Didn't take them long to figure that one out instead of arguing. If they didn't make it in time, they had to wash it themselves.) The major exception to this is the simple fact I have teens now, not little ones. When they were small I'd make a point of showing them, "Look dirty clothes go in the laundry basket". As they grew older and I'd slowly find less and less on the floor- they showed me when they were ready for it to be a golden rule by their actions of maturity. It worked, and it's been our rule for many years.
Sorry! Got sidetracked - so our beds are made, sheets and dirty laundry collected now-the key of "D" - dirty is start the laundry- I always have a load going before I sit down for coffee.

I hate nothing more than loads and loads of laundry piling up becoming a monster chore- this knocks the feet right out from under the potential monster chore and just get's it started. The hardest part of any chore is the start!

DS= Dump/Swipe: This is Trash and Bathrooms. DUMP: that's easy - all Trash- I gather all bags lining my trash cans in the entire house and take them all the way out to the trash. Easy, done, and gone! no questions- gone- outta here!  Hint: I keep an extra bag in the bottom of each can to replace the taken one- it's easy and right where I need it.   
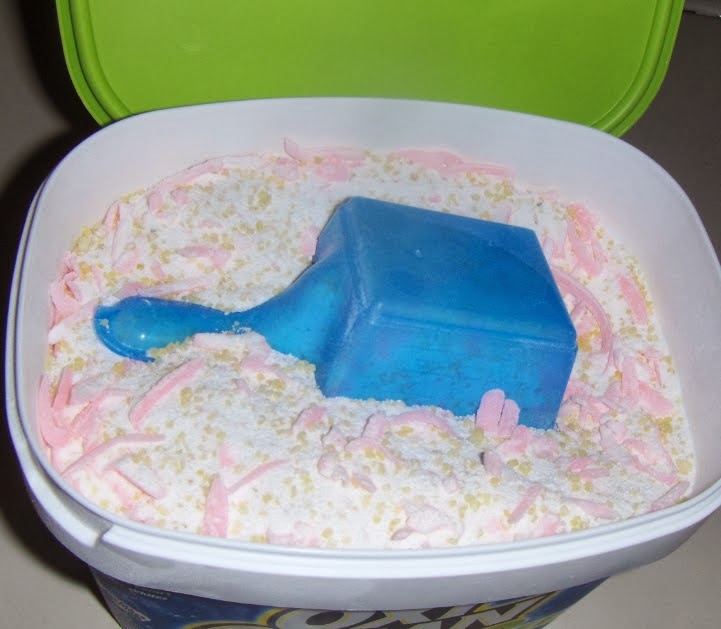
Swipe:  I walk in the bathroom, pour small amount of baking soda into sink and toilet and grab the toilet brush and swipe it clean. Then I take my scrub sponge (always have one under the sink) and swipe the sink clean. (Hint! A Mr. Clean magic eraser works wonders here!)  After rinsing, I swipe down the counter and check for any major disasters to swipe. Usually it's not too bad.  (Remember- Monday is "Find the House Day - my goal is to get it to a manageable spot- heavy cleaning happens in spurts during the rest of the week.)

NOW I take a break! House already is starting to come together! Coffee or glass of lemon water!
Before I start back in I run to the laundry, start next load, and get the dryer going.

2. SD=Soak/ Dishes: Whether you have a dishwasher, or do them by hand- this means Dishes. Stack and swish (rinse them) and get them in the dishwasher and turn it on; or stack, soak and wash those dishes to drying. Nothing feels better to a Mom who needs to be in control of her house than a clean and shining sink! If you really think about it- it does not take that long to do, it is usually more of a grudge chore if they have sat too long and piled up. Get it done. Drain the sink. I always pour a dab of baking soda in the bottom, and as an added bonus, I drop a few drops of lemon juice on it to paste up and I swipe the sink shiny- smells fantastic as I'm doing it and benefits the drain as well- no lingering smells.

DS=Dust/ Sweep (or Swiffer). Let's get up the sneezes! Grab your swiffer, or your cloth and polish, and Dust the important areas! Living room, tables , desks, entertainment center, whatever- just dust! get it gone! That's all you are doing right this minute- just dust!
 Sweep= All floors in whole house that are hard - linoleum, tile, wood- usually entry, kitchen and bathrooms.  Whether I sweep or swiffer -I judge this by the day- if it's been an outdoor weekend and a lot of yard got trudged into my house- like dirt, mud, lawn, grass- I sweep AND swiffer.  I have a lot of hard wood floors in my house and I can see a film easily if the dust dirt has accumulated- I do both. Either way- the floor looks better after this! :) Yay!


NOW I take a break! The House REALLY is starting to come together! And starting to Shine! Hmmmm smell... YAY! Almost there! And it's still morning!
Before I start back in I run to the laundry, start next load and get the dryer going.

3. SD= Square up! This, simply, is Finshing the laundry. S=Square up means folding - pulling from the dryer and folding. square corners, and with this I never ever put clean laundry back into dirty hamper- I take it straight to the room it belongs to- the boys clothes gets stacked at the foot of their beds for them to put away. I put away my own in my room of course- but everyone's clean squared up laundry is in the right room and looks good. Squared away- under control. And D= Dinner- What's for dinner tonight? If you menu plan, take time to look at what you have and design the list for the week. If you don't , decide at least what's for tonight and either pull it to thaw if frozen, or start what needs to happen if it's a slow cook meal. Like, for example: Stick a roast in the slow cooker- and get it going. (I love slow cooker meals on a Monday! Awesome set and forget it for a while slow cooker meals are wonderful on the one day of the week that might feel more hectic or crazy- they usually end up being a comfort food meal everyone enjoys!)

 DS=Dents/ Smell:   Dents or  i.e. Vacuum marks. My son noticed them when he was little, and I had to agree. Early on when my boys were little I cleaned the church we went to. My son pointed out one day, "When you see the dents you know it's clean!" and I had to agree. I vacuum purposely backwards in each room, always ending at the door, just because of this now. I want to see the "dents". I want my family, or visitors, to walk in to the fresh room and realize no one has walked in since it was cleaned. It's a nice thing ...subtle, but true.   
Smell- This is a joy, smell. Your house will already smell better by now- no trash, no old dishes, no teenage dirty socks, etc. But if there is anything remaining- for example- the cat box, do it now. Smells be gone! LOL Whatever they are! Finish off with lighting a candle, or getting your aromatherapy diffuser going, or set some cinnamon and orange peels in a pot on the stove to simmer- create the smell, and enjoy-


4. YAY! You "found your house!" Smile! :)
       Smile :D     -Done :)  Yay!

This may not seem like a "frugal" routine, but once you get the hang of it it is a wonderful time saver for the week- getting a grip on the house, and finding what is manageable for you, allows you to schedule more and not have monster grudge pileups of laundry or dishes that make it harder for you later. 
Hope this helps!