Monday, December 30, 2013

Apple-Pumpkin Spice Cake

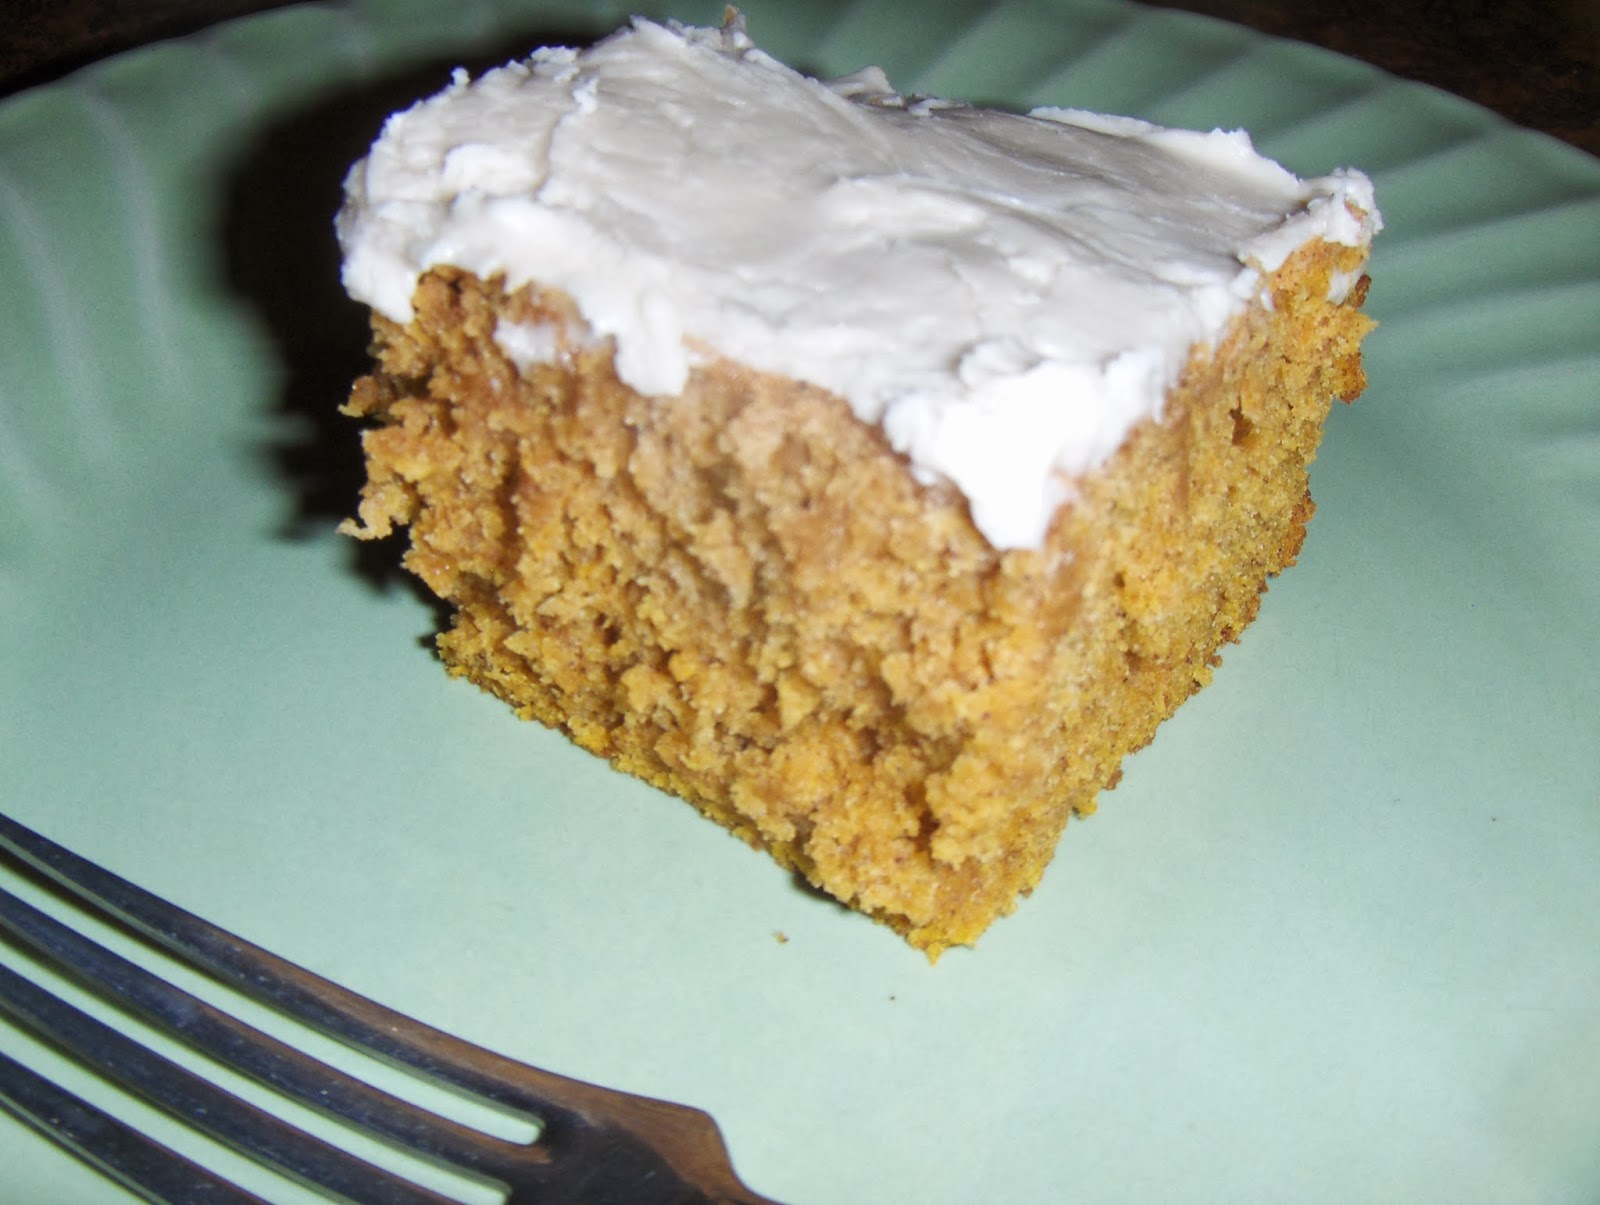
Apple Pumpkin Spice Cake


You need:

1/2 c real butter melted (or shortening like olive oil)
2 eggs
1 1/2c brown sugar**
2 tsp vanilla extract
1 c applesauce or applebutter ( I used my homemade applebutter)
1 c pumpkin puree
1 tbsp cinnamon (or 1 tsp cinnamon & 2 tsp pumpkin pie spice)
2 1/2 c flour (all purpose, or whole wheat works great)
3 tsp baking powder
1 tsp real salt

In mixing bowl cream butter and sugar together, add eggs and beat until smooth. Add vanilla, pumpkin and applesauce. Mix well.
Add flour, salt and baking powder.


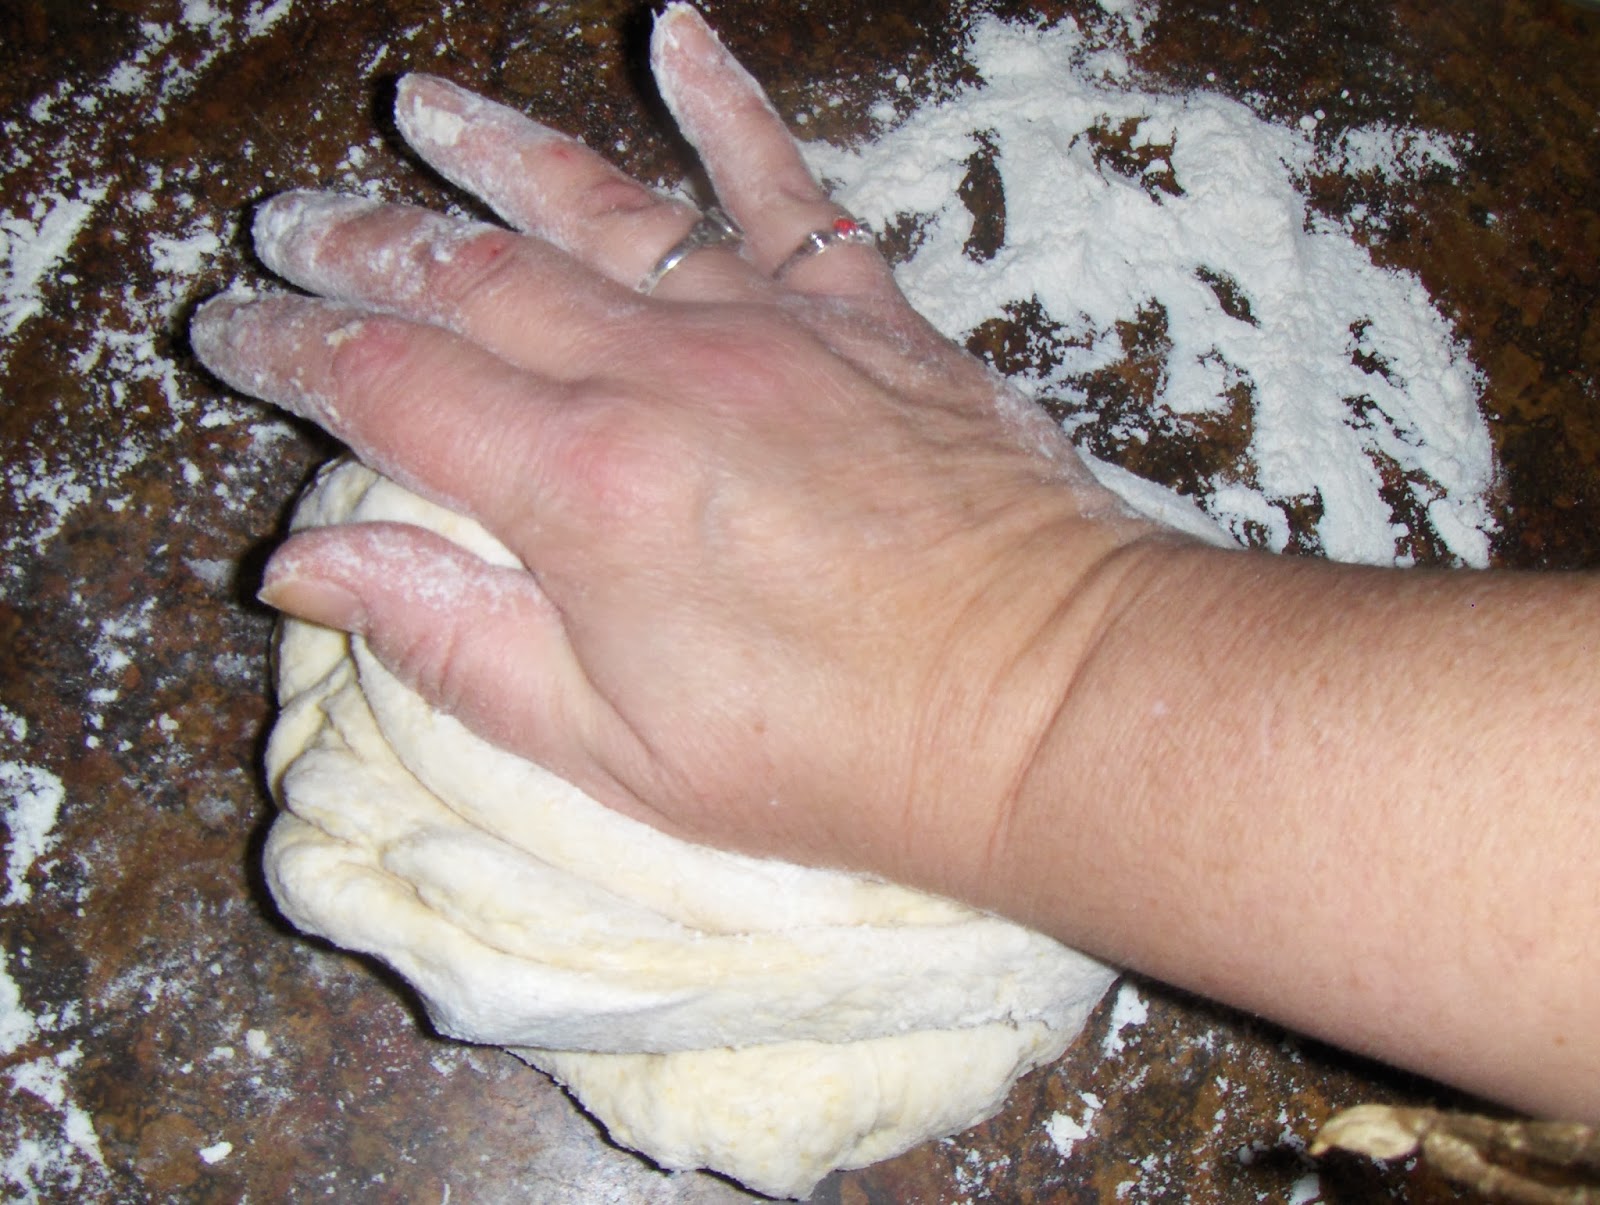
Mix until all smooth and no lumps- will be very thick.


Pour into greased 13x9 pan and bake 30 minutes at 350F degrees, or until butter knife inserted in middle comes out clean.


 Top with cream cheese frosting, basic butter cream frosting, just sprinkle with powdered sugar, or do nothing! It's delicious on it's own! .
Enjoy! :)

** If you are avoiding brown sugar then substitute   1 c honey or half honey/ half molasses?

This recipe is easy to make, and fairly inexpensive. A family favorite, and frugal on my budget. Which I love!
This is quick becoming one of our favorite cakes! Turns out moist and flavorful, a great for taking with you to family gatherings or parties!  Thumbs up from every family member! Kid tested, Kid approved! Yay!


You might like the links and recipes found at:
Frugal Days Sustainable Ways #101

Real Food Wednesday 1-1-2014

Monday's Homestead Barn Hop #141


If you cannot find ingredients you might try:

Disclaimer: These are affiliate links, which do not raise your end cost; but, do help support this blog. Thank you

Sunday, December 29, 2013

Rockin the Quinoa!

 Rockin' the Quinoa!


Easy to Make Quinoa

1 tbsp olive oil
1/2 tsp real salt 
1/2 tsp pepper
1 clove garlic minced
1/2 c sliced mushrooms
1 c Quinoa (rinsed)
1/2 c chicken broth
2 c warm water

Lightly brown mushrooms and garlic in olive oil over med heat in sauce pan.  You want the garlic to start turning tender.
Stir in 1 cup rinsed quinoa and lightly fry in pan making sure to get all quinoa coated with oil. Keep over med heat for a minute.

Add 1/2 c chicken broth and bring to boil. Stir frequently until all liquid runs dry- takes about 4-5 minutes. Add 1/2 tsp salt & 1/2 tsp pepper, and 2 cups water.

Bring to boil then cover, reduce heat to simmer, and simmer for 20 minutes. Remove from heat, and let set final 5 minutes, fluff and serve.
(1 c raw quinoa makes about 3 cups cooked.)  Quinoa is delicious!


I was intimidated by Quinoa for a long time! Never having tried it or been exposed to it, personally. But Quinoa is a super food! Considered a complete protein source, quinoa is also high in magnesium,  iron, and fiber. It's a seed- not a grain. And after hearing about it in the majority of real food blogs I read, I knew I could not avoid it forever!
My sister is actually the reason I tried it- and now love it! She gave me the push and I am very grateful! There are dozens of different ways to make it- this is just my initial love recipe. I will be trying more and posting as I can. It actually is as easy to make as traditional rice- but less starchy and has almost a light nutty flavor.  Fluffy! I don't know what I was so afraid of! I regret not having tried it earlier!
The taste will be fantastic with fresh vegetables! I can't wait to try it with peas, broccoli, asparagus, green onions, etc!
Tonight we had it with baked chicken breast. Very very good!


You might love the links found in:
Real Food Wednesday 1/1/2014


You can find Quinoa at Trader Joes, or your Local Health Food store, and  at Whole Foods.

Or you can order it here:


Disclaimer: Affiliate Links in no way affect your end price, there is no increase for you. But, they do help to support the cost of the blog. Thank you.

Friday, December 27, 2013

Peanut Butter Cookies

Family Favorite Peanut Butter Cookies


 In a large mixing bowl add:

1 c peanut butter (Creamy or crunchy- depends on your taste preference!:)
1 c brown sugar
1 c sugar
2 eggs
1 c real butter (2 sticks)
2 tsp vanilla extract

Cream together in bowl until sugar dissolves.

Add to bowl:
3 c flour
1 tsp baking powder
2 tsp baking soda
1/2 tsp real salt

Mix all together well. Set bowl in refrigerator for 1 hour until dough firms. Take spoonful batter and roll into 1" balls. Place on ungreased cookie sheet. Use a fork to create hatch-marks on each and slightly flatten top on cookie dough roll.
Bake at 375F degrees for 8-10 minutes.
Enjoy!

This recipe is extremely easy to follow and very good for beginning learners! Kids love helping to roll and smoosh down the dough balls- the refrigerated batter makes for easy clean up, and easy to work with dough. Kid friendly and certainly kid approved. Makes approximately 5 dozen.
Bring smiles! Enjoy together!


You might find supplies you need:

Disclaimer: The above links are Affiliate Links. This, however, does not affect your end price; but does help to pay the cost of the blog. Thank you!.

Sunday, December 15, 2013

Easiest Holiday Fudge

Easiest Holiday Fudge 


You need:

1 1/2 c semi sweet chocolate chips
1 1/2 c milk chocolate chips
1 can (14 oz.) sweetened condensed milk (not evaporated)
1 1/2 c chopped walnuts
2 tsp vanilla

 Line a 8 inch square pan with wax paper, or foil.  In a double boiler, melt chocolate chips, add milk and stir constantly until incorporated. Remove from heat.  Stir in vanilla and walnuts. While still hot, pour immediately into lined pan.  Place into refrigerator for at least 2 hours to completely cool and set recipe. You might have to go longer.  When firm, remove from wax paper or foil, and cut into 8 rows by 8 rows for 1" pieces.

Variations to this recipe can be any 1 1/2 c chopped nuts you prefer (ex: almonds, pistachios, hazelnuts, or cashews). Or you can make this very festive by using crushing up candy canes instead of nuts.


I have found this recipe, if I watch sales and use coupons during holiday season, is very cheap and easy to make! Chocolate chips are frequently on sale! This makes  this fudge, for me, a perfect addition to holiday gift plates! It actually is Frugal, in that the recipe is so inexpensive, and the candy so rich, it goes a long way- it makes for a fantastic gift without high cost! Allowing me to share the season without a huge cut in my budget. :)

Saturday, December 14, 2013

Once a Month Alarm Brownies

Once A Month Alarm Brownies


I didn't know what to call these. My hubby said "Death by Chocolate Brownies".
I wanted "3 Alarm Brownies", or "Milk Alarm Brownies" (so rich, you run for the milk!)

Basically these are THE brownies to make when that chocolate craving is just beyond what you can handle. Want to solve the serious sweet tooth ? Really solve that once a month need for chocolate before the lack there of sets you off kilter and in a "mood"? (haha!)
This is it. For serious chocolate lovers, like me. I'm not even going to try to doll up the pictures- because this is serious- serious biz here folks! :)


Once a Month Alarm Brownies

Pre heat oven to 350F degrees. Spray/ or grease a 8" square baking pan.

Brownies:
1/2 c softened real butter
2 eggs
1 c sugar
2 tsp vanilla
1/3 c unsweetened cocoa powder
1/2 c flour
1/4 tsp baking powder
1/4 tsp real salt
1/2 c chopped walnuts (** Optional)

Frosting
4 tbsp softened real butter
1 tsp vanilla
2 tbsp unsweetened cocoa powder
2 tbsp honey
1 cup powdered sugar
1 tbsp milk

In a bowl,add 1/2 c softened butter, eggs and sugar. Mix on low speed until sugar dissolves. Add cocoa and vanilla. Add flour, baking powder and salt and mix on medium speed until smooth. **Add chopped walnuts and mix once more until well blended.  Will be thick.
Pour into prepped pan and bake in center of the oven for 25 -30 min. (until a butter knife inserted comes out clean.
In a bowl, mix  butter, powdered sugar, honey, milk, vanilla and  cocoa powder. Mix on low until powder dampens and then high speed until fluffed and smooth like frosting. Spread over brownies while they are still hot from oven. Let it melt across - and drizzle in.....ahhhhhhh enjoy warm with a glass of milk and dissolve away all sweet tooth or chocolate craving you have in a matter of seconds!
As i said- I'm not dolling up the pictures- these brownies speak for themselves. Make no mistake- these are for serious chocolate lovers!


You may like the links shared at:

Mondays Homestead Barn Hop #140


Thursday, December 12, 2013

Best Homemade Pizza Dough

Best Homemade Pizza Dough

(Dough for 2 reg. pizzas, or 4 mini personal pizzas)

 This particular recipe is delicious! For our family, the recipe has brought fun and joy into family food nights- everyone can participate. I usually have all the ingredients already on the shelf, and we save so much money! This feeds everyone with some left over for lunch next day (or midnight gamer's snacks), and the best part is each person gets to choose what goes on- fitting the moods, lightening hearts,  and bringing the family together for more than just a sit at the table- this gives us time. I hope it brings smiles to your family as well!

Homemade Pizza Dough

Start with large bowl & add:
3 tsp yeast
1 tsp sugar
1 1/3 c warm water

dissolve yeast and sugar in warm water in large bowl and allow to proof for 5 minutes. (will foam up)

add to yeast mixture:
3 tbsp olive oil
3 tbsp corn meal
1 tsp real salt
3 c all purpose flour or whole wheat flour

mix all together and knead dough until smooth. roll into ball, lightly oil the outside with olive oil and allow to rise until double- about 45 minutes


I always use the same bowl I just mixed it in- cuts down on dishes, but doesn't make for pretty pictures! Haha! Once doubled, you are ready to make pizzas! Yay! 

Cut dough in half **- this dough makes 2 pizzas. Roll out each half on lightly floured surface to desired size and thickness. Thin crust, thick crust- it all depends on what you roll it to! We like ours thin to regular.  Place on pizza pan, warmed pizza stone, or cookie sheet lightly dusted with cornmeal.  Bake in oven for 7 minutes at 450 F degrees. Remove from oven, Top with sauce, toppings of your choice an cheese. return to oven - Bake at 450F degrees for 9-10 minutes. (Sorry Sorry! I forgot to take a picture of rolling it out! I'll add it next time!) Here they are at prebake.


Have fun with the toppings! Have the kids help grate the cheese, and choose their own toppings. (For cheese lovers, you can roll pieces of string cheese into the crust edges and create a stuffed crust the kid's will love! -Do this at the first stage). Kids love rolling out the dough.** This is enough dough, you can further divide dough for four mini pizzas if everyone wants their own personal mini pizza!  Enjoy!


you might like the recipes and ideas on:
Frugal Days Sustainable Ways #100

Make Your Own Monday 12/16


you might enjoy:


Disclaimer: Affiliate Links in no way affect your end price, there is no increase for you. But, they do help to support the cost of the blog. Thank you.


Saturday, December 7, 2013

Chili Dogs- No Bean Chili

Homemade Chili Dogs- No Bean Chili 


Start with:
1 lb ground beef - lean
1/2 lb ground pork - lean (not sausage)
fry completely, drain of grease, and mince as small as possible-
I have even put mine through the food processor.

 in a separate bowl whisk until smooth and dissolved:
6 cups warm water
1/4 c cornstarch
1/2 c flour

add to water mixture and whisk until smooth:
2 tbsp tomato paste
1 tbsp white vinegar
3 tbsp chili powder
1/2 tsp real salt
1 tsp ground cumin
1/4 tsp black pepper
1/2 tsp garlic powder
2 tbsp dried onion flakes

Add this mixture to the meat and  mix together.  Over med heat - bring to a boil stirring constantly so it does not burn. Once it comes to a boil reduce to smallest simmer setting and cover with lid. Simmer 1 hour, stirring occasionally.

Serve with hotdogs, or over french fries, or even over nachos and extra grated  cheddar cheese. Delicious!!!!!!
Yummmmmm!!!!!!!!!


You might like the links shared at:
Frugal Days Sustainable Ways #100

Mondays Homestead Barn Hop #140


You might like to try:


Disclaimer: Affiliate Links in no way affect your end price, there is no increase for you. But, they do help to support the cost of the blog. Thank you.

Friday, December 6, 2013

My DIY Favorite! My Mix Laundry Soap

DIY Favorite! My Mix Laundry Soap!


We all have our favorites- the ONE recipe or household tip that started the ball rolling for DIY enthusiasts!

This laundry mix was mine- the starter of it all!

 I always had trouble with Laundry soaps. Tide is a hives producer, for me, personally. I always fought the laundry soap blues between budget and quality constraints. When my youngest started getting the itchies from other brand soaps I used, my options kept getting narrowed down. When the options I did have just didn't clean, or seemed watered down, or left bad smells (like some hypo allergenic unscented soaps can)...

...well,  I got fed up! Grrrrrr!

And the search was on.  Thus began my love for DIY!

And oh how my budget can love some of my discoveries.
Hence,  My project for the day!  My Mix!!!!!!! Yay!!!!! 
I'm always Always happy with the results of this one- it has never let me down! I absolutely love it!

I wrote about it before- at this link: My Mix Laundry Soap
So I won't be explaining everything over again, however- I'll give you the recipe once more- :DYay!


My Mix Laundry Soap

1 box 20 Mule Team Borax (4lb+)
1 box Arm & Hammer Super Washing Soda (3lb+)
4 boxes Baking soda (1lb ea)
3 bars Zote soap (grated ahead of time)(14 0z ea)
3 Purex Crystals Laundry Enhancer (28 oz ea., or 2 -55 oz)
1 OxyClean  (3lb.)

step 1: grate the soap - like this:
(Note: A fine grate is best if you only use cold water. The Zote soap dissolves easily enough.)

Step 2: Mix it all into a large bucket! I use a recycled 5 gal. bucket from my hubby's pile in the garage. LOL  - I pour ingredient's into the bucket in layers or parts outside- because - well the powder can Poof! LOL and frankly I do not want Poof! in the house! ;) , Mix it all - well-  with large ladle or slotted spoon and then--- done! Yay!!!!!!!  It's as easy as that!

Step 3: Use it!   I recycle the OxyClean container and the scoop that comes with it. Fill it with my mixture and this sits on my washer for daily use. A large load to the 2 line on the OxyClean blue scoop is perfect!

Note: The remainder of the mix, I store in the garage (keep in a cool dry place, away from the children and label) , refilling as needed.

Also to note: because this is a low suds recipe- it is safe for HE washers, and does not leave a residue like some castile soap mixes can.
It lasts! About 6 months- or longer depending how often you do laundry. The cost is a whopping $35.  ---- (compared to the amount I paid before- averaging $20 a month, or more, on soaps- that's a previous cost of  $120 for 6 months of soaps- and I just paid less than $35 actually because I caught everything on sale. Savings $85. For me, this is a no brainer!)

Easy! Done! Enjoy!


You might Like the Links at:
Make Your Own Monday Link Up 12/16


If you can't find items at your local store- You might try:


Disclaimer: Affiliate Links in no way affect your end price, there is NO increase for you. But, they do help to support the cost of the blog. Thank you.

Thursday, December 5, 2013

Soft Oatmeal Raisin Cookies

Soft Oatmeal Raisin Cookies


3/4 c real butter
3/4 c applesauce
3/4 c sugar
3/4 c brown sugar
2 eggs
1 tsp vanilla
1 1/2 c flour
1 tsp baking soda
1 tsp ground cinnamon
1/2 tsp real salt
3 c quick rolled oats
1 c raisins
Preheat oven to 375 F degrees
In large bowl, beat butter, sugars, and applesauce together until smooth.
Add eggs and vanilla and beat well until egg is incorporated. In separate bowl- mix flour, baking soda and salt. Stir into the butter/sugar mixture. Roll in oats and raisins and stir well
Place spoonfuls onto ungreased cookie sheet and bake at 375 F degrees in the oven (center rack) for 8-10 minutes.
cool and enjoy!

Great for holidays, or family events! Stay soft, and batch makes about 4 dozen! Perfect for sharing or the cookie jar!


You might like the recipes and links found at:
Mondays Homestead Barn Hop #139


You might enjoy:


Disclaimer: Affiliate Links in no way affect your end price, there is no increase for you. But, they do help to support the cost of the blog. Thank you.

Good Smells for the Home - Quick and Easy

Good Smells for the Home - Quick and Easy

Today I checked the orange tree in our backyard; pulled the most ripe citrus I could find. Better now than tomorrow, I figured. Because our local weather is predicting a Hard Frost warning tonight, 31 degrees F.
Snow is coming Friday and Saturday.
On my orange tree, I fear some of the top fruit I didn't get today could be bit; but there wasn't much time.
I might have to brave the ladder tomorrow and see what I can salvage.

Today, however, I was after the ripest sweet treats! Oranges are fantastic fruit for the cold weather- to ward off sniffles -and one of the best grab and go treats I can offer the family! 


Bringing in the oranges today sparked an old favorite whim- the smell of fresh orange and cinnamon! But I personally do not do well with commercial potpourri that is soaked in chemicals and heavy on perfumes. I prefer to go natural, and it is so easy to do! Also a huge money saver! Frugal Home Recipe ! Makes the whole house smell great!

Stovetop Potpourri
On the back of the stove, I cut up 2 oranges, and added water to fill the pan and 2+ cinnamon sticks- and set it to simmer. You can use ground cinnamon as well! The wonderful smell soon came from the kitchen! Inspiring! Inviting!  Wonderful! Yay! A Fall favorite anyone can do!
 It Took less than 2 minutes and I had simmering potpourri for the rest of the day! So easy!  Made the house smell fantastic! Loved it!
(Note: simmer the potpourri mixture, and check the water off and on all day, It will run out! Don't forget to check. Simply add more water if you need. Be sure to turn off if you leave, or head to bed!)

It can be done with any citrus! Oranges, Lemons, Limes!  And different spices! Anise, nutmeg, ginger, cloves, cinnamon! or Mint! Whatever combo strikes the inspiration in you! Even just the smell of simmering cinnamon can be a welcoming change! Try apples! Ahhhhh! Fantastic! Aromatic and romantic! and best yet- all natural.

Hope you might try it! But be careful! You might end up absolutely LOVING it!.


You might like the tips shared at:
Frugal Days Sustainable Ways #100


You might like these items:


( Disclaimer, the links above are affiliate links. Affiliate Links in no way affect your end price, there is no increase for you. But, they do help to support the cost of the blog. Thank you.)