Showing posts with label kid favorite. Show all posts

Tuesday, November 4, 2014

Easy Carrot Salad

Easy Carrot Salad

2 cups shredded carrots,
1 cup raisins,
2 tbsp lemon juice,
1 diced apple,
2 tbsp. honey,
1 heaping tbsp. mayonnaise (Homemade preferred).

Grate, dice, and mix! Stir together and chill for 1 hour before serving.


Excellent for picnics, kid approved, great way to teach kids how to make recipes. 
Bring a smile- enjoy. 

Proof we can have fun with fruits and vegies! 

Recipe also noted in Carrots!


Monday, December 30, 2013

Apple-Pumpkin Spice Cake

Apple Pumpkin Spice Cake


You need:

1/2 c real butter melted (or shortening like olive oil)
2 eggs
1 1/2c brown sugar**
2 tsp vanilla extract
1 c applesauce or applebutter ( I used my homemade applebutter)
1 c pumpkin puree
1 tbsp cinnamon (or 1 tsp cinnamon & 2 tsp pumpkin pie spice)
2 1/2 c flour (all purpose, or whole wheat works great)
3 tsp baking powder
1 tsp real salt

In mixing bowl cream butter and sugar together, add eggs and beat until smooth. Add vanilla, pumpkin and applesauce. Mix well.
Add flour, salt and baking powder.


Mix until all smooth and no lumps- will be very thick.


Pour into greased 13x9 pan and bake 30 minutes at 350F degrees, or until butter knife inserted in middle comes out clean.


 Top with cream cheese frosting, basic butter cream frosting, just sprinkle with powdered sugar, or do nothing! It's delicious on it's own! .
Enjoy! :)

** If you are avoiding brown sugar then substitute   1 c honey or half honey/ half molasses?

This recipe is easy to make, and fairly inexpensive. A family favorite, and frugal on my budget. Which I love!
This is quick becoming one of our favorite cakes! Turns out moist and flavorful, a great for taking with you to family gatherings or parties!  Thumbs up from every family member! Kid tested, Kid approved! Yay!


You might like the links and recipes found at:
Frugal Days Sustainable Ways #101

Real Food Wednesday 1-1-2014

Monday's Homestead Barn Hop #141


If you cannot find ingredients you might try:

Disclaimer: These are affiliate links, which do not raise your end cost; but, do help support this blog. Thank you

Friday, December 27, 2013

Peanut Butter Cookies

Family Favorite Peanut Butter Cookies


 In a large mixing bowl add:

1 c peanut butter (Creamy or crunchy- depends on your taste preference!:)
1 c brown sugar
1 c sugar
2 eggs
1 c real butter (2 sticks)
2 tsp vanilla extract

Cream together in bowl until sugar dissolves.

Add to bowl:
3 c flour
1 tsp baking powder
2 tsp baking soda
1/2 tsp real salt

Mix all together well. Set bowl in refrigerator for 1 hour until dough firms. Take spoonful batter and roll into 1" balls. Place on ungreased cookie sheet. Use a fork to create hatch-marks on each and slightly flatten top on cookie dough roll.
Bake at 375F degrees for 8-10 minutes.
Enjoy!

This recipe is extremely easy to follow and very good for beginning learners! Kids love helping to roll and smoosh down the dough balls- the refrigerated batter makes for easy clean up, and easy to work with dough. Kid friendly and certainly kid approved. Makes approximately 5 dozen.
Bring smiles! Enjoy together!


You might find supplies you need:

Disclaimer: The above links are Affiliate Links. This, however, does not affect your end price; but does help to pay the cost of the blog. Thank you!.

Thursday, December 5, 2013

Soft Oatmeal Raisin Cookies

Soft Oatmeal Raisin Cookies


3/4 c real butter
3/4 c applesauce
3/4 c sugar
3/4 c brown sugar
2 eggs
1 tsp vanilla
1 1/2 c flour
1 tsp baking soda
1 tsp ground cinnamon
1/2 tsp real salt
3 c quick rolled oats
1 c raisins
Preheat oven to 375 F degrees
In large bowl, beat butter, sugars, and applesauce together until smooth.
Add eggs and vanilla and beat well until egg is incorporated. In separate bowl- mix flour, baking soda and salt. Stir into the butter/sugar mixture. Roll in oats and raisins and stir well
Place spoonfuls onto ungreased cookie sheet and bake at 375 F degrees in the oven (center rack) for 8-10 minutes.
cool and enjoy!

Great for holidays, or family events! Stay soft, and batch makes about 4 dozen! Perfect for sharing or the cookie jar!


You might like the recipes and links found at:
Mondays Homestead Barn Hop #139


You might enjoy:


Disclaimer: Affiliate Links in no way affect your end price, there is no increase for you. But, they do help to support the cost of the blog. Thank you.

Thursday, June 13, 2013

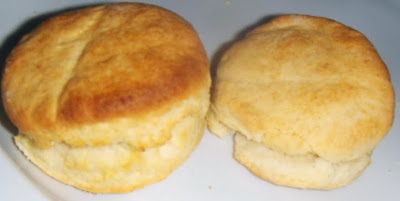
Homemade Biscuits

Homemade Biscuits


4 tbsp cold real butter or cold lard
1 tsp sugar or honey
2 c whole wheat flour
4 tsp baking powder
1 tsp real salt
3/4 cup whole milk, or half and half

 Preheat oven to 425F.
Cut butter into slices and in bowl,  sift together the baking powder and wheat flour and sugar and salt. Using a pastry cutter, or fork, combine until mixture is small crumbs. Add milk all at once and stir until batter follows fork, place on lightly floured surface and barely knead with hands a few times (comes together fast and do not over work).
Roll out dough to about 1/2 inch thickness. Cut out biscuits using a cookie cutter, biscuit cutter, or I used a juice glass with edge lightly floured :). Place biscuits on an un-greased cookie sheet.
Bake for approximately 10 minutes, or until light brown on top. Do not over bake - or the bottoms will burn.

Awesome, flaky, and easy alternate to pre-made biscuits; making this a healthier Real Food alternate to the convenience prepackaged foods containing unnecessary preservatives and fake ingredients.


Note: This is an excellent recipe for teaching the kids dough, measuring and mixing, following instructions, and baking. Fun for all! Make memories in the kitchen!
Kid Idea: Make small amount of  bacon and scrambled eggs, and grated cheese; allowing the kids to stack their own breakfast sandwiches. :)

Wednesday, June 12, 2013

Baked Spiral Potatoes

So easy and an awesome variation to regular baked potatoes! A Family favorite! Kid approved!

Baked Spiral Potatoes 

4-6 small potatoes (1 per person)
skewers
olive oil
seasonings (Your preference)

Peel and wash potatoes. Prep a cooking sheet with butter or olive oil to prevent sticking. Skewer potato lengthwise from small end to small end. With a sharp knife, carefully cut in to potato just until you feel the skewer, using it as your guide- rotating potato over as needed to achieve spiral. This actually is the hardest part if you do not have a spiral slicer, which I don't. But it is not impossible- basically tilt the knife at a slight angle as you cut and do not take it out of the potato- let it guide itself. It goes faster the more you cut.
                                                    
When done to end,  slowly pull potato apart along skewer until stretched and resembling spiral. Place on baking sheet. Brush with olive oil,  and sprinkle with seasonings. I use paprika, garlic powder, and pepper.

Bake at 350F  for 45 minutes or until potatoes are done.

For added goodie: You can add a slice of bacon skewering end at top and winding around to end-spiraled around potato.

The taste is slightly different than a baked potato - more like wedges. Some people pull it in the last 5 minutes and add grated cheese and bacon bits across the top returning to the oven to melt this in. I have also heard people drench it in sour cream, and add chives in the end.

Many people deep fry these, I chose to bake mainly to avoid huge amounts of greasy food. But you can easily look up or google, the directions if you prefer frying. They are also called tornado fries.

Serves great with Homemade Chicken Nuggets or BBQ Chicken! A great alternate for something different on the menu!  Love the fact it's easy to do and cheap making it one of my more favorite frugal recipes to stretch the budget. It's Easy to figure out how many to cook- 1 per person!

I think I am going to try this style with a sweet potato next time and see how that turns out. This might also be promising for a zucchini squash as well! :) I'll let you know! :)


This has been shared with, and you might also like the links at:

Frugal Days Sustainable Ways #76


You might try:


Disclaimer: Affiliate Links in no way affect your end price, there is no increase for you. But, they do help to support the cost of the blog. Thank you.

Friday, June 7, 2013

Easy Fried Rice - Kid's Favorite

Easy Fried Rice - Kid's Favorite

This is one of my fall back recipes, it is not incredibly authentic, but it has been incredibly successful in my house- particularly when my children were younger- it was one of my favorite recipes accepted by the kids that I felt good about because it got them to eat their vegies! It was easy to make and always a success. I even loved it for the ability to use up leftovers- like the meat or vegies- making my meals spread further and happily stretching my budget! A frugal favorite!

Easy Fried Rice (Takes about 30 minutes to prepare if using old fashioned rice )

To cook, I start with the rice-

2 cups rice
1 tbsp olive oil
a dash salt
4 cups water
To cook, I prepared old fashioned rice, (you can also use instant rice if you prefer, or as time saver. Prepare 2 cups as instructed on the box.). For old fashioned rice:
In large sauce pan, with excellent fitting lid:
I added olive oil and 2 cups old fashioned long grain rice. Over med high heat, I fried the rice grains until they turn puffier white and start to brown. Takes about 5 minutes, stir frequently- but, doing this trick helps to insure the grains won't stick together in finished product. Once rice begins to brown, add 4 cups hot water and bring to boil. When boil starts, reduce heat to low simmer and cover tight. Set timer for 20 minutes.

While rice is cooking, I steam the vegies or prepare the frozen vegetables, as directed, in a sauce pan. ( Or heat up your left over vegies at this time.) You'll need about 2 cups vegies - For the pictured fried rice, I used a frozen vegetable mix; however, I have a lot of success with just frozen peas, or just broccoli.

Last step is the meat:

1 lb. cooked shredded meat- (perfect for left overs! Use anything you have - pork chops, chicken breast, steak, ground beef, etc.)
olive oil
1 clove minced garlic, 1/2 c green onion diced tiny,  salt and pepper. 
1 tbsp. soy sauce
 2 eggs (scrambled in a bowl and set aside for last step)

Shred  or dice the meat into small chunks. In fry pan, add olive oil and garlic and cook until the garlic is tender - just a minute or two (this infuses the flavor of the garlic into the oil.) Add the diced meat. Lightly fry until the meat is heated through. Add the green onions and seasonings. Stir thoroughly and cook only until the green onions are to your liking- they get soft very fast.  Turn off heat.

Your sauce pan of vegies should be done at this point- Drain your vegies. set aside.
By now the rice should be done. Yay! Stir to fluff, and check to make sure it's completely cooked.

In the meat fry pan, bring back to heat until all is sizzling, add in rice, and soy sauce. Stir together until all is combined well. Add vegies and stir again. Once combined well, move all ingredients to the side -so as to give yourself a pocket space to work in of fresh fry pan- pour in the scrambled egg and fry until completely done. Takes only a quick minute- do not worry about the remaining rice- at this point- it's just gaining the extra  fried flavor as you focus on the egg. I scramble it with the edge of my spatula. Once the egg is done stir into the rice mixture.  (Note: I do not add personally add extra salt to this as the soy sauce is already mainly salt. Taste test to decide for yourself.)
Yay! You are done! Use as a main dish or a side dish, depending on how adventurous you are. I served a salad first, and at times I will serve with a spring roll.

Tuesday, April 23, 2013

Real Food snacks: Fruit Leathers

Real Food Snacks: Fruit Leathers
When talking with my husband and boys about the real food challenge, and writing about it; they jumped in with a request I post my fruit leathers. According to them, this is the biggest of all the changes. These have been a fantastic snack alternative to candy bars, etc.  Along with simple dried fruit for snacks(banana chips apple chips, dried pineapple), I always keep something of this on the counter readily available for anytime they need it. 


Apple Fruit Leather
1 jelly jar of apple butter (Homemade and canned, gala apples simmered with honey and cinnamon for 10 hours in crock pot until fully reduced, and canned in jelly jars) or 8oz applesauce!
1 7 oz jar homemade plain yogurt
1/4 cup honey
mix well and dehydrated in dehydrator on 135 degrees for 6-8 hours until leathered
pulled off and cut warm, wrapped in wax paper rolls. sent easily in lunches for snack.
Pina-Coco Leather
1/2 pineapple cored, skinned, and cut into chunks
1 cup shredded coconut
1/4 cup organic honey
Combined all in food processor  and pulse until smooth,  (this one will always appear slightly chunky- get it as smooth as possible). Spread flat on dehydrator tray. Dehydrate for 6-8 hours at 135 degrees. this one comes out a bit stickier, thicker- remove from sheets and wrap in strips on wax paper while warm. Delicious pina colada flavor.

Pina-coco leathers are not as pretty but just explode in taste:

If you do not have a dehydrator:
Line a rimmed baking sheet with wax paper. Pour out the mixture into the lined baking sheet to about an 1/8 to 1/4 inch thickness. Place the baking sheet in the oven. Heat the oven to lowest setting below 140f. Perfect range: 135-140°F. If you have a convection setting, use it, it will speed up the process and help dry out the fruit in half the time.  Let dry in the oven like this for as long as it takes for the fruit mixture to dry out and form fruit leather. We usually keep it in the oven overnight, so about 8-12 hours for the thicker leathers, check at 6 hours for thin leathers like apple. The fruit leather is ready when it is no longer sticky, but has a smooth surface.