Showing posts with label easy recipe. Show all posts

Wednesday, November 19, 2014

Easy Clam Chowder

Easy Clam Chowder


1/2 c diced onion
1/2 c diced celery
dash salt and pepper
1 tsp original Mrs. Dash
1 tbsp butter
2 cups vegetable broth
2 cups diced potatoes
1/2 c shredded carrots (I grated mine.)
2 cans diced clams (drain juice and use with vegetable broth)
1 cup mashed potatoes*
1 cup milk (or cream, or half and half)

 Over med heat. lightly saute the onions and celery until soft. Add vegetable broth and clam juice and bring to boil adding potatoes and carrots. Cook about 10 min. Add mashed potatoes, seasonings, and milk. Bring to boil and cook on med-low heat for about 10 minutes. Add clams in the last 5 minutes. Remove from heat, Thickens as it cools. Serve warm w/ crackers. Serves 4-6 easily.

* Many people I know use flour to thicken, I learned that other mashed fresh vegetables that are starchy will thicken just as well and you get the added vegetable nutrients and flavor. I had leftover homemade mashed potatoes from last night's roast and just used that. If you do not, you can fry 2 tbsp flour with the onions and butter in the beginning right before adding the broth. This will create a thick gravy to add to.  By using the mashed potatoes, however, you can serve this without problems of wheat flour (for those with sensitivity.)


Monday, November 17, 2014

DIY Cookie Butter

Simple to make, and soooo very good. It's sinful, and delicious!!

DIY Cookie Butter


1 c crushed cookies
1/2 c powdered sugar
1/4 c water
1/4 c olive oil

To make, crumble cookies into food processor and pulse until fine powder. Then add oil and water and process for a minute. Slowly add powdered sugar  and let process until thick and creamy.  Scoop into jar or bowl with a good lid. Use on toast, crackers, waffles, pancakes, or as frosting /glaze on cake, or whatever! Warm in the microwave for 30 seconds and drizzle as topping over ice cream.

Refrigerate. Lasts a week.

My advice is to use hard cookies, like chocolate chip or snicker doodles. Cream filled cookies tend to separate. The absolute best is to use homemade cookies, that way you are certain of no extra ingredients you don't want. The oil you use can also vary- I suggest coconut oil or olive oil.
However you put this together, it is definitely cheaper to make at home, (Total price for what I made was about $0.80) and quick to make too! 
Your kids will love the alternate, and you will love both the price and ease.


Tuesday, November 4, 2014

Easy Carrot Salad

Easy Carrot Salad

2 cups shredded carrots,
1 cup raisins,
2 tbsp lemon juice,
1 diced apple,
2 tbsp. honey,
1 heaping tbsp. mayonnaise (Homemade preferred).

Grate, dice, and mix! Stir together and chill for 1 hour before serving.


Excellent for picnics, kid approved, great way to teach kids how to make recipes. 
Bring a smile- enjoy. 

Proof we can have fun with fruits and vegies! 

Recipe also noted in Carrots!


Monday, December 30, 2013

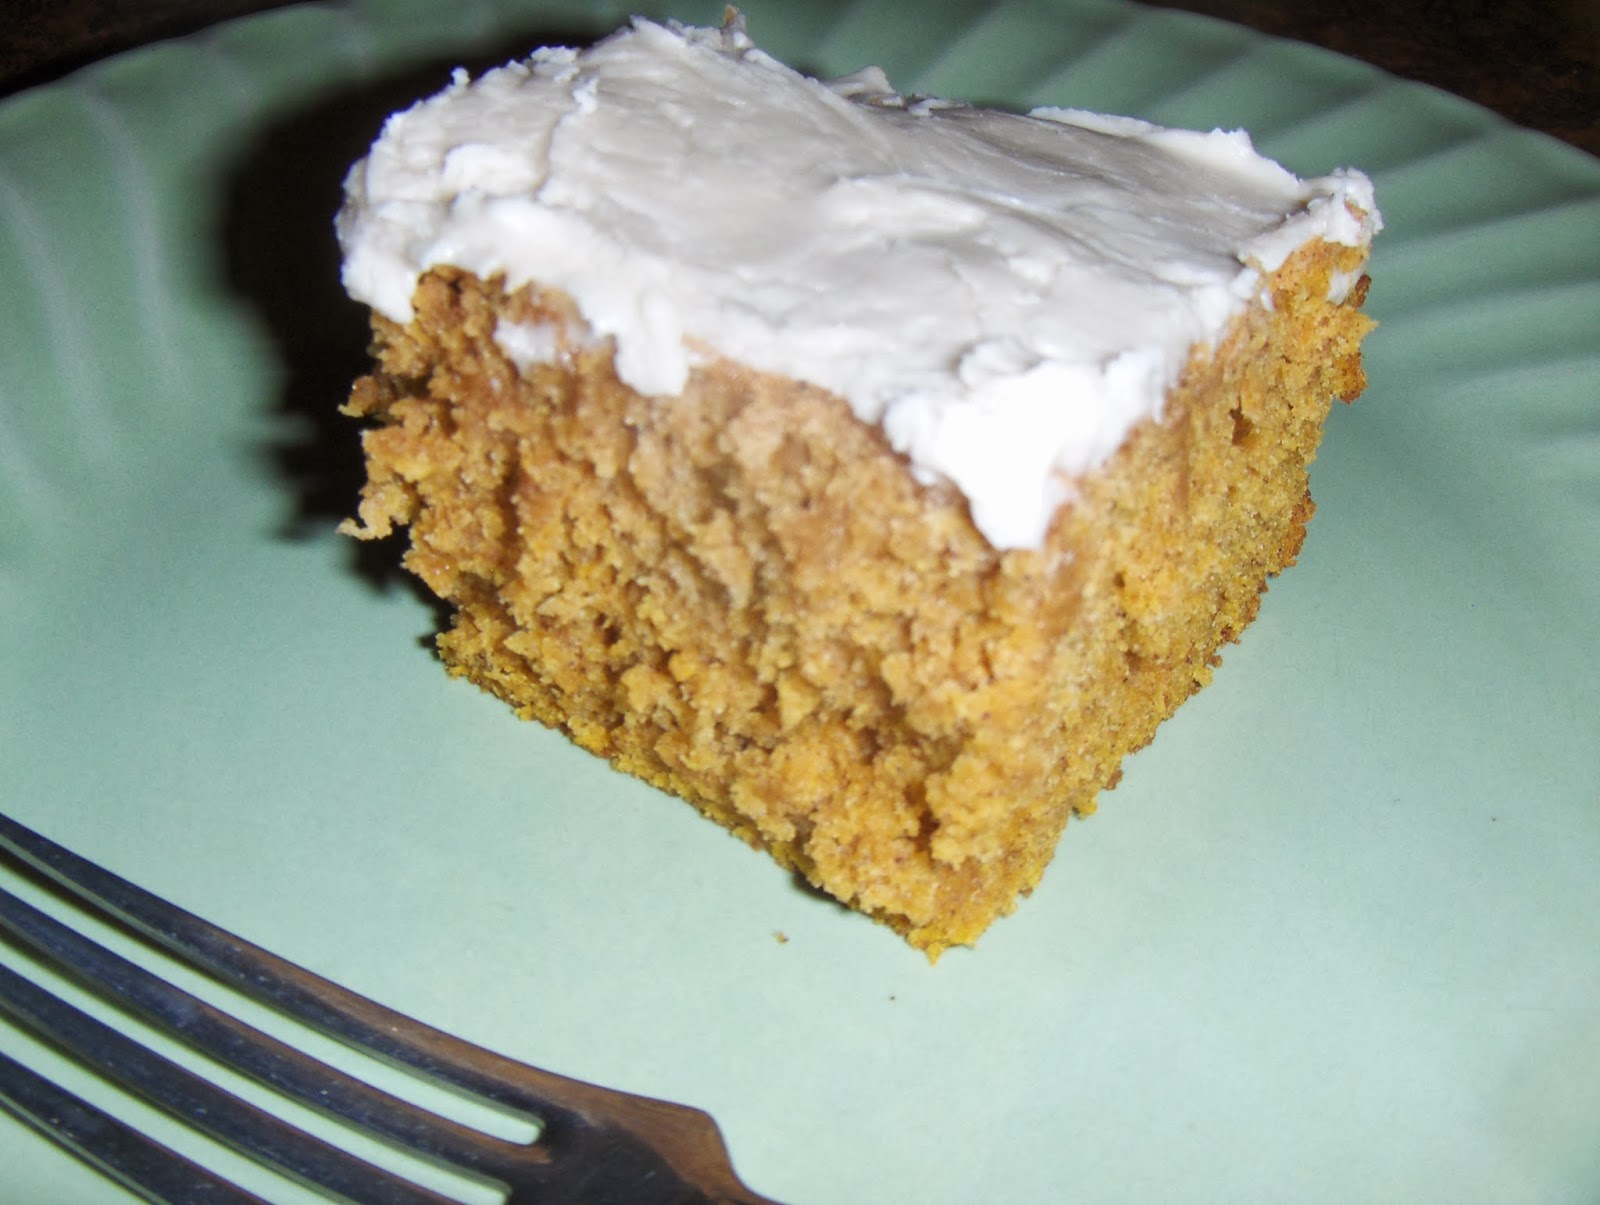
Apple-Pumpkin Spice Cake

Apple Pumpkin Spice Cake


You need:

1/2 c real butter melted (or shortening like olive oil)
2 eggs
1 1/2c brown sugar**
2 tsp vanilla extract
1 c applesauce or applebutter ( I used my homemade applebutter)
1 c pumpkin puree
1 tbsp cinnamon (or 1 tsp cinnamon & 2 tsp pumpkin pie spice)
2 1/2 c flour (all purpose, or whole wheat works great)
3 tsp baking powder
1 tsp real salt

In mixing bowl cream butter and sugar together, add eggs and beat until smooth. Add vanilla, pumpkin and applesauce. Mix well.
Add flour, salt and baking powder.


Mix until all smooth and no lumps- will be very thick.


Pour into greased 13x9 pan and bake 30 minutes at 350F degrees, or until butter knife inserted in middle comes out clean.


 Top with cream cheese frosting, basic butter cream frosting, just sprinkle with powdered sugar, or do nothing! It's delicious on it's own! .
Enjoy! :)

** If you are avoiding brown sugar then substitute   1 c honey or half honey/ half molasses?

This recipe is easy to make, and fairly inexpensive. A family favorite, and frugal on my budget. Which I love!
This is quick becoming one of our favorite cakes! Turns out moist and flavorful, a great for taking with you to family gatherings or parties!  Thumbs up from every family member! Kid tested, Kid approved! Yay!


You might like the links and recipes found at:
Frugal Days Sustainable Ways #101

Real Food Wednesday 1-1-2014

Monday's Homestead Barn Hop #141


If you cannot find ingredients you might try:

Disclaimer: These are affiliate links, which do not raise your end cost; but, do help support this blog. Thank you

Sunday, December 29, 2013

Rockin the Quinoa!

 Rockin' the Quinoa!


Easy to Make Quinoa

1 tbsp olive oil
1/2 tsp real salt 
1/2 tsp pepper
1 clove garlic minced
1/2 c sliced mushrooms
1 c Quinoa (rinsed)
1/2 c chicken broth
2 c warm water

Lightly brown mushrooms and garlic in olive oil over med heat in sauce pan.  You want the garlic to start turning tender.
Stir in 1 cup rinsed quinoa and lightly fry in pan making sure to get all quinoa coated with oil. Keep over med heat for a minute.

Add 1/2 c chicken broth and bring to boil. Stir frequently until all liquid runs dry- takes about 4-5 minutes. Add 1/2 tsp salt & 1/2 tsp pepper, and 2 cups water.

Bring to boil then cover, reduce heat to simmer, and simmer for 20 minutes. Remove from heat, and let set final 5 minutes, fluff and serve.
(1 c raw quinoa makes about 3 cups cooked.)  Quinoa is delicious!


I was intimidated by Quinoa for a long time! Never having tried it or been exposed to it, personally. But Quinoa is a super food! Considered a complete protein source, quinoa is also high in magnesium,  iron, and fiber. It's a seed- not a grain. And after hearing about it in the majority of real food blogs I read, I knew I could not avoid it forever!
My sister is actually the reason I tried it- and now love it! She gave me the push and I am very grateful! There are dozens of different ways to make it- this is just my initial love recipe. I will be trying more and posting as I can. It actually is as easy to make as traditional rice- but less starchy and has almost a light nutty flavor.  Fluffy! I don't know what I was so afraid of! I regret not having tried it earlier!
The taste will be fantastic with fresh vegetables! I can't wait to try it with peas, broccoli, asparagus, green onions, etc!
Tonight we had it with baked chicken breast. Very very good!


You might love the links found in:
Real Food Wednesday 1/1/2014


You can find Quinoa at Trader Joes, or your Local Health Food store, and  at Whole Foods.

Or you can order it here:


Disclaimer: Affiliate Links in no way affect your end price, there is no increase for you. But, they do help to support the cost of the blog. Thank you.

Sunday, December 15, 2013

Easiest Holiday Fudge

Easiest Holiday Fudge 


You need:

1 1/2 c semi sweet chocolate chips
1 1/2 c milk chocolate chips
1 can (14 oz.) sweetened condensed milk (not evaporated)
1 1/2 c chopped walnuts
2 tsp vanilla

 Line a 8 inch square pan with wax paper, or foil.  In a double boiler, melt chocolate chips, add milk and stir constantly until incorporated. Remove from heat.  Stir in vanilla and walnuts. While still hot, pour immediately into lined pan.  Place into refrigerator for at least 2 hours to completely cool and set recipe. You might have to go longer.  When firm, remove from wax paper or foil, and cut into 8 rows by 8 rows for 1" pieces.

Variations to this recipe can be any 1 1/2 c chopped nuts you prefer (ex: almonds, pistachios, hazelnuts, or cashews). Or you can make this very festive by using crushing up candy canes instead of nuts.


I have found this recipe, if I watch sales and use coupons during holiday season, is very cheap and easy to make! Chocolate chips are frequently on sale! This makes  this fudge, for me, a perfect addition to holiday gift plates! It actually is Frugal, in that the recipe is so inexpensive, and the candy so rich, it goes a long way- it makes for a fantastic gift without high cost! Allowing me to share the season without a huge cut in my budget. :)

Saturday, December 14, 2013

Once a Month Alarm Brownies

Once A Month Alarm Brownies


I didn't know what to call these. My hubby said "Death by Chocolate Brownies".
I wanted "3 Alarm Brownies", or "Milk Alarm Brownies" (so rich, you run for the milk!)

Basically these are THE brownies to make when that chocolate craving is just beyond what you can handle. Want to solve the serious sweet tooth ? Really solve that once a month need for chocolate before the lack there of sets you off kilter and in a "mood"? (haha!)
This is it. For serious chocolate lovers, like me. I'm not even going to try to doll up the pictures- because this is serious- serious biz here folks! :)


Once a Month Alarm Brownies

Pre heat oven to 350F degrees. Spray/ or grease a 8" square baking pan.

Brownies:
1/2 c softened real butter
2 eggs
1 c sugar
2 tsp vanilla
1/3 c unsweetened cocoa powder
1/2 c flour
1/4 tsp baking powder
1/4 tsp real salt
1/2 c chopped walnuts (** Optional)

Frosting
4 tbsp softened real butter
1 tsp vanilla
2 tbsp unsweetened cocoa powder
2 tbsp honey
1 cup powdered sugar
1 tbsp milk

In a bowl,add 1/2 c softened butter, eggs and sugar. Mix on low speed until sugar dissolves. Add cocoa and vanilla. Add flour, baking powder and salt and mix on medium speed until smooth. **Add chopped walnuts and mix once more until well blended.  Will be thick.
Pour into prepped pan and bake in center of the oven for 25 -30 min. (until a butter knife inserted comes out clean.
In a bowl, mix  butter, powdered sugar, honey, milk, vanilla and  cocoa powder. Mix on low until powder dampens and then high speed until fluffed and smooth like frosting. Spread over brownies while they are still hot from oven. Let it melt across - and drizzle in.....ahhhhhhh enjoy warm with a glass of milk and dissolve away all sweet tooth or chocolate craving you have in a matter of seconds!
As i said- I'm not dolling up the pictures- these brownies speak for themselves. Make no mistake- these are for serious chocolate lovers!


You may like the links shared at:

Mondays Homestead Barn Hop #140


Thursday, December 5, 2013

Soft Oatmeal Raisin Cookies

Soft Oatmeal Raisin Cookies


3/4 c real butter
3/4 c applesauce
3/4 c sugar
3/4 c brown sugar
2 eggs
1 tsp vanilla
1 1/2 c flour
1 tsp baking soda
1 tsp ground cinnamon
1/2 tsp real salt
3 c quick rolled oats
1 c raisins
Preheat oven to 375 F degrees
In large bowl, beat butter, sugars, and applesauce together until smooth.
Add eggs and vanilla and beat well until egg is incorporated. In separate bowl- mix flour, baking soda and salt. Stir into the butter/sugar mixture. Roll in oats and raisins and stir well
Place spoonfuls onto ungreased cookie sheet and bake at 375 F degrees in the oven (center rack) for 8-10 minutes.
cool and enjoy!

Great for holidays, or family events! Stay soft, and batch makes about 4 dozen! Perfect for sharing or the cookie jar!


You might like the recipes and links found at:
Mondays Homestead Barn Hop #139


You might enjoy:


Disclaimer: Affiliate Links in no way affect your end price, there is no increase for you. But, they do help to support the cost of the blog. Thank you.

Sunday, June 16, 2013

Happy Father's Day! And Father's Day Dinner Steak Tips

Happy Father's Day!

To all those special Fathers out there!
Hope the day turns out wonderful for you!! 


 My hubby with the boys several years ago. :) So sad how fast they grow!


Making Special Father's Day Steak dinner?

A few quick tips to make it turn out just right!

Steak Tips for cooking on fry pan or grill:


A key factor: What ever steak you want to cook let it set at room temp about 15 -20 minutes before you cook it. Cooking cold steak takes longer and causes a tougher steak in finish. Let it get to room temp!

For average size steak say an 1" thick, cook an average of 5-7 minutes each side- using salt and pepper only. You can add or brush a dab of real butter on each side to help it not stick to the pan or grill and add flavor, but you really do not need more.

Do not poke the steak with a fork to flip -that releases the juices that you want  to stay!- use your spatula or tongs.

To tell if the steak is done: Poke it with your thumb- If it feels like soppy jelly, it's still in need of cooking time and not done. If it's rock hard- it's overcooked.

Before you cut or serve- Let it rest!!!   This allows the juices to settle into the meat. Let it rest  for half the time you cooked it, before cutting it to serve-so if you cooked it a total of 14 minutes, let it rest for 7.


Friday, June 7, 2013

Easy Fried Rice - Kid's Favorite

Easy Fried Rice - Kid's Favorite

This is one of my fall back recipes, it is not incredibly authentic, but it has been incredibly successful in my house- particularly when my children were younger- it was one of my favorite recipes accepted by the kids that I felt good about because it got them to eat their vegies! It was easy to make and always a success. I even loved it for the ability to use up leftovers- like the meat or vegies- making my meals spread further and happily stretching my budget! A frugal favorite!

Easy Fried Rice (Takes about 30 minutes to prepare if using old fashioned rice )

To cook, I start with the rice-

2 cups rice
1 tbsp olive oil
a dash salt
4 cups water
To cook, I prepared old fashioned rice, (you can also use instant rice if you prefer, or as time saver. Prepare 2 cups as instructed on the box.). For old fashioned rice:
In large sauce pan, with excellent fitting lid:
I added olive oil and 2 cups old fashioned long grain rice. Over med high heat, I fried the rice grains until they turn puffier white and start to brown. Takes about 5 minutes, stir frequently- but, doing this trick helps to insure the grains won't stick together in finished product. Once rice begins to brown, add 4 cups hot water and bring to boil. When boil starts, reduce heat to low simmer and cover tight. Set timer for 20 minutes.

While rice is cooking, I steam the vegies or prepare the frozen vegetables, as directed, in a sauce pan. ( Or heat up your left over vegies at this time.) You'll need about 2 cups vegies - For the pictured fried rice, I used a frozen vegetable mix; however, I have a lot of success with just frozen peas, or just broccoli.

Last step is the meat:

1 lb. cooked shredded meat- (perfect for left overs! Use anything you have - pork chops, chicken breast, steak, ground beef, etc.)
olive oil
1 clove minced garlic, 1/2 c green onion diced tiny,  salt and pepper. 
1 tbsp. soy sauce
 2 eggs (scrambled in a bowl and set aside for last step)

Shred  or dice the meat into small chunks. In fry pan, add olive oil and garlic and cook until the garlic is tender - just a minute or two (this infuses the flavor of the garlic into the oil.) Add the diced meat. Lightly fry until the meat is heated through. Add the green onions and seasonings. Stir thoroughly and cook only until the green onions are to your liking- they get soft very fast.  Turn off heat.

Your sauce pan of vegies should be done at this point- Drain your vegies. set aside.
By now the rice should be done. Yay! Stir to fluff, and check to make sure it's completely cooked.

In the meat fry pan, bring back to heat until all is sizzling, add in rice, and soy sauce. Stir together until all is combined well. Add vegies and stir again. Once combined well, move all ingredients to the side -so as to give yourself a pocket space to work in of fresh fry pan- pour in the scrambled egg and fry until completely done. Takes only a quick minute- do not worry about the remaining rice- at this point- it's just gaining the extra  fried flavor as you focus on the egg. I scramble it with the edge of my spatula. Once the egg is done stir into the rice mixture.  (Note: I do not add personally add extra salt to this as the soy sauce is already mainly salt. Taste test to decide for yourself.)
Yay! You are done! Use as a main dish or a side dish, depending on how adventurous you are. I served a salad first, and at times I will serve with a spring roll.

Tuesday, June 4, 2013

Slow Cooker Stuffed Cabbage

Slow Cooker Stuffed Cabbage


Cut  and wash half a cabbage pulling leaves apart as whole and large as is possible.

In a bowl, mix:
2 lbs ground meat ( you can use hamburger, ground beef, ground sausage, ground turkey or chicken)
1 cup bread crumbs
1/2 cup oats (if using ground turkey-or chicken eliminate the oats as this will be too dry a mixture to hold)
2 eggs
seasonings - pinch of cumin, paprika, garlic powder, salt and pepper.
(Other seasonings that are really good in it are  basil, oregano, green onion, minced garlic, chopped onions, etc.)
Combine all ingredients in bowl, and form med sized  meat balls - wrapping each ball with cabbage and place in the slow cooker/crock pot. Add all unused cabbage to the cooker surrounding the stuffed leaves.

Fill the remaining spaces in the casserole with cleaned and cut potato and carrot wedges.

Pour over all of it 1 quart jar of homemade canned tomatoes -which is  my favorite-juice and all- and  cover. Cook on high for 3-4 hours until meatballs are completely done in center.

That's it- additions to the casserole can include celery, carrots,  onions, squash, whatever you feel would match the cabbage taste. You can use canned tomato sauce, or tomato soup instead of whole tomatoes if you prefer. So easy- so versatile. And very filling!  Serves at least 4-6.  I usually have left overs, making this one of my favorite frugal recipes!. Enjoy!


you may also like the links found at:
Frugal Days Sustainable Ways #75


You might try:


Disclaimer: Affiliate Links in no way affect your end price, there is no increase for you. But, they do help to support the cost of the blog. Thank you.