Thursday, June 27, 2013

Lime Water

Lime Water! 

The Lime tree in my front yard is about ready to start picking! I found a few ripe enough to try out this morning and I am enjoying Lime Water! 

Did you know... 1 lime has approx. 32% of your daily value of Vitamin C? 

Lime also naturally has calcium and potassium! 
Lime water is beneficial for your gut health, improves liver function, and helps reduce phlegm in the body.
Like Lemon water, warm lime water can help you wake up faster and improves digestive functions! 

Beyond that it's just delicious! Certain types of limes - like a Persian lime are not as tart as say a Key lime; making them easier to use when making infused water for the kids! 


Also, as a side note: Limes are absolutely fantastic squeezed over chicken tacos!  Yay!!!!!!


Shared with and you may love the links at:

Make your own Monday link up 7/1


Summer is here, folks!


Summer is here,  folks!  

Be careful of Heat Exhaustion!


Be careful! 

Heat.  I prefer winter, spring, fall… I do not like the heat.  However, summer has arrived.  If you live in the Southwest, USA- you know heat. We have already had a week of 110 F temps.   If you are new to the area- you will be greeting true heat in the coming weeks.   We have temps predicted at 110F and 112F coming up.  People in parts of AZ might be seeing 118F.  We are predicted to have record breaking temps in this coming week- and it’s not even July.  Who knows what July will bring! 

For many, the luxury of sitting in air conditioning all day is not an option. Even if it is for you, at some point you will have to get out and be exposed to the heat and I would just like to convey a simple warning! Be Careful! 

Water, Water, Water.  Liquids, liquids, and more liquids (although, avoid alcohol and caffeine).

Heat Exhaustion is nothing to laugh at. Heat Stroke- what comes after heat exhaustion is serious and dangerous! 

Heat exhaustion occurs after repeated exposure to high temps and you have become dehydrated. When dehydrated - your body temp goes up and your body cannot maintain its regulated core temperature (Your body temp goes up like you are running a fever.)    It is a heat related illness that has symptoms such as: dizziness, fainting,  fatigue, pale clammy skin, weak but rapid heartbeat, muscle cramps, heavy sweating, nausea, headache, rapid pulse, higher body temp, etc. 
Left without taking steps to help your body during heat exhaustion- your organs begin to shut down, and that is when it becomes heat stroke- which is very dangerous!  If your body core temperature reaches higher than 104F you risk damage to your brain and vital organs- which is what heat stroke does. 

If you start feeling heat exhaustion, take it seriously!  Stop activity and rest. Get to a cooler place. Take a cool water shower, or bath, or sponge bath. If you can’t get to a restroom and splash cool water on your face, and let cool water flow over your hands and wrists for a minute. Drink fluids. Do not do heavy physical labor or exercising. Loosen your clothes – tight clothes can trap more heat. 

Heat can affect anyone, any age. So watch the kids too! It is particularly dangerous for children under 4, and adults over 65; however, it can effect anyone! Heat related illnesses are felt by all when record breaking temps arrive! 

I am not a doctor, but I have in my lifetime seen the effects of heat stroke on people I care for; and it is not a pleasant thing. Heat exhaustion, once fully suffered, takes a week or more to recover from. Heat stroke on the other hand- can leave damaging effects permanently (Like people unable to further tolerate heat at all.)
Mainly, be careful!  Liquids, liquids, and more liquids!  If you think you are in need of a doctor- go! 

Summer is a time for fun! Enjoy as much of it as you can! The Season brings ups and downs in the temperatures; please just use extra caution when the temps reach their highest peaks! 


Disclaimer: I am not a doctor, this is not to be used as medical advice. This is intended for informational purposes only and written as friendly advice. If you are suffering heat exhaustion or heat stroke, please seek proper medical care!  
Sources used for reference:


Thursday, June 20, 2013

100% Natural Detangler

Natural Detangler -


Surprises can come from the simplist of things. And I love the fact I learned this one! YAY!!!!

The longer my hair gets the more I have to mind the tangles. I have naturally curly hair that can frizz and tangle in a heartbeat (or a foggy day- whichever comes first! Haha!)  I am sooo tired of the myriad of products all designed to detangle, with nothing more than fake, toxic chemicals that strip and dry out; or do the opposite- coat and grease, and weigh down the hair. Either way- when I discovered this simple secret- I have never been happier.

Aloe. 100% pure, all natural aloe.
I use Aloe Vera gel! All natural 100% Aloe Vera Gel  (about a quarter sized portion in my hand)  run through the ends of my hair softens, detangles, and moisturizes my hair- without residue, without chemicals. Applied to my wet hair (or to dry), it works wonders and has no scent, it soaks in, is weightless and non greasy, and combs through and dries clear- disappearing.


I now use it after every shower. I combine the quarter sized dollop with 1-2 drops of lavender essential oil and my hair smells amazing, and I have no fear of the comb! Plus! It reduces the amount of frizz my curls have- for my hair it's amazing!


This is exceptionally natural way to detangle a child's hair with less tears and no extra toxins or build up. Less tears-that is a huge WIN WIN! & makes mom happy!  It's fantatsic for the scalp and skin, and cannot harm children in any way!
 

Oh how I love Aloe Vera and it's many uses! Always work from the bottom up. If the tangle mass is huge- douse the mass with aloe and slowly separate- within minutes it starts to come apart and combs right through!

After a long conversation with my friends Virginia, and Vicki;  I was happy to have it confirmed that Aloe Vera works in more hair types than just thick curly brown! Which is fantastic news! Virginia and Vicki both have confirmed that Aloe Vera is excellent in ethnic hair! Vicki said she uses aloe all the time on her and her daughter's hair, when she gets her out of bath she puts it on,  and said she likes it because it does not add extra weight and is non greasy!!!! Followed by coconut oil for extra moisturizing, especially when using the hot irons-  they are 100% natural and happy with their hair!  Yay!!


Healthy Hair! Happy Hair!


Shared with and You might also like the links at:

Frugal Days Sustainable Ways #77

Make Your Own Monday Link Up 6/24

Homesteaders Hop 23


You can find items here:


Disclaimer: Affiliate Links in no way affect your end price, there is no increase for you. But, they do help to support the cost of the blog. Thank you.

Sunday, June 16, 2013

Happy Father's Day! And Father's Day Dinner Steak Tips

Happy Father's Day!

To all those special Fathers out there!
Hope the day turns out wonderful for you!! 


 My hubby with the boys several years ago. :) So sad how fast they grow!


Making Special Father's Day Steak dinner?

A few quick tips to make it turn out just right!

Steak Tips for cooking on fry pan or grill:


A key factor: What ever steak you want to cook let it set at room temp about 15 -20 minutes before you cook it. Cooking cold steak takes longer and causes a tougher steak in finish. Let it get to room temp!

For average size steak say an 1" thick, cook an average of 5-7 minutes each side- using salt and pepper only. You can add or brush a dab of real butter on each side to help it not stick to the pan or grill and add flavor, but you really do not need more.

Do not poke the steak with a fork to flip -that releases the juices that you want  to stay!- use your spatula or tongs.

To tell if the steak is done: Poke it with your thumb- If it feels like soppy jelly, it's still in need of cooking time and not done. If it's rock hard- it's overcooked.

Before you cut or serve- Let it rest!!!   This allows the juices to settle into the meat. Let it rest  for half the time you cooked it, before cutting it to serve-so if you cooked it a total of 14 minutes, let it rest for 7.


Friday, June 14, 2013

Peppermint Sugar Scrub for tired feet

Peppermint Sugar Scrub


Tired aching feet?  Peppermint will help save the evening and help you to relax!

Try this simple sugar scrub to revive:

Peppermint Sugar Scrub

1/2 c sugar
1/8 c good quality oil- I suggest olive oil, coconut oil, or sweet almond oil.(-you want enough to coat the sugar but not drown it.LOL)
10-20 drops Peppermint essential oil

Soak feet, if you have time in Epsom salts. The magnesium is absolutely wonderful for you! Then use the scrub at end.
If not enough time available to soak: wet feet with warm water and  use the sugar scrub- rubbing in circular motion across the bottoms, and get every part -between the toes, tops of the toes,  the ball of the foot, the heel, back of the ankle- rub and invigorate the blood flow to your feet, enjoy the cool peppermint, until the sugar begins to dissolve. Rinse in warm water. :) Wipe dry. Smile. Take a deep breathe- the peppermint scent helps to ease away some of that long day head ache too.


If you've been bare foot all day- and your feet are looking dingy from playing outside or chasing the kids.... another invigorating scrub is 1/2 c sugar, 2 tbsp.  Peppermint Castile Soap, 10 drops peppermint essential oil, and 1/8c olive oil or almond oil. Scrubs the dirt and day right off quickly. Leaves your feet soft and clean and smells invigorating! Works like a charm! :)

Store the remaining sugar scrub in a non breakable container with lid (I reused a small rubbermaid tub with lid;  some prefer a glass jar with reusable lid), clearly label, and sit in a cool place like the bathroom shelf- ready for next time you need it! Lasts a few weeks- I'm not sure about longer as I never have it last that long! :)


This has been shared on, and you might love the links in:

Make Your Own Monday Link Up 6/17

Natural Living Monday-9


You might like to try:


Disclaimer: Affiliate Links in no way affect your end price, there is no increase for you. But, they do help to support the cost of the blog. Thank you.

DIY Glass Cleaner

DIY Glass Cleaner   

The blue stuff.... ugh....
millions of gallons of the blue stuff are sold daily- all just because the mass market media says it's what you should use to clean your windows. But.... do you HAVE to use the blue stuff?
NO.
Did you know the blue stuff contains: Ammonia, 2 Hexoxyethanol, Ammonium Hydroxide, Mirapol Surf S-210, Viden EGM, Sodium C14-17 Sec-Alkyl Sulfonat, and Synthetic Fragrances.

Not green. Not safe. More like a toxic concoction of mess.
Don't know what some of these are? Neither does your body, or the earth, or your pets, or your family. Like I have explained before in posts- if an ingredient listed on an item is non-pronounceable, non-recognizable to you- it most likely is non recognizable to your body! Toxic chemicals, when sprayed, go into the air you breathe, and soak into your skin on your hands that you touch. They are either inhaled or soaked in, and are dangerous either way to your health. They leave a toxic chem-trail behind that can affect you.

Many things clean glass.
Many things clean glass well: and are safe, effective, non-toxic, and GREEN.

Like what might you ask?  I'll address the 2 most common, that you most likely already have on your shelves: Hydrogen peroxide, and or - Vinegar.

Hydrogen Peroxide -


Did you know the nozzle to a standard spray mist bottle will fit directly onto a peroxide bottle? So perfectly convenient-  no mess no fuss?

Hydrogen peroxide as a glass cleaner?
Oh yes! And much more!
Hydrogen peroxide is cheap! And not only does it save money, it is Antibacterial, Antifungal, Kills mold, Kills mildew. It is a natural  disinfectant!!!!! Kills house hold germs and prevents spreading of germs due to common colds and flu!  My first grab if someone has been sick.

You can clean far more than your windows with it!
You can clean glass, counter tops, sinks, and other hard surfaces. Use the three percent solution undiluted in a spray bottle and spray it on the surface to be cleaned. Allow it to stand for several minutes and then wipe it off.
Hard surfaces that can be cleaned with hydrogen peroxide are: counter tops, stove tops, appliances, mirrors, windows, showers, shower doors. bathtubs, sinks, toilets, garbage cans, walls, door frames, door knobs, etc etc.

My favorite use for a bottle of peroxide is in the kitchen. It is the perfect disinfectant for my cutting boards! Wash the cutting board off in the sink. Then Spray on Hydrogen Peroxide, wait 10 minutes, and wipe away. This eliminates all bacteria from meats & raw foods and disinfects your cutting board! No cross contamination! Yay!

Vinegar

White Vinegar is incredible.
For DIY Glass Cleaner:  A 50/50 solution of water and vinegar in a spray bottle is all you need for glass cleaning! Spray on, wipe dry. It works! No streaks! Removes dirt, finger prints, and other grime that can build up. All natural, no toxins.
If gunk is built up on the glass surface you can apply vinegar undiluted and remove nearly anything. (An example for me was the bird poop that was graciously left on my car window the other day- by the time I got to it, it was dry and permanently stuck on....ugh...until that is I applied the vinegar! Yay! Gone in seconds!)

Vinegar is the best household cleaner! It cleans, disinfects, is anti fungal, antibacterial, eliminates mold and mildew, kills most household germs, and it's cheap! Making it extremely frugal for house cleaning!

Make Homemade Wipes with vinegar- these will clean your glass, windows, tubs tiles, counter tops, stove tops sinks, walls, doors. door knobs, shower- (oh! in the shower! get rid of mold and mildew with vinegar too!)


You can mop with vinegar solution as well! Shine those tile or linoleum floors! Safe and effective!


Here is my mirror after vinegar- see no streaks! Just clean clear shine. Yay!


Between these 2 cleaners- you can nearly clean your entire house! Frugal, and very GREEN cleaning!


Shared with, and you may also like the DIY Links on:

Make Your Own Monday Link Up

Homestead Barn Hop #115

Frugal Days Sustainable Ways #77


You might like to try:


Disclaimer: Affiliate Links in no way affect your end price, there is no increase for you. But, they do help to support the cost of the blog. Thank you.

Thursday, June 13, 2013

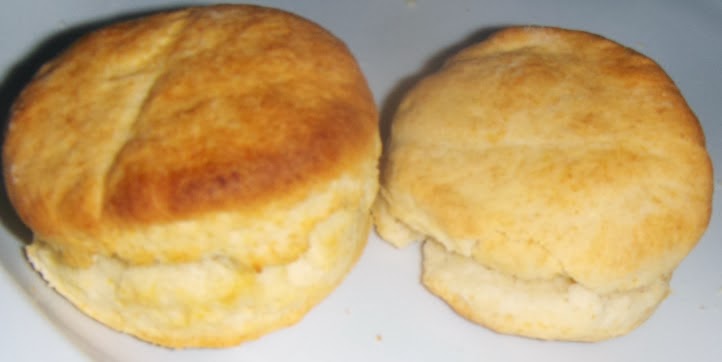
Homemade Biscuits

Homemade Biscuits


4 tbsp cold real butter or cold lard
1 tsp sugar or honey
2 c whole wheat flour
4 tsp baking powder
1 tsp real salt
3/4 cup whole milk, or half and half

 Preheat oven to 425F.
Cut butter into slices and in bowl,  sift together the baking powder and wheat flour and sugar and salt. Using a pastry cutter, or fork, combine until mixture is small crumbs. Add milk all at once and stir until batter follows fork, place on lightly floured surface and barely knead with hands a few times (comes together fast and do not over work).
Roll out dough to about 1/2 inch thickness. Cut out biscuits using a cookie cutter, biscuit cutter, or I used a juice glass with edge lightly floured :). Place biscuits on an un-greased cookie sheet.
Bake for approximately 10 minutes, or until light brown on top. Do not over bake - or the bottoms will burn.

Awesome, flaky, and easy alternate to pre-made biscuits; making this a healthier Real Food alternate to the convenience prepackaged foods containing unnecessary preservatives and fake ingredients.


Note: This is an excellent recipe for teaching the kids dough, measuring and mixing, following instructions, and baking. Fun for all! Make memories in the kitchen!
Kid Idea: Make small amount of  bacon and scrambled eggs, and grated cheese; allowing the kids to stack their own breakfast sandwiches. :)